2
1
02'
=
$8;
1
02'
=
$8;
1
02'
=
$8;
1
02'
=
$8;
HD4607/4
HC4607/4
N4607/4
L4607/4
NT4607/4
AM5787/4
HS4607/4
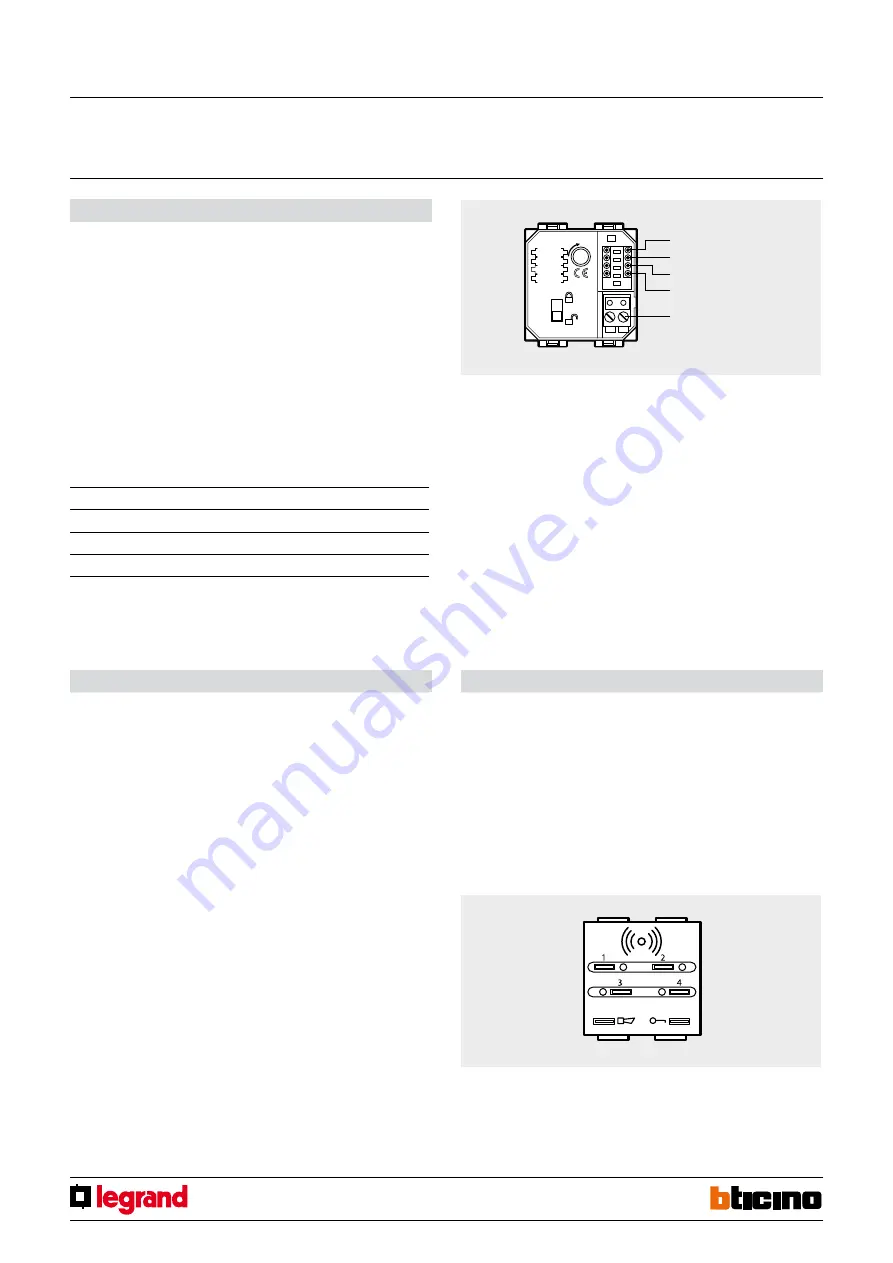
Configuration
AUTOMATION mode – SCENARIO MANAGEMENT:
Z
This configurator with value 0-9 coincides with the A position of the scenario module.
N°
This configurator with value 1-9 coincides with the PL position of the scenario module.
MOD
Assigns the operating mode. Connect configurator 9.
AUX
It assigns one of the scenarios programmed on the scenario module to the four
pushbuttons (SCE = 1-9) as per the table.
Pairing transponders
1.
Move the “programming block” switch to the open padlock and then:
2.
Press pushbuttons 1 and 4 at the same time for more than 5 seconds until the alarm
LED status comes on for 0.5 second and an audible signal is heard.
3.
Release pushbuttons 1 and 4.
4.
Move the transponder being programmed close to the device:
- if the transponder has been correctly saved the alarm status LED will slowly flash
twice and an audible signal will be heard. Go to step
6
.
- if the code is already in the memory there will be 2 audible signals and the led will
flash quickly twice.
- if the memory is full there will be 5 audible signals and the LED will flash quickly 5
times.
5.
To store other transponders repeat the procedure in step
4
, otherw
i
se go to step
6
.
6.
Move the “programming block” switch back on the closed padlock to exit
programming. Otherwise the device will exit programming mode after 1 minute of
inactivity.
Erasing the memory
1.
Move the “programming block” to the open padlock.
2.
Press pushbuttons 1 and 4 at the same time for more than 10 seconds and check that
the LED flashes slowly 4 times, and that there is an audible signal.
3.
Release pushbuttons 1 and 4.
4.
The transponder zones activator will remain in programming mode, ready for a new
programming sequence.
5.
Move the switch back to the closed padlock position to exit the erasing procedure.
Z
No.
MOD
AUX
Clamp for burglar
alarm BUS
Pushbutton no.
Associated scenario no.
pushbutton 1
SCE
pushbutton 2
SCE + 1
pushbutton 3
SCE + 2
pushbutton 4
SCE + 3
Example
If configurator 3 is connected to AUX, use pushbutton 1 to recall scenario no. 3, pushbutton
2 to recall scenario no. 4, pushbutton 3 to recall scenario no. 5, and pushbutton 4 to recall
scenario no. 6
1-4 zone transponder
divider
MQ00028-c-EN
24/04/2014


