


APPEARANCE
APPEARANCE
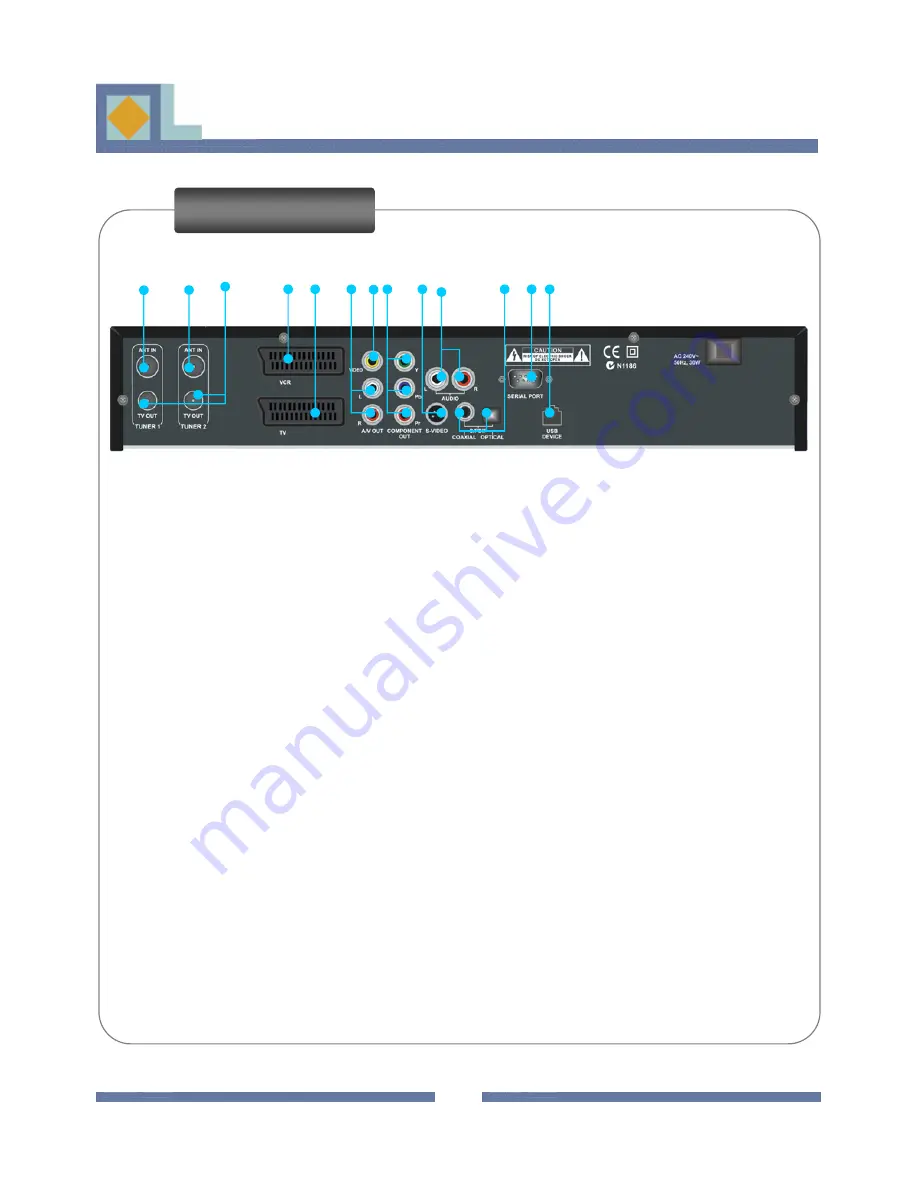
Rear View
1 2 3 4 5 6 7 8 9 10
11 12 13
7.
VIDEO RCA
: Connect to a video signal output socket for television or AV receiver.
8.
Component VIDEO OUT
: Connect to the component video sockets for television.
9.
S-VIDEO
:Connects to a video signal output socket for Super-Video interface.
10.
AUDIO RCA
: Connect to a Left/right stereo output sockets for the hi-fi system.
11.
S/PDIF
: Connect to an audio output socket for Dolby digital audio signal for digital multi-channel
amplifier.his to Dolby Digital compatible audio equipment through coaxial S/PDIF cable.
12.
SERIAL PORT
: Connect to a serial communication port of a PC for software upgrade (if required).
13.
USB PORT
: Connect this to the USB port of a PC for Music and Software download.
6


