QUICK SETUP GUIDE
QUICK SETUP GUIDE
Thank you for purchasing this Legamaster e-Screen
interactive display. This Quick Setup Guide will help
you setup the monitor and cover the basic operation
instructions.
Please refer to the user manual that can be found on
the USB drive for more detailed instructions and the
full safety and installation information.
Legamaster guarantees the repair or replacement, free
of charge, of faulty e-Screen products and/or parts by
an authorized service partner for a warranty period of
5 years. The warranty shall take effect on the date of
purchase as stated on the receipt.
If you wish to make a claim under the warranty or
you have any other service issues, please contact your
dealer or Legamaster directly. Please refer to www.
Legamaster.com/warranty for specific warranty infor-
mation for your market.
This product, when disposed of, is supposed to be
collected and recycled according to your country‘s
legislation to reduce environmental burden.
When you dispose of this product, please contact a
distributor or an affiliate in your country. The contact
addresses are listed on the Legamaster website
http://www.legamaster.com.
By disposing this product correctly you will help
ensure that the waste undergoes the necessary
treatment, recovery and recycling and thus prevent
potential negative effects on the environment and
human health which could otherwise arise due to
inappropriate waste handling.
FCC:
FCC CFR Title 47 Part 15
Subpart B Class A,
ICES-003 Issue 6
CE:
EN 55024
EN 61000-3-2
EN 61000-3-3
UL:
UL 60950-1
CB:
IEC 60950-1
CAUTION
MOUNTING OF THIS PRODUCT CAN ONLY BE EXECUTED BY QUALIFIED STAFF
CAUTION
TO REDUCE THE RISK OF ELECTRIC SHOCK, MAKE SURE POWER CORD IS UNPLUGGED FROM WALL
SOCKET. TO FULLY DISENGAGE THE POWER TO THE UNIT, PLEASE DISCONNECT THE POWER CORD
FROM THE AC OUTLET. DO NOT REMOVE COVER (OR BACK). NO USER SERVICEABLE PARTS INSIDE.
REFER SERVICING TO QUALIFIED SERVICE
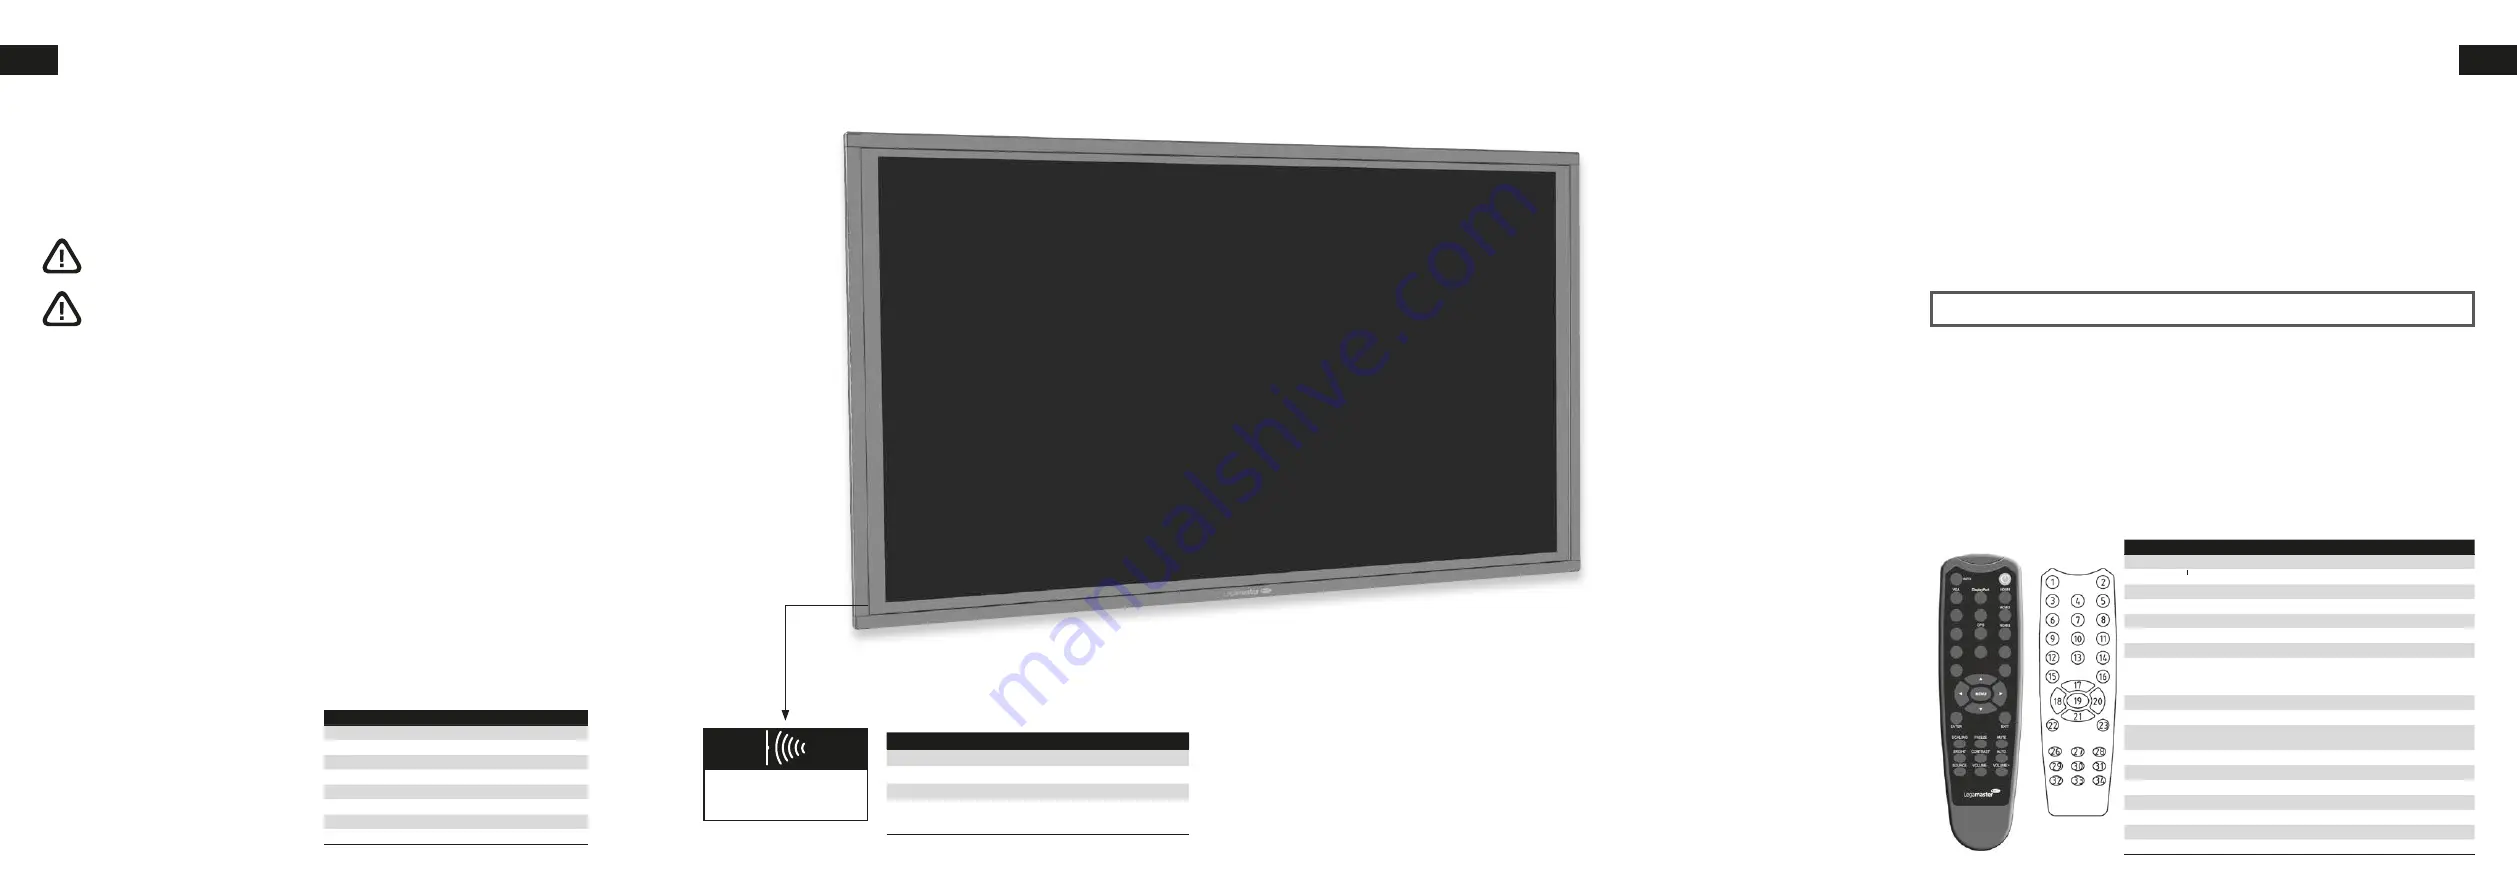
Item
IR Remote Control (Batteries Included)
IR Extender
HDMI Cable
USB Type B to A
Power Cord
USB drive with user manual
Bag with EasyFix cable clips
Legamaster high precision stylus
Label
Description
1
INFO
Provides source and resolution information
2
Turns the display on and off
3
VGA
Selects the PC RGB source
4
DISPLAYPORT Selects the DisplayPort source
5, 8
HDMI 1, 2
Selects the HDMI source
10
OPS
Selects the OPS computer source
19
MENU
Opens the display’s on-screen menu system.
17, 18,
20, 21
►◄▲▼
When the menu system is already open, pressing this
button will select the previous submenu/Navigates
through submenus and settings
22
ENTER
Selects highlighted menu choices
23
EXIT
Closes the menu system
26
SCALING
Selects each aspect ratio, in sequence: Full Screen,
Native, Letter Box and Pillar Box
27
FREEZE
Freezes the current picture on the screen
28
MUTE
Turns off the sound
29
BRIGHTNESS
Adjusts the brightness
30
CONTRAST
Adjusts the contrast
31
AUTO
Auto adjustment of VGA source
32
SOURCE
Selects each source, in sequence
33/34
VOLUME -/+
Decreases/ Increases the sound volume
Adjusting the Volume
1. Using the remote or control panel, press the VOLUME- or
to increase or decrease the volume.
Selecting the input source
1. Press the source button on the control pad to enter the
source menu. Press source multiple times to cycle through
available sources.
The display will automatically switch to the selected input
after two seconds:
VGA / DisplayPort / HDMI 1 / HDMI 2 / OPS
2. Using the remote, press the desired source button
(DISPLAYPORT, HDMI1, HDMI2, VGA)
3. If the display cannot find a source, a “No signal” message
will appear.
Turning the display on
1. Connect the display to an AC power outlet
2. Ensure the AC switch is set to „l“.
3. Press the power button on the control pad, alternatively
you can use can use the power button on the remote
control.
Turning the display off
With the Power on, press the power button on the control pad.
A warning message will appear. Press the power button again to
confirm shut down. Alternatively you can use the power button
on the remote control. To turn off power completely, turn the
AC switch to „O“ or disconnect the AC power cord from the
power outlet.
Note:
If there is no signal input for a period of time, the display will automatically go into power saving (sleep) mode.
LED Illumination
Condition
Green
Normal operation
Blinking Orange
No signal
Orange
Power Saving
Off
Power off
AC off
INTRODUCTION
WARRANTY
RECYCLING INFORMATION
COMPLIANCE
INCLUDED ACCESSORIES
REMOTE CONTROL
TURNING THE DISPLAY ON AND OFF
ADJUSTING THE VOLUME AND INPUT SOURCE
OPERATIONS
IR receiver
+ status LED


