background image

www.prolight.co.uk

Spectra Flood 18T3


User Manual

7

Colour mix mode:

To access the colour mix mode press 

“MODE”

 until  

Pr01

 shows on the LED display. Now press the 

“ENTER”

 button and use the 

“UP”

 and 

“DOWN”

 buttons to select  

0rgb

. Press the 

“ENTER” 

button and 

the display will show the red brightness between  

r.000

 ~ 

r.255

. Now use the 

“UP”

 and 

“DOWN”


buttons to adjust the red brightness and press the 

“ENTER” 

button. Repeat for green (

9

) and blue (

b

).

Value: 000 - 255 (000 = low brightness, 255 = high brightness)

To exit out of any of the above options, press the 

“MODE”

 button. 

Built-in programs:

To access the built-in programs, press the 

“MODE”

 button on the rear of the unit to show  

Pr--


on the LED display. Now use the 

“UP”

 and 

“DOWN”

 buttons to choose the required program   

Pr01

 ~ 

Pr10

. Press the 

“ENTER”

 button to confirm the setting and use the 

“UP”

 and 

“DOWN”


buttons to choose the speed  

SP00

 ~

SP99

. Press the 

“ENTER”

 button again to confirm the setting 

and use the 

“UP”

 and 

“DOWN”

 buttons to select the flash speed 

F500

 ~ 

F599

Pr01

 - Press the 

“ENTER”

 button and use the 

“UP”

 and 

“DOWN”

 buttons to select the static colour 

required. Press the 

“ENTER”

 button to confirm the setting and use the 

“UP”

 and 

“DOWN”

 buttons to 

select the flash speed  

F500

 ~ 

F599

.

To exit out of any of the above options, press the 

“MODE”

 button.

Auto mode:

To access auto mode, press the 

“MODE”

 button on the rear of the unit to show  

Auto

 on the LED 

display. The unit will now run through its built-in programs.
To exit out of any of the above options, press the 

“MODE”

 button. 

Master/slave mode:

The default setting for this fixture is Master.
To set the slave unit, press the 

“MODE”

 button on the rear  

of the master unit to show  

SLav


on the LED display.  

The unit is now in Slave mode. 
To exit out of any of the above options, press the 

“MODE”

 button.

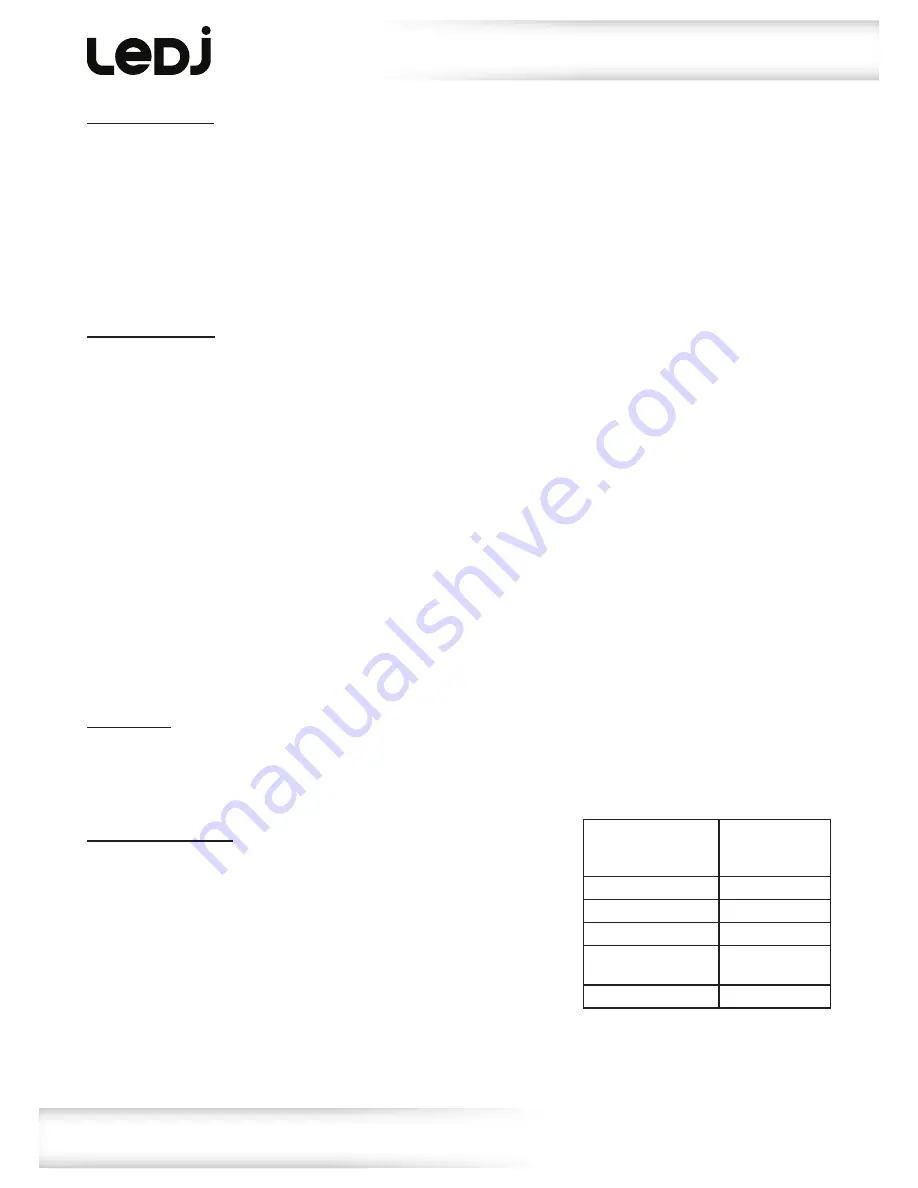
Operating instructions

Colour mix mode

r.000

~

r.255

 R

g.000

~

g.255

 G

b.000

~

b.255

 B

Built-in programs

Pr01

~

Pr10

Auto mode

Auto

Master/slave mode

SLav

DMX mode

1CH, 3CH, 4CH, 
5CH, 6CH

Address setting

d001

~

d512

Menu system

0

 - White (RGB)

1

 - Red

2

 - Orange

3

 - Light Yellow

4

 - Green

5

 - Cyan

6

 - Blue

7

 - Purple

8

 - Pink

9

 - Yellow

10

 - Cool White

11

 - Warm White

Содержание spectra flood 18T3

Страница 1: ...Order code LEDJ256 Spectra Flood 18T3 Exterior Fixture User Manual...

Страница 2: ...ent and do not modify the unit Do not connect this equipment to a dimmer pack Do not switch the equipment on and off in short intervals as this will reduce the system s life Do not expose to flammable...

Страница 3: ...ull automation 18 x 3W tri colour LEDs RGB Beam angle 40 2150 Lux 2m full on 7 8kHz refresh rate DMX channels 1 3 4 5 or 6 selectable Static colour colour fade colour change colour mix auto and master...

Страница 4: ...djustment knobs 03 LED display 04 Function buttons 05 IP rated power input 06 IP rated power output 07 IP rated DMX input 08 IP rated DMX output 09 Safety eye In the box 1 x fixture 1 x power cable 1...

Страница 5: ...unit to show d001 on the LED display Now press the ENTER button to show CH on the LED display and use the UP and DOWN buttons to select between 1 3 4 5 and 6 channels To exit out of any of the above o...

Страница 6: ...t Blue 108 116 Medium Blue 117 125 Blue 126 134 Violet 135 143 Purple 144 152 Magenta 153 161 Pink 162 170 Light Pink 171 179 Pastel Blue 180 188 Pastel Green 189 197 Pastel Yellow 198 206 Pastel Purp...

Страница 7: ...ns to select the flash speed F500 F599 Pr01 Press the ENTER button and use the UP and DOWN buttons to select the static colour required Press the ENTER button to confirm the setting and use the UP and...

Страница 8: ...are DMX compliant To ensure proper DMX data transmission when using several DMX fixtures try to use the shortest cable path possible The order in which fixtures are connected in a DMX line does not in...

Страница 9: ...pin XLR DMX connectors Some manufactures use 5 pin XLR connectors for data transmission in place of 3 pin 5 pin XLR fixtures may be implemented in a 3 pin XLR DMX line When inserting standard 5 pin X...

Страница 10: ...possible harm to the environment or human health from uncontrolled waste disposal please separate this from other types of wastes and recycle it responsibly to promote the sustainable reuse of materia...

Страница 11: ...www prolight co uk Spectra Flood 18T3 User Manual 11...

Страница 12: ...www prolight co uk Spectra Flood 18T3 User Manual 12...

Отзывы: