


EN - 6 -
THE VARIOUS FUNCTION AND POSSIBILITIES
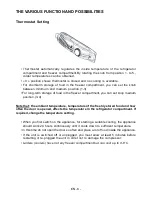
Thermostat Setting
• Thermostat automatically regulates the inside temperature of the refrigerator
compartment and freezer compartment.By rotating the knob from position 1. to 5.,
colder temperatures can be obtained.
• « 0 » position shows thermostat is closed and no cooling is available.
• For short-term storage of food in the freezer compartment, you can set the knob
between minimum and medium position.(1-3)
• For long-term storage of food in the freezer compartment, you can set knop medium
position.(3-4)
Note that; the ambiant temperature, temperature of the freshly stored food and how
often the door is opened, affects the temperature in the refrigerator compartment. If
required,change the temperature setting.
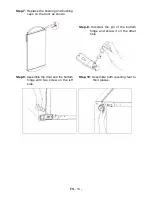
• When you first switch on the appliance, for starting a suitable cooling, the appliance
should work 24 hours continuously until it cools down to sufficient temperature.
• In this time do not open the door so often and place a lot of food inside the appliance.
• If the unit is switched off or unplugged, you must allow at least 5 minutes before
restarting or re-plugged the unit in order not to damage the compressor.
•
Larders (coolers) have not any freezer compartment but can cool up to 4-6°C.
Содержание L50262W
Страница 1: ...USER GUIDE L50262W...
Страница 16: ...52074052...