


SPECIFICATIONS D’USAGE POUR VOTRE SMX
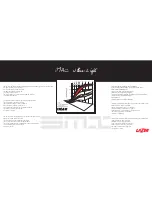
COMMENT REGLER LA VISIERE ?
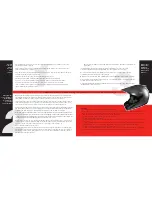
Rien de plus simple. Avec les doigts et sans outil, desserrez la vis centrale supérieure permettant ainsi le déblocage du dispositif de
réglage central. (photo 1)
Ensuite il vous suffit de régler la visière dans la position désirée.
Resserrez la vis centrale avec les doigts - et toujours sans outil - afin de bloquer le dispositif de réglage central.
Il n’est pas nécessaire de modifier la position des vis latérales pour régler la visière.
COMMENT DEMONTER LA VISIERE ?
Rien de plus simple. Desserrez complètement de la même manière les trois vis de fixation et retirez-lez de leur logement.
Lors du démontage et remontage, veillez ne pas perdre les différentes rondelles intercalaires et vérifiez leur positionnement.
Lors du remontage, resserrez les trois vis sans excès.
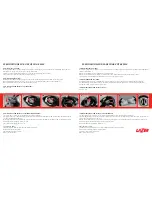
COMMENT ENLEVER ET REMETTRE LES JOUES ?
Photos 2 – 2B
COMMENT ENLEVER ET REMETTRE LA COIFFE INTERIEURE ?
Lors du démontage de la coiffe, il est conseillé d’enlever d’abord les joues. (Voir procédure précédente)
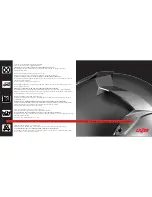
Tirez doucement sur le coin gauche ou droit de la partie avant, vers l’intérieur par rapport à la bordure du casque. Vous détacherez
ainsi les deux boutons pression. (photo 3 )
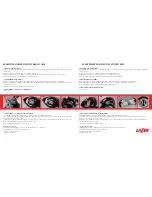
Ensuite, tirer doucement sur le coin gauche ou droit de la partie arrière, vers l’intérieur par rapport à la bordure du casque. Vous
détacherez ainsi la languette de fixation arrière. (photos 4 – 4B)
Retirez l’ensemble de la garniture. (photos 5 – 6)
Pour remettre la coiffe :
Introduisez d’abord la languette arrière entre la bordure du casque et le polystyrène.
Fixez les deux boutons pression de la partie avant.
La coiffe se met en place toute seule.
Remettez les joues en place.
1
2
2B
3
4
4B
5
6
SPECIFICATIONS FOR USE OF YOUR SMX
HOW TO ADJUST THE VISOR ?
Nothing could be simpler. Using your fingers, unscrew the central upper screw to unlock the central adjusting device. (photo 1)
All you have to do next is move the visor to the position desired.
Tighten the central screw again by turning it to lock the central adjusting device in place.
You do not need to move the side screws to adjust the visor.
HOW TO REMOVE THE VISOR ?
Nothing could be simpler. Using your fingers, undo the three fastening screws and take them out of their casing.
When removing and replacing the visor, take care not to lose the different shims and check their placement.
When replacing the visor, do not over-tighten the three screws.
HOW TO REMOVE AND REPLACE THE CHEEK PADS ?
Photos 2 – 2B
HOW TO REMOVE AND REPLACE THE INTERNAL PADDED LINING ?
It is a good idea to remove the cheek pads first. See above procedure.
Pull gently on the left or right-hand-corner of the front part towards the inside from the rim of the helmet. This will detach the
two front fastening snaps. (photo 3)
Next pull gently on the left or right-hand-corner of the lower back part towards the inside from the rim of the helmet. This will
detach the back fastening tab. (photos 4 – 4B)
Take out the whole lining. (photos 5 – 6)
To replace the lining :
Insert the back tab between the helmet rim and the polystyrene.
Next, attach the two front snaps.
The lining fits into place by itself.
Replace the cheek pads.
Содержание SMX
Страница 1: ...SMX Owner Manual...


