background image

20

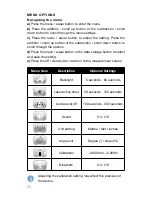
Adjusting the calibration setting may affect the precision of 
the device. 

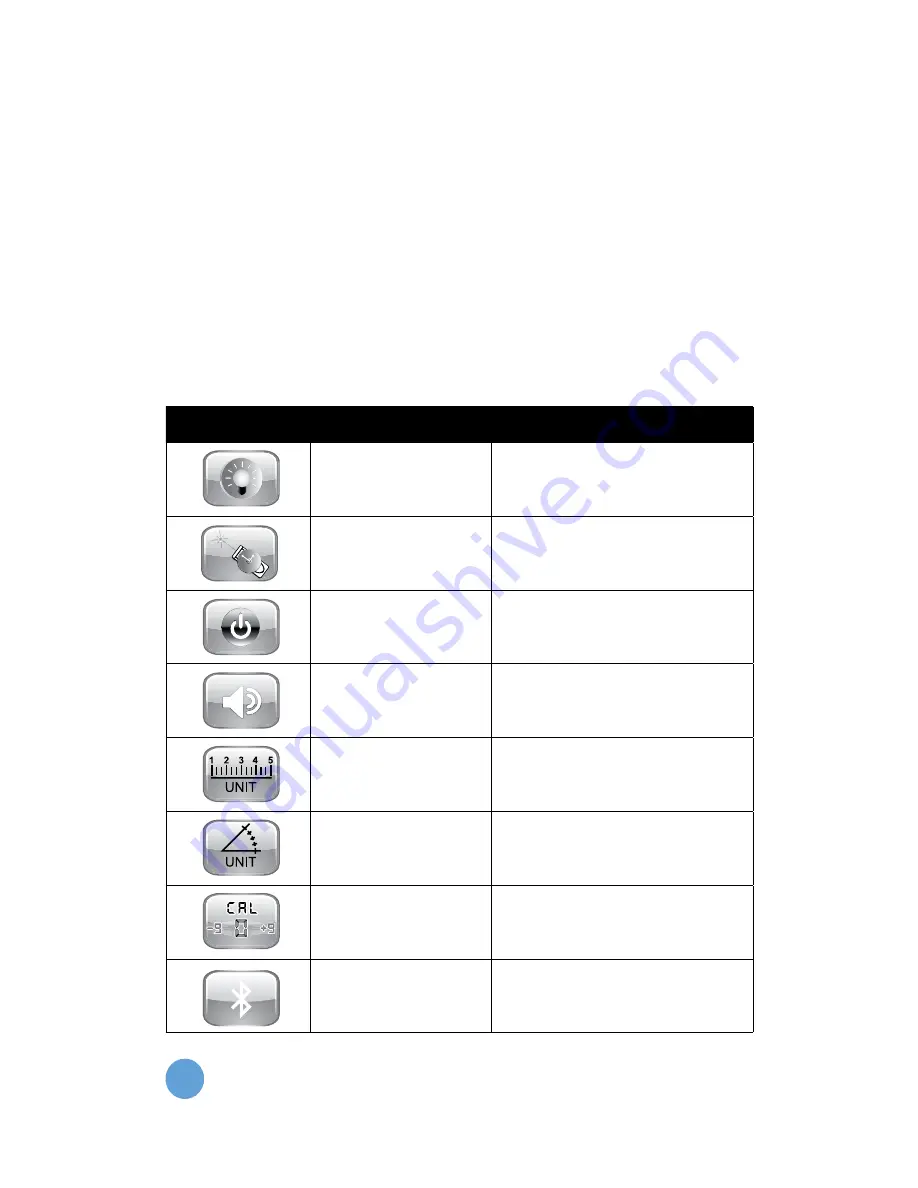
Menu Item

Description

Optional Settings

Backlight

5 seconds - 60 seconds

Laser active timer

20 seconds - 120 seconds

Auto power off

100 seconds - 300 seconds

Sound

On / Off

Unit setting

Metres / feet / inches

Angle unit

Degree (°) / slope (%)

Calibration

-0.009m to +0.009m

Bluetooth

On / Off

MENU OPTIONS
Navigating the menu
a) 
Press the menu / equal button to enter the menu. 
b)  Press the addition / scroll up button or the subtraction / scroll 
down button to scroll through the menu settings.
c)  Press the menu / equal button to adjust the setting. Press the 
addition / scroll up button or the subtraction / scroll down button to 
scroll through the options. 
d) Press the menu / equal button or the data storage button to select 
and save the setting.
e) Press the off / clear button to return to the measurement screen. 

i

Содержание LDM120

Страница 1: ...L D M 1 2 0 1 2 0 M L A S E R D I S TA N C E M E A S U R E R I N S T R U C T I O N M A N U A L ...

Страница 2: ...void the warranty Only approved and authorised service technicians can carry out warranty repairs Do not use optical tools such as a telescope or transit to view the laser beam Serious eye injury could result Do not place the laser in a position which may cause anyone to intentionally or unintentionally stare into the laser beam Serious eye injury could result Do not position the laser near a refl...

Страница 3: ... LDM120 Carry pouch Carry strap USB cable Rechargeable batteries Please ensure the following items are included with your laser distance measurer If anything is missing please contact your retailer ITEM CHECKLIST ...

Страница 4: ...4 LCD screen Laser emitter Control panel USB connection port PRODUCT OVERVIEW LASER MEASURER FRONT ...

Страница 5: ...5 Battery compartment Wrist strap attachment End piece 1 4 thread for operation on a tripod LASER MEASURER BACK LASER MEASURER BOTTOM Unfold the end piece to access the battery compartment i End piece ...

Страница 6: ...6 Read laser emission on Menu equal Power off clear Digital bubble vial staking out Subtraction scroll down Addition scroll up Data storage Camera Benchmark timer Multi function CONTROL PANEL ...

Страница 7: ...ce point Tilt angle Measuring mode Measuring mode Measurement display Backlight time Measurement timer Auto power off time Volume on off Distance unit Angle unit or Main measurement display Unit Battery level 45 9 DISPLAY SCREEN ...

Страница 8: ...rs The battery level icon will flash while the battery is charging The battery level icon will appear solid green when the battery is fully charged For infrequent use please take out the battery to avoid corrosion to the body of the device On off a Press and hold the read button to turn the laser distance measurer on b Press and hold the off clear button for 3 seconds to turn the unit off The devi...

Страница 9: ...the distance unit setting c Press the menu equal button to adjust the units Press the addition scroll up button or the subtraction scroll down button to scroll through the unit options d Press the menu equal button to select the unit e Press the off clear button to return to the measurement screen OPTIONAL UNITS Length Area Volume 0 000m 0 000m2 0 000m3 0 00m 0 00m2 0 00m3 0 0in0 0 00ft2 0 00ft3 0...

Страница 10: ...be displayed on the main measurement display c The previous three measurements will also be displayed above the main measurement display Continuous measurement a Press and hold the read button Minimum and maximum results will be displayed on the display screen b Press the read button or off clear button to exit continuous measurement MEASUREMENT ...

Страница 11: ...he display screen e Press the off clear button to clear measurement Volume measurement a Press the multi function button twice Three rectangles will appear on the display screen b Press the read button to measure the first edge height c Press the read button to measure the second edge length d Press the read button to measure the third edge width e Volume will be calculated automatically with resu...

Страница 12: ...oras measurement To calculate the unilateral distance of a triangle pythagorean mode can be used When taking measurements of the triangle ensure the length of the right side is shorter than the length of the hypotenuse If not the instrument will display an error signal To ensure the accuracy of measurement take measurements from the same starting point of the first order hypotenuse Then follow wit...

Страница 13: ...lar side c Length x of the hypotenuse will be calculated automatically with results shown on the display screen 2 Calculate the side of a right angle triangle Press the multi function button four times to enter pythagorean mode Follow the instructions displayed on the screen as follows a Press the read button to measure the length a of the hypotenuse b Press the read button to measure the length b...

Страница 14: ...ngth c of the rectangular side d Length x of the vertical side will be calculated automatically with results shown on the display screen 4 Calculate the third side of a triangle Press the multi function button six times to enter pythagorean mode Follow the instructions displayed on the screen as follows a Press the read button to measure the length a b Press the read button to measure the length b...

Страница 15: ... has been set press the read button 6 Calculate the area of an irregular triangle Press the multi function button eight times to enter pythagorean mode Follow the instructions displayed on the screen as follows a Press the read button to measure the length a b Press the read button to measure the length b c Press the read button to measure the length c d Area x will be calculated automatically wit...

Страница 16: ...n The values will be subtracted automatically with the results shown on the display screen d Press off clear button to exit addition or subtraction mode To clear the previous measurement press the off clear button Adding and subtracting area measurement a Take the area measurement as described in the Area Measurement section pg 11 b Press the addition scroll up button or the subtraction scroll dow...

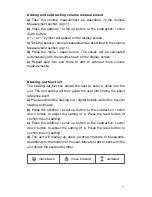
Страница 17: ...nction The staking out function allows the user to enter a value into the unit The unit setting will then guide the user into finding the exact reference point a Press and hold the staking out digital bubble vial button to enter staking out mode b Press the addition scroll up button or the subtraction scroll down button to adjust the setting of a Press the read button to confirm the unit setting c...

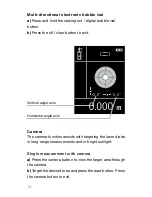
Страница 18: ...th camera a Press the camera button to view the target area through the camera b Target the desired area and press the read button Press the camera button to exit Multi directional electronic bubble vial a Press and hold the staking out digital bubble vial button b Press the off clear button to exit Horizontal angle axis Vertical angle axis ...

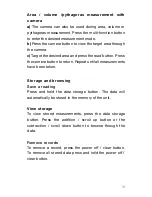
Страница 19: ...s the camera button to return Repeat until all measurements have been taken Storage and browsing Save a reading Press and hold the data storage button The data will automatically be stored in the memory of the unit View storage To view stored measurements press the data storage button Press the addition scroll up button or the subtraction scroll down button to browse through the data Remove record...

Страница 20: ...09m Bluetooth On Off MENU OPTIONS Navigating the menu a Press the menu equal button to enter the menu b Press the addition scroll up button or the subtraction scroll down button to scroll through the menu settings c Press the menu equal button to adjust the setting Press the addition scroll up button or the subtraction scroll down button to scroll through the options d Press the menu equal button ...

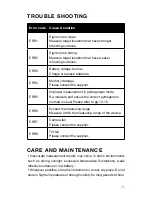
Страница 21: ...he correct pythagorean method is used Please refer to pg 12 15 ERR6 Exceed the measuring range Measure within the measuring range of the device ERR7 Camera fail Please contact the supplier ERR8 Tilt fail Please contact the supplier ds nds nds Inaccurate measurement results may occur in harsh environments such as strong sunlight excessive temperature fluctuations weak reflective surfaces or low bat...

Страница 22: ...t you with any queries or technical questions please contact customer support Australia 1300 658 338 New Zealand 0800 367 527 Store in the carry pouch supplied in a cool dry place Remove the batteries before storing the device for long periods of time without use To remove dust clean the instrument with a damp soft cloth WARRANTY CUSTOMER SUPPORT The Bluetooth word mark and logos are registered tr...

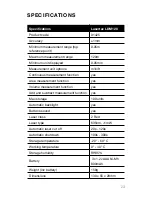
Страница 23: ...es Area measurement function yes Volume measurement function yes Add and subtract measurement function yes Max storage 100 units Automatic backlight yes Buttons sound yes Laser class 2 Red Laser type 635nm 1mW Automatic laser cut off 20s 120s Automatic shutdown 100s 300s Storage temperature 20 60 C Working temperature 0 40 C Storage humidity RH85 Battery 3x 1 2v AAA Ni Mh 800mAh Weight Inc battery...

Страница 24: ...www spoton com au ...

Отзывы: