11.
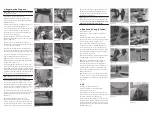
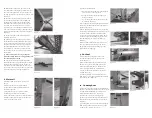
Identify the clew patch, (written on the
sail) attach the center of the gennaker sheet to
the clew of the gennaker. (As per jib sheet to
jib clew previously covered in section Sails - Jib)
(fi gure 50)
12.
Pass the free ends of the gennaker sheets
aft (one sheet either side of the jib luff ) and
through the gennaker sheet ratchet blocks
attached to the shroud anchor points. Th
ere
are arrows on the ratchet block to indicate
which way the rope should pass. When under
load, the ratchet will engage. (Note: Th
e sheets
must pass forward of the shrouds at all times.)
(fi gure 51)
13.
Tie the free ends of the gennaker sheet
together. (fi gure 52)
14.
Ensure the boat is pointing directly into
the wind and hoist the gennaker. Take great
care to ensure that the gennaker does not get
snagged around the trolley; a second person
should help with this to ensure it does not
snag anywhere. Check the gennaker is not
twisted and the sheets are not tangled with
the halyard.
15. Always take great care to pull up the
gennaker slowly and do not keep pulling if it
becomes tangled or tight.
16.
Uncleat the halyard and gently pull the
gennaker into the sock by pulling the halyard
through the block at the aft end of the sock.
A second person should help with this and be
positioned at the front of the boat to ensure the
gennaker does not get snagged anywhere.
fi gure 50
fi gure 51
fi gure 52
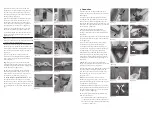
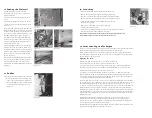
fi gure 55
8. Mainsail
1.
Remove the mainsail from its bag and
unroll.
2.
Ensure all battens are tight in their
pockets and the locking mechanisms are
positively engaged.
3.
Position the boat so it is head to wind
(bow facing directly in to the wind).
4.
Place the mainsail in the cockpit of the hull
with the luff closest the bow (front) and the
leach closest the stern (back).
fi gure 54
fi gure 53
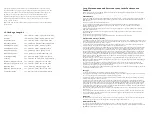
fi gure 57
fi gure 56
fi gure 58
9. Outhaul
1.
Feed the plastic slug slide on the clew
outhaul into the cut out on the top of the
boom. (fi gure 56)
2.
Th
e outhaul line is then passed through
the lowest eye in the sail (from port/left to
starboard/right side) and anchored on the
starboard/right side with a simple knot
located in the slot formed in the boom end
casting. (fi gure 57)
3.
Outhaul tension is controlled using the
forward rope, cleat and fairlead at the forward
end of the boom. (fi gure 58)
5.
Take the main halyard:
a. Ensure there are no twists in the halyard
and it is clear of the spreaders.
b. Tie the halyard to the head of the sail
using
a
bowline.
c. Locate the head of the mainsail into the
mast track. (fi gure 53)
6.
Hoist the mainsail using the main halyard
block/cleat assembly on the lower port side of
the mast. (fi gure 54)
7.
Note: Hoisting the mainsail is a two person
operation as assistance will be required to feed
the mainsail into the mast track while the
other person hoists using the halyard. (Th
is
will prevent the sail pulling out of the track
and jamming which could cause luff rope
damage.)
8.
When the mainsail is fully hoisted, cleat
and tidy away the halyard rope end in the
halyard pocket positioned on the top of the
gennaker sock. (fi gure 55)
10. Cunningham
1.
Pass the rope at the end of the cunningham
purchase system through the eye at the bottom
of the mainsail luff (from port/left hand to
starboard/right hand side). (fi gure 59)
2.
Anchor the end of the cunningham
purchase system by sliding a half hitch knot
into the mast track just below the gooseneck.
(fi gure 60)
3.
Cunningham tension is controlled using the
forward rope and fairlead/cleat on top of the
cockpit centre console. (fi gure 61)
fi gure 60
fi gure 59
fi gure 61


