GL-30064ST
Larson Electronics, LLC
Phone: (800) 369-6671
Fax: (903) 498-3364
www.larsonelectronics.com
2
of
2
MOUNTING INSTALLATION
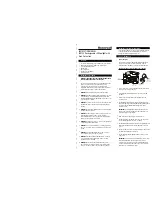
Determine the location for the light on your vehicle or boat. Remove the mounting plate from the light. Center the
mounting plate with the vise screw on the mounting plate to the back. Mark the hole locations for the three mounting
screws and drill a pilot hole for each with a 1/8 inch bit. Fasten the stainless steel mounting plate with the 3 #10 – 16x ¾
type AB cross recessed pan head tapping screws. Drill a ¼” hole (wireless) or a 5/8” hole (hardwired) in the center of the
mounting plate opening to accommodate the power wire or wiring harness and connector. Attach the connector that is
affixed to the underside of the light to the corresponding connector on the wiring harness (hard-wired). Position the
connection point beneath the mounting surface, and apply silicone sealant around wire to seal the drilled opening. Wet
the mounting surface with a small amount of water or lubricant for easier installation, then place the light over the
mounting plate by sliding the front of the light over the front of the mounting plate, first pull the light backwards, then seat
the back of the light on the mounting plate. Displace the back of the gasket and install the vise screw (provided). Tighten
the vise screw using a Philips head screwdriver. Replace the gasket
MAINTENANCE
There are no serviceable parts inside the fixture. However, it is good practice to routinely clean and check the
fixture for proper function.
•
Disconnect power running to the lamp and be sure the fixture is cool to the touch.
•
Use a non-abrasive glass cleaning solution to clean the lens.
Note: It is not necessary to open the fixture and clean or touch the LED’s.
USE AND CARE
Unauthorized modification may impair the function and/or safety of this device and could affect the life of the equipment.
Always check for damaged or worn out parts before using the device. Store it in a secure place out of the reach of
children when not in use. Inspect for good working condition prior to storage and before re-use.
REPLACEMENT PARTS
The
GL-30064ST
is designed to provide years of reliable performance. Should the need for replacement parts arise,
please contact Larson Electronics.
THESE INSTRUCTIONS MAY NOT COVER ALL DETAILS OR VARIATIONS OF THIS PRODUCT FOR YOUR EQUIPMENT OR INSTALLATION REQUIREMENTS.
SHOULD FURTHER INFORMATION NOT COVERED BY THESE INSTRUCTIONS BE REQUIRED, PLEASE CONTACT LARSON ELECTRONICS BY EMAIL AT
OR BY PHONE AT 1-800-369-6671 FOR FURTHER ASSISTANCE.
PLEASE VISIT LARSONELECTRONICS.COM FOR
WARRANTY
AND
RETURN
INFORMATION.