GL-2XXXGT Series
Larson Electronics, LLC
Phone: (800) 369-6671
Fax: (903) 498-3364
www.larsonelectronics.com
2
of
5
3. The wire leads under the light need to be connected to a fused 12V DC power source on the vehicle. It is critical that
polarity be observed. Connect vehicle positive (+) to spotlight positive (+) wire. Connect vehicle chassis ground (-) to
spotlight ground (-) wire. Use appropriate wire gauge and fuse for your light and appropriate automotive wiring
connectors. For best results wire the spotlight to a dedi-cated power source. As indicated in the reprogramming
procedure, removing and reapplying power to the light initi-ates a frequency code search phase for six seconds.
Wiring the light to dedicated power source eliminates unwanted frequency disturbances.
4. Electrical requirements are as follows:
Halogen Models
Max Current Draw: 5.5A @ 13.8V
Recommended Fuse: 7.5A to 10A
LED Models
Max Current Draw: 3.5A @ 13.8V
Recommended Fuse: 5A
7. Use silicone sealant to fill center hole around power cord. IMPORTANT: Allow 75 mm (3 inches) of cord to remain
under light to ensure full 370 degrees rotation.
8. Seat spotlight base onto mounting bracket. Use four flathead machine screws (included) to secure spotlight to
mounting bracket. Press rubber tabs on mounting gasket into plastic base.
9. Mechanical and electrical installation of the spotlight is now complete.
BATTERY INSTALLATION
WIRELESS HANDHELD REMOTE
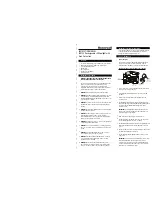
1. Remove the battery compartment cover from the rear of the handheld remote
by removing the single rounded head screw.
2. Insert the two supplied 23A 12V batteries. Note batteries must be installed with
proper polarity (+ and - ) as shown inside battery compartment. See Figure 3.
3. Reinstall battery cover and screw.
REPROGRAMMING – WIRELESS HANDHELD REMOTE
The RadioRay handheld remote is pre-programmed to the spot-light using a
default setting at the factory. Golight recommends reprogramming the remote to
the spotlight to prevent cross-talk with other spotlights in your fleet or in your area.
Figure 3
Figure 3 - Wireless Handheld Remote
Reprogramming simply involves changing the DIP switch set-tings inside the
remote and the spotlight will re-learn the new channel. There are 2187 possible
channels.
1. Disconnect power to the spotlight.
2. Remove battery cover from the handheld remote.
3. Set the seven DIP switches (See Figure 3) to the selection of your choice using a small flat screwdriver. Note each
switch has positive and negative settings with neutral in the middle. Note the orientation of the positive and negative
settings may vary between the wireless handheld and wireless dash mount.
4. Replace battery cover.
5. Depress the on/off button and hold it down while reconnect-ing power to the spotlight.
6. Release the on/off button after 6 seconds.