


NoiseTutor System Manual
2-14
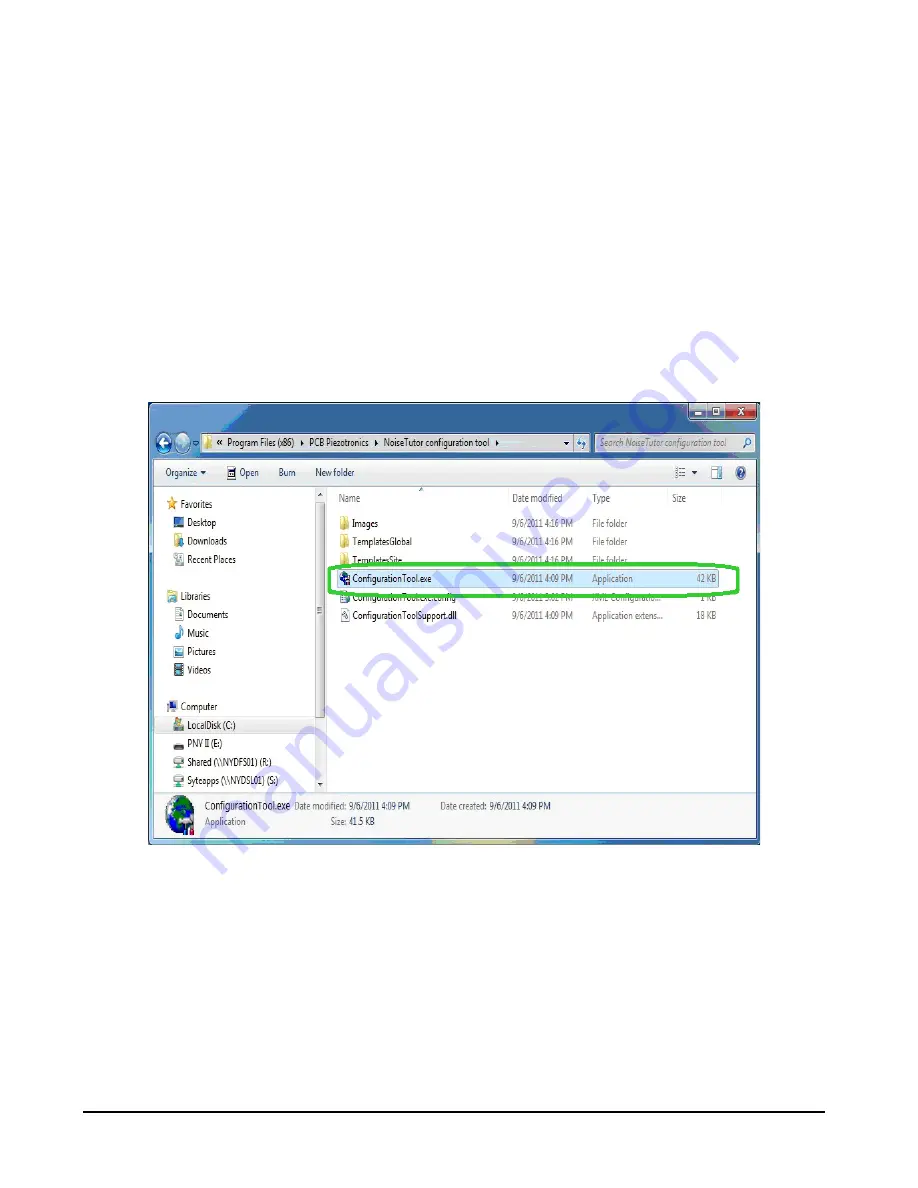
Step 1
On the
Start
menu, click
Computer
. Browse to
the
ConfigurationTool.exe
file, and double-click it, as
shown in FIGURE 2-16.
A.
For 64-bit Windows 7 operating systems, the file is
located at
c:\program files (x86)\PCB Piezotron-
ics\NoiseTutor configuration tool\Configura-
tionTool.exe
.
B.
For 32-bit Windows 7 operating systems, the file is
located at
c:\program files\PCB Piezotronics\Noi-
seTutor configuration tool\ConfigurationTool.exe
.
FIGURE 2-16 Configuration Tool - Launch
Step 2
If you are configuring a new site, click
New
Configuration
on the
File
menu of the NoiseTutor Site
Configuration Tool dialog box. Skip to step 6.
Step 3
If you are modifying an existing configuration,
click
Open Configuration
on the
File
menu.
Содержание NoiseTutor
Страница 1: ...NoiseTutor System Manual...
Страница 2: ...I021 02 Rev A NoiseTutor System Manual NoiseTutor System Manual Larson Davis...
Страница 57: ...NoiseTutor System Manual Public Access 2 48...
Страница 75: ...NoiseTutor System Manual Create and Publish Graphical Reports to Web Site 3 18...
Страница 85: ...NoiseTutor System Manual Data File 4 10 FIGURE 4 6 Data File E mail setup...
Страница 90: ...4 15 Realtime Report Setup NoiseTutor System Manual FIGURE 4 10 Web Publishing Setup...
Страница 95: ...NoiseTutor System Manual 5 2 FIGURE 5 1 Direct Screen...
Страница 98: ...NoiseTutor System Manual A 3...


