


4. Installing the SilverCloud®
! !
!
!
!
4.1
!
Installing the SilverCloud® System
Users will need to
activate
(Section 3) their SilverCloud® unit(s) first before starting the system.
Users will also need to install the Google Earth® plugin on their computer (PC and/or Mac). The
Google Earth plugin will allow users to access the functionalities of Google Earth without having
to install the full application. To download and install the Google Earth plugin, go to:
www.earth.google.com/plugin
.
After activating the SilverCloud® unit(s), be sure to charge the device. Once the device is fully
charged, take it outdoors with a clear view of the sky so that it can acquire a strong GPS signal.
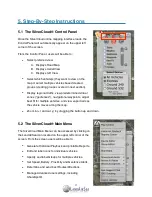
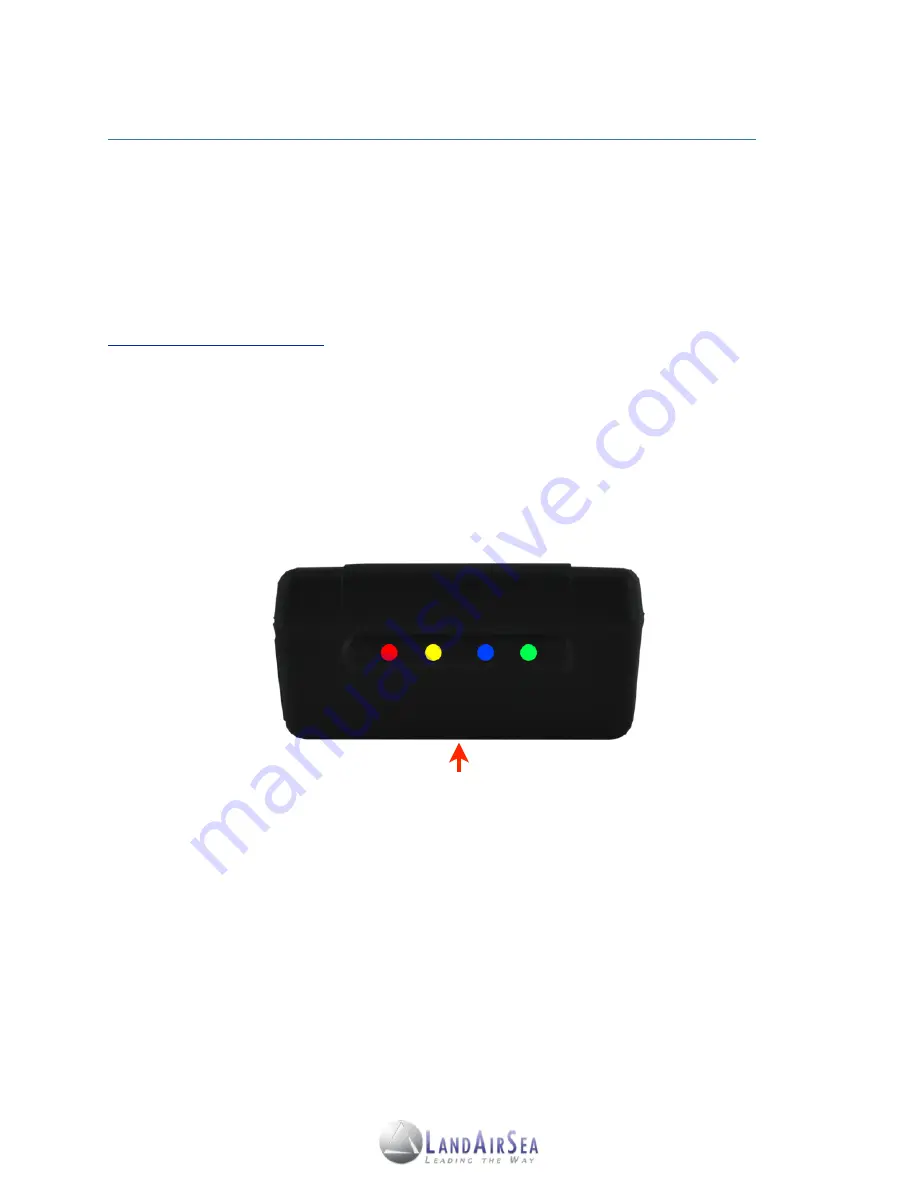
The SilverCloud® has 4 LED lights on the back panel of the device (see Illustration below).
There is an on/off switch located inside the battery case. To access the switch, open the battery
compartment. When the device is turned on, the LED lights on the back panel will light up. The
device should be outdoors with a clear view of the sky before checking the LED light behavior.
1. Charging light: The #1 LED will display red when the device is charging. Once the device is
fully charged, the light will turn off.
2. Cellular Modem light: The #2 light will be green at first, then pulse a short yellow burst when
the device is communicating with a cell tower. The light will then turn green again.
3. GPS light: The #3 light will display as blue. It will pulse once every 3 seconds when the de-
vice is attempting to acquire a fix with the GPS satellites, and then turn solid once the fix
has been made. Upon turning solid blue, the device is logging GPS data.
4. Power Light. The #4 light will display green once the device turned on and has sufficient
power to operate. It will turn from green to yellow at 50% power, and red at 20%.
7
Battery Compartment
1
2
3
4


