Section 5: Maintenance & Lubrication
11/27/18
STB1560, STB1572, STB1584 & STB1596 Snow Trip Blade 301-493M
24
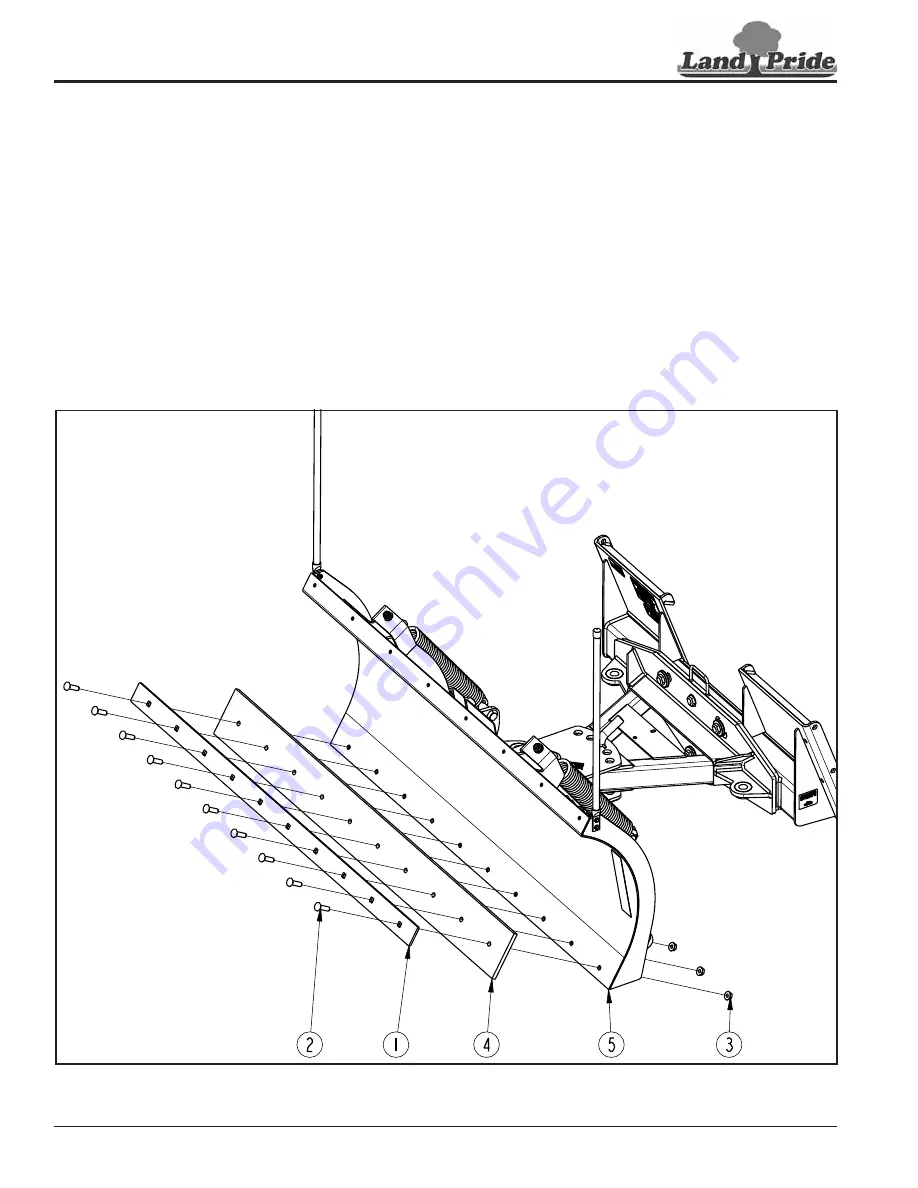
Poly Cutting Edge Removal and Assembly
1.
Remove all but the two outside carriage bolts (#2)
and nuts (#3) from moldboard (#5).
2. Loosen the two outside hex nuts (#3). Do not remove
nuts at this time.
3. Hold one end of cutting edge (#4) and retaining plate
(#1) up and remove carriage bolt (#2) and nut (#3)
from that end. Lower that end down to the ground.
4. Hold opposite end of cutting edge and retaining plate
up and remove carriage bolt from that end. Lower
cutting edge and retaining plate to ground.
5. Inspect carriage bolts (#2) and nuts (#3) for wear.
Replace as needed.
6. Inspect poly cutting edge (#4). Rotate or replace
cutting edge if excessively worn.
7.
With cutting edge (#4) down, raise one end up and
attach to moldboard with carriage bolt (#2), backing
bar (#1), and hex nut (#3). Draw nut up snug, do not
tighten.
8. Raise the other end up and attach to the moldboard
with carriage bolt (#2), retaining plate (#1), and hex
nut (#3). Draw nut up snug, do not tighten.
9. Install remaining 5/8"-11 x 1 1/2" GR5 carriage bolts
(#2) and nuts (#3). Tighten all nuts to the correct
torque.
10. Return to the tractor. Raise unit up and remove
support blocks.
Poly Cutting Edge Removal and Assembly
Figure 5-2
39709


