


Assembly Instructions
7/8/20
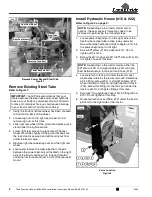
Third Function Valve Kit #380-340A Installation Instructions Manual No. 380-151M
4
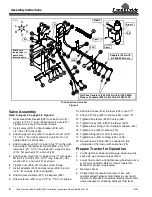
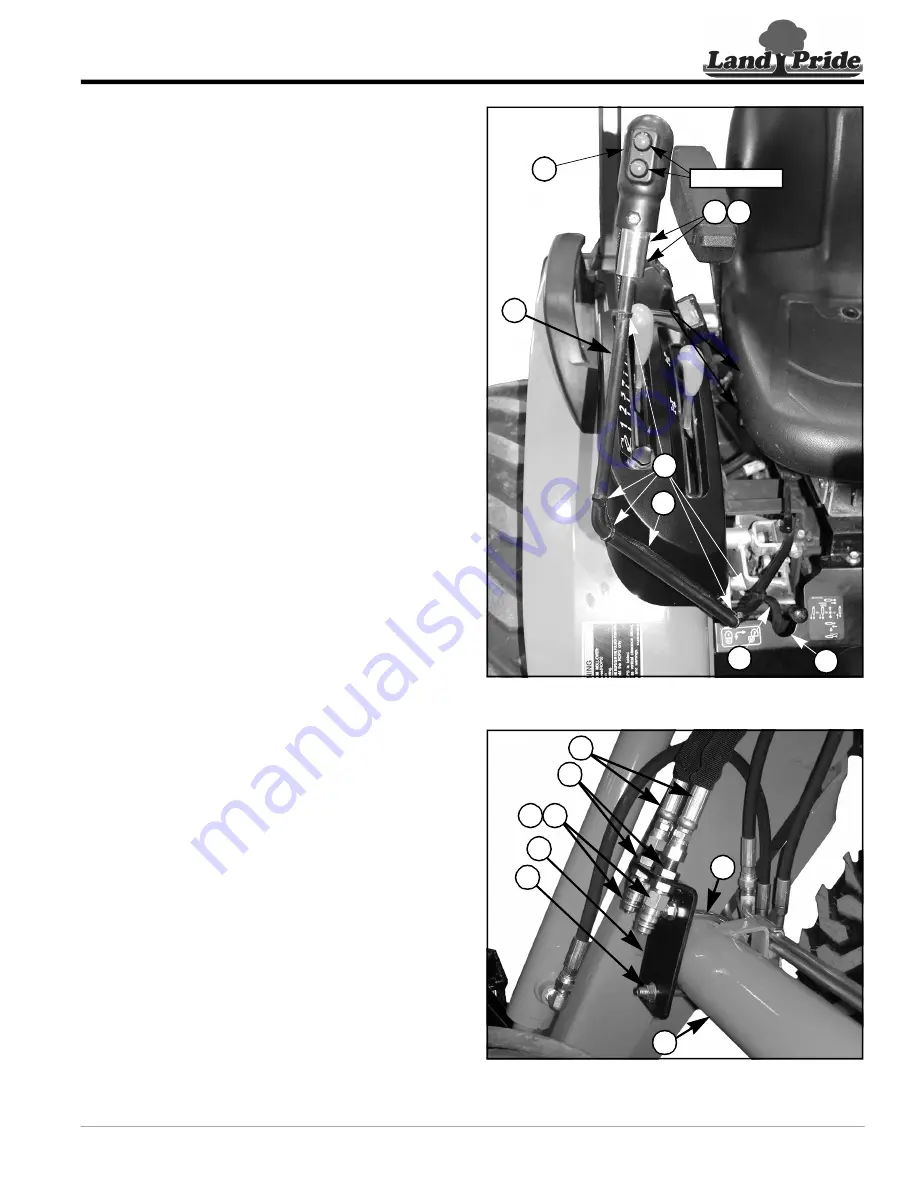
Control Lever Assembly
Refer to Figure 3 on page 3, & Figure 4:
1. Remove existing knob (not shown) from end of
control lever “D”.
2. Install new control handle (#17) onto control lever (D).
Adjust control handle to align the push buttons to suit
the operator and then tighten set screws (#6) against
control lever. Tighten jam nuts (#8) to secure set
screws (#6).
3. Thread wiring harness (#18) through hole “E” and
forward under the tractor platform.
Refer to Figure 3 on page 3:
4.
Reference Connections “A”:
Connect one
black wire in harness (#18) to one black wire in
harness (#41) and the other black wire in
harness (#18) to one white wire in harness (#41).
5.
Reference Connection “B”:
Connect the two red
wires from control handle (#17) to wire (#42) on one
end of fuse holder (#19).
6. Connect wire (#42) on opposite end of fuse
holder (#19) to the positive (+) post on the tractor
battery.
Refer to Figure 4:
7.
Secure wire harness (#18) with cable ties (#5) as
needed.
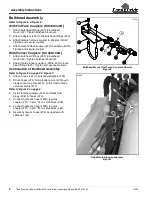
Cross Beam Mount Assembly
Refer to Figure 3 on page 3, & Figure 5:
1. Orient as shown and attach bulk head mount (#2) to
the right-hand side of loader crossbeam “F” with
u-bolt (#12) and whiz nuts (#10). Tighten whiz nuts to
the correct torque.
Control Stick Assembly
Figure 4
Cross Beam & Hose Holder Assembly
(Pioneer Couplers Shown)
Figure 5
17
6
8
D
E
18
Push Buttons
74502
5
18
2
12
10
24
F
37029
33
40
39