

8
www.howdens.com
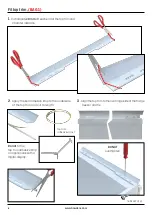
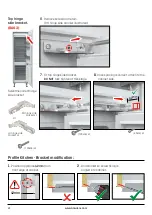
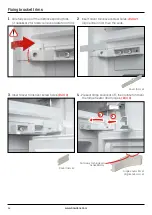
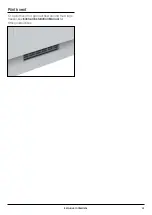
Top trim
adhesive strip x1
(3.9x13 FH) x2
Fit top trim,
(BAG 1)
2
- Apply the self adhesive strip to the underside
of the top trim and cut to length.
1
- Cut indicated
3mm
off each end of the top trim and
chamfer inwards.
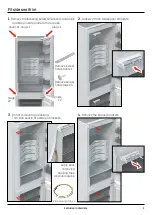
3
- Align the top trim to the non hinge side of the fridge
freezer and fix.
DO NOT
overtighten.
Do not
fit the
top trim adhesive strip
on appliances with a
digital display.