13
ENVIRONMENT CONCERNS
Recycle the materials with the symbol
. Put the packaging in applicable
containers to recycle it.
Help protect the environment and human
health and to recycle waste of electrical
and electronic appliances.
Do not dispose appliances marked with
the
symbol
with the household waste.
Return the product to your local recycling
facility or contact your municipal office
INSTALLATION INSTRUCTIONS
BEFORE INSTALLATION
Check that the input voltage indicated on the
characteristics plate is the same as the
voltage of the power outlet you are going to
use.
Minimum fuse rating: 5 Amps.
Open the drawer and take out all the
accessories and remove the packing material.
WARNING!
The front surface of the Warming Drawer may
be wrapped in a protective film. Before using
the Warming Drawer for the first time, remove
this film carefully.
Make sure that the Warming Drawer is not
damaged in any way. Check that the drawer
opens and closes correctly. If you find any
damage, contact the Technical Assistance
Service.
ATTENTION:
The power socket should be easily accessible
after the Warming Drawer has been installed.
The Warming Drawer should only be built-in
in combination with those appliances
indicated by the manufacturer. If it is fitted in
combination with other appliances, the
guarantee is no longer valid since it is
impossible to guarantee that the Warming
Drawer will work correctly.
INSTALLATION
To build-in the Warming Drawer in
combination with another appliance there
must be a fixed, interim shelf in the housing
unit to support the weight of both appliances.
The appliance to be combined with the
Warming Drawer will be placed directly on the
latter without any need to have a separating
shelf.
To build-in the appliance which is combined
with the Warming Drawer, follow the
instructions set out in the respective
instructions and fitting booklet.
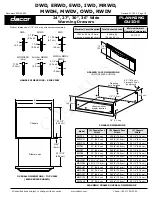
The relevant installation dimensions are
indicated in mm in the diagrams shown at the
end of this booklet. Proceed as follows:
1. Place the Warming Drawer on the shelf
and slide it towards the interior of the niche
in such a way that it is centred and
completely lined up with the front of the
unit.
2. Check that the Warming Drawer’s frame is
properly levelled and is sitting evenly on
the shelf.
3. Open the drawer and fix the Warming
Drawer to the sides of the unit using the
provided screws.
ELECTRICAL CONNECTION
The product should only be installed by a
suitably qualified person. The product must
be installed in accordance with all local
regulations. Before connecting the Warming
Drawer to the electric mains, check that the
voltage and frequency of the mains matches
which is shown on the rating plate located
in the heating block inside.
Содержание LAM9002
Страница 1: ...Warming Drawer LAM9002 Instructions and Installation www howdens com appliance registration...
Страница 2: ...See back page for product serial number...
Страница 15: ...15 INSTALLATION...
Страница 17: ......
Страница 18: ...Product serial number Place sticker here ISSUE v2 010518...


