background image

- 5 -

Using the LAMAX X7.1 Naos action camera

1. INSertINg the MIcroSDhc cArD

Only insert or remove a microSDHC or SDXC card (U3 recommended) from the microSD card 

slot when the camera is switched off and not connected to the computer.

Note: Use only branded microSDHC or SDXC cards. Generic unbranded cards are not 

guaranteed to function correctly for data storage.

2. INStALLINg the BAttery

a) Open the battery cover by sliding it to one side.

b)  Insert the battery (connector end first) into the compartment so that the connectors are 

on the correct side.

c) Close the battery cover by reattaching it and sliding it back in place.

3. chArgINg

a) Camera can be charged by connecting to a PC or using the AC adapter.

b) In a vehicle, the camera can be charged sing the cigarette lighter adapter.

c) Whilst charging, you can still shoot video or take photos (except when charging via PC).

d)  Camera may also be charged when turned off.

Note: Never charge unattended. If device overheats, produces smoke or suspicious odour 

when charging, immediately unplug and stop charging.

4. tUrNINg the cAMerA oN AND off

a) To turn camera on, press and hold the “On/Off” button for 3-5 seconds.

b) To turn camera off, press and hold the “On/Off” button for 3-5 seconds.

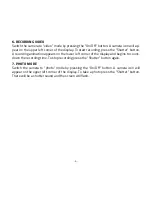
5. SwItchINg MoDeS AND NAvIgAtINg the MeNU

Tapping the “On/Off” button toggles between the modes: video / photo / slow motion / 

gallery / settings.

Содержание X7.1 Naos

Страница 1: ...1 LAMAX X7 1 Naos Waterproof up to 30 m Native 2 7K video at 30 fps Photos at a resolution of 16 MP WiFi...

Страница 2: ...cards may limit the functionality of the camera and it may not be able to record in all modes and at all resolutions 5 Do not place the microSD card near magnetic fields or in places where static elec...

Страница 3: ...t 30 fps Full HD at 60 fps amd HD at 120 fps Wide angle 170 lens 16 MP photos Wide selection of resolutions for video and photo Time lapse photo and time lapse video modes Wide range of accessories in...

Страница 4: ...button this button also turns the WiFi function on and off 4 Down button 1 2 3 4 Accessories Remote control Waterproof case Pole mount Frame for mounting without waterproof case J mount Fast plug in Q...

Страница 5: ...eattaching it and sliding it back in place 3 Charging a Camera can be charged by connecting to a PC or using the AC adapter b In a vehicle the camera can be charged sing the cigarette lighter adapter...

Страница 6: ...ecording animation appears on the lower left corner of the display and begins to count down the recording time To stop recording press the Shutter button again 7 Photo mode Switch the camera to photo...

Страница 7: ...amera is set by default in the resolution Full HD 1080p 60 fps The 4K resolution is interpolated and best suited for recording time lapsed videos Slow motion when enabled the camera is recording the v...

Страница 8: ...exposure as needed The exposure is set from 3 to 3 White balance selects the white balance mode when taking photos or recording videos depending on the ambient lighting Frequency allows you to select...

Страница 9: ...9 Factory settings restores the camera to factory settings Firmware displays actual version of the firmware installed on the camera...

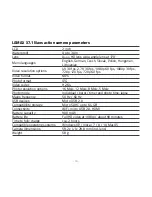
Страница 10: ...o format JPG Video codec H 264 Photo resolution options 16 Mpix 12 Mpix 8 Mpix 5 Mpix Photo mode Individual burst timer and photo time lapse Mains frequency 50 Hz 60 Hz USB devices Micro USB 2 0 Compa...

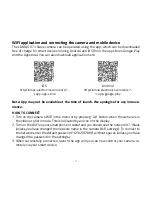
Страница 11: ...e at the time of launch We apologise for any inconve nience How to connect 1 Turn on the camera s WiFi in the menu or by pressing Up button when the camera is in the video or photo mode This is indica...

Страница 12: ...with remote control automatically Full English manual can be downloaded from here Die Bedienungsanleitung in Deutsch k nnen Sie von hier runterladen esk manu l ke sta en zde Slovensk manu l na stiahn...

Отзывы: