background image


Revision 1.1 

P/N 119-845 

10 


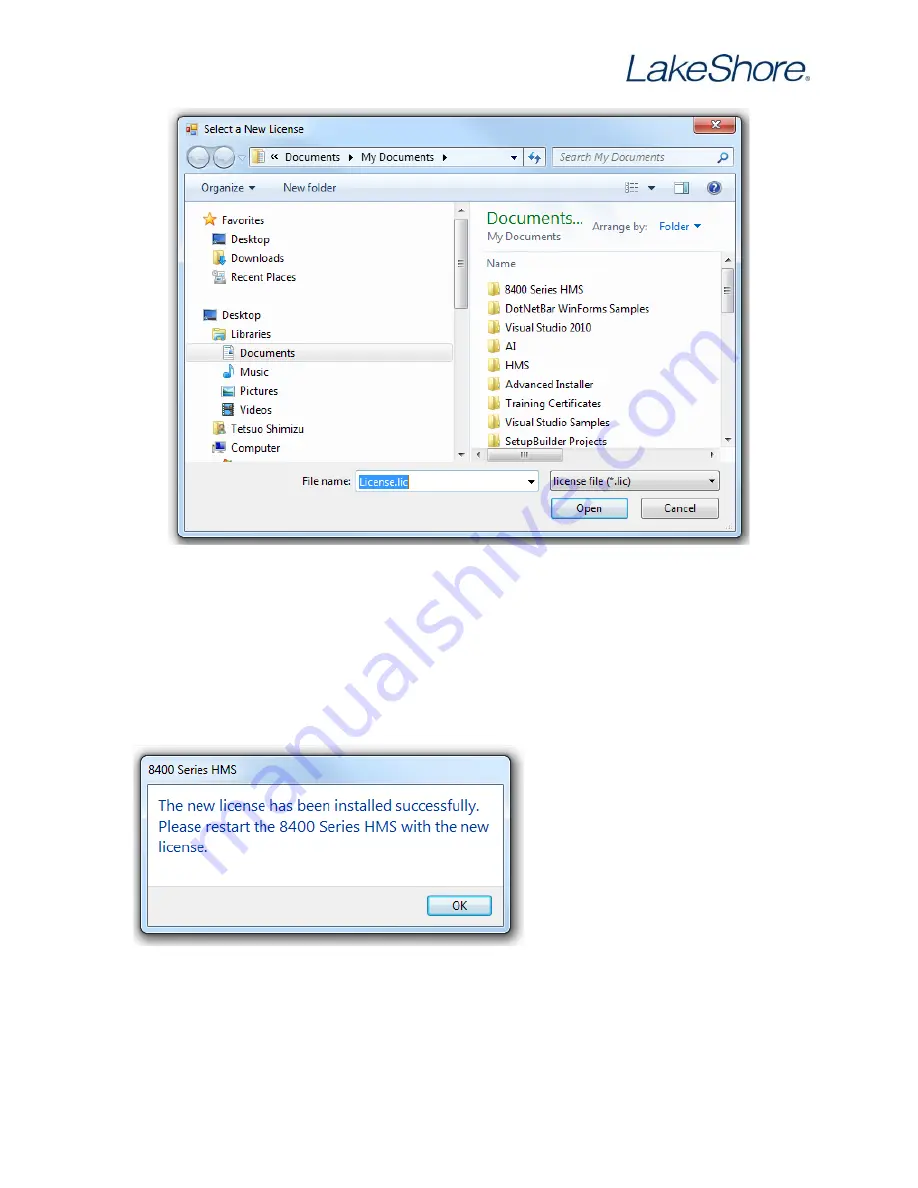
Figure 11: 

New license window


5.


Insert the HMS 8400 software DVD into the DVD drive. The DVD contains the license file for the 
gate bias option. 

6.


Navigate to the license file, select it, and click 

Open

7.


When the license file is installed, the software will show the dialog box in Figure 12. 

8.


Click 

OK

9.


The software automatically exits.  

 
The new license is now installed. The 
next time you start the HMS software, 
it will run with the license for the gate 
bias option. 


Figure 12: 

Successful license update 


Содержание 84032-FI

Страница 1: ... mount and associated cables This addendum provides instructions for installing and connecting your gate bias option All other information can be found in the user s manual II Unpacking The Model 84032 FI is shipped in a box with the rack mount kit Remove the packaging and set the Keithley 6487 and all parts in a workspace near the console The box contains the following 1 Keithley 6487 Picoammeter...

Страница 2: ...res CAUTION For continued protection against fire hazards use only the same fuse type and rating specified for the line voltage selected 1 Turn off power to the system 2 Determine the voltage for the single phase AC main power at the facility 3 With a small flat blade screwdriver positioned at the side of the fuse drawer gently push in and to the right to release the fuse drawer 4 Remove the line ...

Страница 3: ...to prepare the location for the Keithley 6487 Use a 2 Phillips head screwdriver to remove the blank filler panels and ensure there is support for the instrument Figure 2 shows the intended location for the gate bias option and the location of the blank filler panels below it Instructions are on the following page Figure 2 Models 8404 8407 instrument console with the location of the gate bias optio...

Страница 4: ...ngle at the bottom of the console two screws are located at the front of the console and two are located at the rear NOTE Only one support angle is required to support the instrument b Attach the provided cage nuts appropriately at position 2 see Figure 3 to fasten the new support shelf c Move the support angle to position 1 see Figure 3 d Adjust the support angle height so that the top surface wi...

Страница 5: ...on the console which you will need to remove to prepare the location for the Keithley 6487 Use a 2 Phillips head screwdriver to remove the blank filler panel and ensure there is support for the instrument NOTE Figure 4 shows the intended location for the gate bias option Figure 4 Model 8425 instrument console with the location of the gate bias option highlighted ...

Страница 6: ...ll full rack space Refer to Figure 4 for installation details The dual half rack mount kit contains inner and outer mounting ears handles optional and screws that adapt the front panel to fit into an 88 9 mm 3 5 in tall full rack space beside an existing instrument Refer to Figure 5 for installation details NOTE Ensure that there is a 25 mm 1 in clearance on both sides of the instrument after rack...

Страница 7: ...y interlock connection cable Lake Shore has provided you with an adapter cable that will solve this problem Plug the male end of this cable into your existing female adapter see Figure 7 then plug the female end of the adapter into the interlock connection of the Keithley 6487 Figure 7 Female 4 pin interlock connector 3 The Interlock cable is labeled on the back of the Keithley 6487 and can be fou...

Страница 8: ...connected to the back of the Model 776 5 Connect the interlock cable as shown in Figure 10 The interlock adapter cable will connect in line with this cable if it is required for proper operation 6 Select the provided power cord with the connector that matches the style of power distribution strip in the console Attach one end to the rear of the Keithley 6487 and the other end to the power distribu...

Страница 9: ...ce to configure the instrument The address should be set to 22 Then follow these instructions to install your new software and update the license for the gate bias option 1 Start the 8400 HMS software 2 When the main window opens click the File menu tab 3 Click Help and the following button will appear on the left side of the screen 4 Click the button The software will open the following screen ...

Страница 10: ...s option 6 Navigate to the license file select it and click Open 7 When the license file is installed the software will show the dialog box in Figure 12 8 Click OK 9 The software automatically exits The new license is now installed The next time you start the HMS software it will run with the license for the gate bias option Figure 12 Successful license update ...

Страница 11: ...line service request form at http www lakeshore com service Pages default aspx Provide a detailed description of the problem and the required contact information You will receive a response within 24 hours or the next business day in the event of weekends or holidays If you wish to contact Systems Service by mail or telephone use the following Lake Shore Cryotronics Inc 575 McCorkle Blvd Westervil...

Отзывы: