background image

18 


knob  will  come  on  when  INTELLISAND  is 
operating.  (Fig.  11  a)  When  the  load  is  decreased, 
INTELLISAND will automatically increase the feed 
rate to the pre-selected speed.  INTELLISAND 

does 

not 

engage when brush sanding or if drum sanding at 

a slower RPM than recommended.


Setting Brush Depth of Cut/Contact


When  a  nylon  or  wire  brush  is  worn  and  needs 
changing,  the  bristles will  either  have  fractured  and 

the  brush  head  looks  “bald”  or  the  bristle  length


has worn and the bristles are too short for effective 
brushing.


When an abrasive or cloth brush is worn, the brushing 
material  will  become  smooth,  or  the  brush  will  be 
considerably smaller in diameter as compared to new. 
Please call SuperMax Tools if you have any questions. 
Brush life can vary considerably, due to RPM, contact, 
type of brush, and material being brushed.


Some types of brush heads, some flatter brushes, for 
example, will allow changing of the brush material by 
the operator.


When  using  a  wire  brush  for  “distressing”  wood, 

slowing  brush  RPM,  using  light  contact  and  a 
moderate feed rate generally will give the best finish 
and longest brush life. When using a wire brush on 
metal,  it  is  important  to  use  a  light  contact  of  the 
bristle  tips. 

Nylon  Brushes. 

If  a  nylon  brush 

becomes uneven dressing the tips of bristle brush to 
maintain uniform brush wear will be a benefit.


Dressing Instructions:


Staple  or  glue a  wide sheet  of  60  grit  sandpaper  to 

a  1/2”  thick  fla

t  wood  surface.  Strips  of  narrow 

sandpaper can also be used. Lower the brush so the 
tips of the bristles contact the sandpaper by 

1/32”.

 Set 

the conveyor speed to approximately 50% feed rate. 
Pass the abrasive loaded board through the machine 
until the brush fibers are sharp and even.


Setting Drum Depth of Cut


Determining  the  depth  of  cut  is  the  most 
IMPORTANT set-up procedure before operating as 
a drum sander. 

It may take some experimentation to 

determine the proper depth of cut, given the variables


of abrasive grit, type of wood, and conveyor feed rate. 
Practicing on scrap before sanding a project can be 
beneficial.


A good rule-of-thumb when sanding is to place the 
workpiece  under  the  drum  and  lower  the  sanding 
head until the workpiece contacts the drum, but the 
drum  can  still  be  rotated  by  hand.  When  making 
successive  passes,  lower  the  sanding  head  no  more 
than the thickness of the grit abrasive, I.e., 1/8-1/16 
of a turn for 80 grit and less for finer grits. 

Note: 

one 

revolution of the height adjustment handle moves the 
sanding head approximately 

1/16”.


Depth Gauge Operation


The depth gauge (see Fig. 5) measures the distance 
between  the  conveyor  table  and  the  bottom  of  the 
sanding  brush  or  drum.  The  sanding  head  must 
be parallel to the conveyor bed surface. To calibrate 
the depth gauge, loosen the two screws holding the 
scale. Lower the brush or sanding head (with abrasive 
installed)  until  the  head  touches  the  conveyor  belt. 

Slide  the  scale  to  align  with  the  pointer  at  the  “0” 

mark.  Tighten the two screws holding the scale. An 
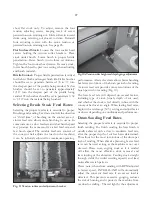
optional DRO (digital read out) for depth is available. 
Fig. 12. This offers the most precise reading of sanded 
thickness  and  allows  for  accurate  repeatability  of  a 
thickness.  Great when making parts that must be an 
exact thickness or when matching a thickness.


To operate, turn ON and select standard inch 

“in”

 or 

metric millimeter 

“mm”.

  Lower drum, with abrasive 

installed,  until  it  touches  the  conveyor  belt.  Press 

“zero” button to calibrate.


      Fig. 12  Optional DRO


Содержание SuperMax 19-38 Combo

Страница 1: ...19 38 Combo Brush Drum Sander Owner s Manual Lagunatools com SKU 219383...

Страница 2: ...Purchased Distributor IMPORTANT KEEP THIS MANUAL HANDY Please read this manual first It was designed to help you get the most from your 16 32 drum sander Before unpacking or using the machine familiar...

Страница 3: ...ING Basic Operating Procedures 16 Adjusting Tension Rollers 16 Selecting Stock Feed Rates 17 Drum 17 Setting Brush Depth of Cut 18 Setting Drum Depth of Cut 18 Using The Depth Gauge 18 Changing Instal...

Страница 4: ...Keep proper footing and balance at all times 14 MAINTAIN TOOLS WITH CARE Keep tools sharp and clean for best and safest performance Fol low instructions for lubricating and changing ac cessories 15 DI...

Страница 5: ...nier un outil s il y a lieu 13 VITEZ DE TRAVAILLER dans une position incommode ou instable Gardez les deux pieds au sol en tout temps 14 ENTRETENIR VOS OUTILS AVEC SOINS Pour une meil leure performanc...

Страница 6: ...ht adjustment handle which raises and lowers the sanding head 2 a brush speed control knob which controls brush speed from 200 to 1000 RPM and drum speed to 1750 RPM 3 a feed rate control knob which s...

Страница 7: ...two wood packing plates from bottom of sanding unit Fig 3 5 With one or two helpers place sanding unit on stand or bench and attach securely Use bolts from packing plates 6 Install knob to height adju...

Страница 8: ...ers finger tight Fully tighten fasteners before use 1 Assemble the stand by securing two legs to the out side of each of the two short top cross braces using the supplied carriage bolts and flange nut...

Страница 9: ...gain the longercrossbracesshouldsitontopoftheshort ones 6 Thread a hex nut onto each of the leveling feet attach a leveling foot to the bottom of each leg with the hard ware order as shown not require...

Страница 10: ...ipped with one 4 diameter dust exhaust port at the top of the cover To attach to your collection system install 4 hose from your collector See Tips For Maximum Performance The minimum recommended dust...

Страница 11: ...the white wire into the terminal connector Press down on the orange clamp to secure the white wire Confirm the white wire is secure in the terminal clamp and that there is no exposed non insulated wir...

Страница 12: ...round Connection green Neutral Connection white Hot live Connection black Power Cord Strain Relief Tension Nut Neutral white terminal clamp connection with orange clamp Hot black terminal clamp connec...

Страница 13: ...rush contact should be equal across the width of the conveyor Brush misalignment can be corrected by loosening the four cap screws on the outboard edge of the conveyor and turning the 7 16 adjustment...

Страница 14: ...14 Fig 6A Checking brush alignment inboard side Fig 6 Checking brush alignment and table height adjustment outboard side Fig 7 Adjusting brush alignment...

Страница 15: ...etching If adjustments are necessary follow the instructions below Belt tracking adjustments are made while the conveyor belt is running With the conveyor unit on and set at the fastest speed setting...

Страница 16: ...eed stock through unit 7 Gradually increase brush speed RPM until the desired finish is achieved Fig 8 To feed stock through the SuperBrush rest and hold the stock to be sanded on the conveyor table a...

Страница 17: ...r belt adjusts the load on the machine it can be infinitely adjusted for maximum operating Fig 11 Tension rollers and adjustment bracket Fig 11ATension rollerheightand depth gauge adjustment performan...

Страница 18: ...rate Pass the abrasive loaded board through the machine until the brush fibers are sharp and even Setting Drum Depth of Cut Determining the depth of cut is the most IMPORTANT set up procedure before...

Страница 19: ...t 5 Bearing 6 Coupling 1 2 7 Spider The drum can be interchanged between the different heads offered for the 19 38 combination machine The drum and brush heads interchange easily by removing the bolts...

Страница 20: ...Shaft Set Screws with an Allen wrench DO NOT remove the set screws on the coupling unless they need to be adjusted preceding steps This will allow the bearings to move left to right on the shaft givi...

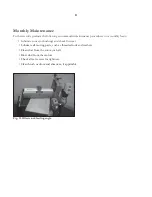
Страница 21: ...a monthly basis Lubricate conveyor bushings and check for wear Lubricate all moving parts such as threaded rods and washers Clean dust from the conveyor belt Blow dust from the motors Check all set sc...

Страница 22: ...if they do not contact the tension rollers When brushing high stock special care is needed to prevent tipping Brushing Imperfect Stock To avoid personal injury take special care when sanding brushing...

Страница 23: ...Pull strips of abrasive from outboard side of brush head Remove one strip at a time Replace strips by sliding them into brush head Abrasive side must face up on infeed or front of brush head Note Abr...

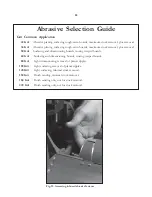
Страница 24: ...removal glue removal 50 Grit Surfacing and dimensioning boards trueing warped boards 60 Grit Surfacing and dimensioning boards trueing warped boards 80 Grit Light dimensioning removal of planer rippl...

Страница 25: ...strip properly cut rewrap the drum and insert the tapered end through the slot in the right inboard end of the drum Insert the tapered end into the inboard take up fastener Pull up on the clip lever...

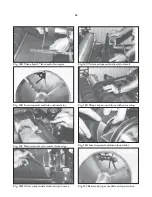
Страница 26: ...slot Fig 16F Mark strip where it crosses drum edge Fig 16H Allow room inside slot for strip to move Fig 16C Trimmed tapered end ready to install Fig 16E Wrap strip around drum without overlap Fig 16G...

Страница 27: ...on on both sides of the belt when taut Insufficient belt tension will cause slippage of conveyor belt on the drive roller during sanding operation The conveyor belt is too loose if it can be stopped b...

Страница 28: ...in primary power cord 2 Brush motor cord unplugged from receptacle near power feed motor Plug in brush motor and inverter cord at receptacle on machine if so equipped Fig 5 3 Circuit fuse blown or cir...

Страница 29: ...cessive depth of cut Tension rollers too high Reduce depth of cut Lower tension rollers page 9 3 Excessive feed rate Reduce feed rate 4 Dirty or worn conveyor belt Clean or replace conveyor belt Conve...

Страница 30: ...ate support of stock Conveyor drive or driven Use roller stands to support stock Readjust rollers rollers higher than conveyor bed Burning of wood or melting of finish 1 2 Feed rate too slow Excessive...

Страница 31: ...31...

Страница 32: ...18 480BS 118 Label Depth Gauge inch 1 19 480BS 119 Depth Gauge Pointer 1 20 480BS 120 Knob 1 21 480BS 121 Height Adjustment Handle 1 22 480BS 122 Nylon Insert Lock Nut 5 8 11 1 23 480BS 123 Height Adj...

Страница 33: ...Hex Nut w Washer M8x1 25 4 72 480BS 172A Screw M4x25 2 73 480BS 173 RPM Speed Label 1 74 480BS 174 Hex Cap Screw 5 16 18x1 1 2 1 75 480BS 175A Mounting Bracket 1 76 480BS 176C Inverter 1 77 480BS 177...

Страница 34: ...34 34...

Страница 35: ...0BS 145 Flat Washer 1 4 4 27 480BS 227 Bracket Take Up Slide 2 28 480BS 154 Bushing Oilite 4 29 480BS 229 Roller Driven 1 30 480BS 230 Wrench 2 31 480BS 231 Hex Nut 1 4 20 2 32 480BS 232 Washer Lock I...

Страница 36: ...36...

Страница 37: ...Left 2 2 480BS 502 Leg Right with TUF tool holder 2 3 480BS 503 Rail Long 2 4 480BS 504 Rail Short 2 5 480BS 505 Shelf 1 6 480BS 506 Carriage Bolt 5 16 18x5 8 24 7 480BS 507 Hex Nut w Washer 5 16 24 8...

Страница 38: ...42 Height 24 without stand Brush 5 diameter typical Typical bristle length 1 1 2 varies Brush Speed Variable 200 1000 RPM Brush 1750 RPM Drum Dust Hood Hinged back with 4 vacuum port Height Adjustment...

Страница 39: ...39...
Страница 40: ...gital read out depth gauge CONVEYOR BELTS Item Description Qty SUPMX 60 0322 Type 1 100 grit abrasive surface with reinforced backing SUPMX 61 1003 Type 2 Polyurethane textured surface with monofilame...

Страница 41: ...Laguna Tools 744 Refuge Way Suite 200 Grand Prairie TX 75050 800 234 1976 www lagunatools com Service 1 800 332 4049 or email customerservice lagunatools com 051223...

Отзывы: