144
General Maintenance
15.
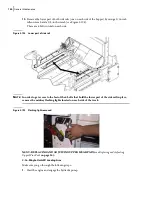
Remove the lower part of both side rails (one on each side of the hopper) by using a 5/16-inch
Allen wrench and a 3/4-inch wrench (see Figure 3
194).
There are 6 bolts in total on each side.
Figure 3
-
194 Lower part of side rail
N
OTE
:
In order to get access to the last of the 6 bolts that hold the lower part of the side rail in place,
remove the midway flashing lights located on each side of the truck.
Figure 3
-
195 Flashing light removed
NEXT: REPLACING AND ADJUSTING UPPER WEAR PADS:
C: Co-Mingle Units W/ Loading Arm
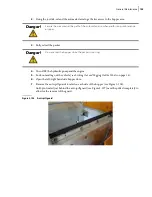
Make sure you go through the following steps:
1.
Start the engine and engage the hydraulic pump.
Содержание EXPERT
Страница 1: ...EXPERT TM MAINTENANCE MANUAL...
Страница 2: ......
Страница 3: ...EXPERT MAINTENANCE MANUAL...
Страница 10: ...viii Table of Contents...
Страница 18: ...8 Introduction...
Страница 244: ...234 General Maintenance...
Страница 251: ...Lubrication 241 Figure 4 11 Glass compartment lubrication chart optional...
Страница 252: ...242 Lubrication Figure 4 12 EXPERT lubrication chart...
Страница 261: ...Lubrication 251 Figure 4 27 Packer lubrication points 2 Grease fitting LH side front cylinder pin...
Страница 263: ...Lubrication 253 Pump Drive Shaft U Joint Figure 4 30 Pump drive shaft lubrication points Grease fittings...
Страница 264: ...254 Lubrication...
Страница 320: ...310 Hydraulic System...
Страница 357: ...Troubleshooting 349...
Страница 358: ...350 Troubleshooting...
Страница 386: ...378 Multiplexing...
Страница 388: ...380 Lifting Arms Figure 10 1 Mounting bolts Figure 10 2 Wear pads Figure 10 3 Helping Hand gripper...


