background image

7

Installing

Installing

Installing

Installing Steps

Steps

Steps

Steps

:

1) Wall-mounting Part installation: Locate the height and position of the electronic whiteboard

to be installed, and mark the holes position of the wall-mounting pieces on the wall as shown

in the picture below.

See

Figure 3-1

Installing

Installing

Installing

Installing Tips:

Tips:

Tips:

Tips:

The length from the knob of the wall-mounting piece to the lower frame of the whiteboard is

95cm. The recommended height from the ground to the lower frame of the interactive

electronic whiteboard shall be around 75-80 cm.

2) Drill holes in the four marked spots with a diameter of 8mm drill and fix two wall-mounting

pieces by using 6*70 expansion screws.;

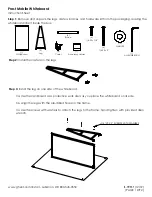
3) Fix two pieces of supports onto the lower frame of the back of whiteboard, as shown below;

4) Fix the Link knob into the wall-mounting pieces, see attached picture above.

5) Mark the position of holes in the Support after successfully hanging the whiteboard on the

wall,

lay flat the whiteboard on the package carton, drill holes in the marked two spots with a

diameter of 8mm drill and fix the support by using 6*70 expansion screws.

Caution:

Caution:

Caution:

Caution:

Set up this product on a level floor surface with a weight bearing capacity of 120 kg/m2

or more, and which is made of floor materials that will not deform or become depressed due to

movement by casters.

Figure

Figure

Figure

Figure 3-1

3-1

3-1

3-1

Figure

Figure

Figure

Figure 3-

3-

3-

3-2

222

Содержание LWB-XX00 Series

Страница 1: ...Version ersion ersion ersion 3 0 3 0 3 0 3 0 Labotrix Labotrix Labotrix Labotrix Group Group Group Group Limited Limited Limited Limited Address Address Address Address Room 1908 1909 Global Logistic...

Страница 2: ...PART PART PART PART ONE ONE ONE ONE HARDWARE HARDWARE HARDWARE HARDWARE...

Страница 3: ...irements 4 3 Certifications and Quality Warranty 4 Chapter II Packing List 5 1 Standard Components 5 2 Optional Accessories 6 Chapter III Installation Procedures 6 1 Wall mounting Installation 6 2 Cab...

Страница 4: ...ade searchlight capture and save screen record and replay input with on screen keyboard input text hyperlink to video or web page insert content etc LWB XX00 series IR interactive electronic whiteboar...

Страница 5: ...4 standard The board structure of each interactive electronic whiteboard enjoys three years warranty and other accessories are entitled to one year guarantee Man made damage to the board may not fall...

Страница 6: ...n Tray Holder 1 Set Eraser 1 Chapter Chapter Chapter Chapter III III III III Installation Installation Installation Installation Procedures Procedures Procedures Procedures 1 1 1 1 Wall mounting Wall...

Страница 7: ...er of 8mm drill and fix two wall mounting pieces by using 6 70 expansion screws 3 Fix two pieces of supports onto the lower frame of the back of whiteboard as shown below 4 Fix the Link knob into the...

Страница 8: ...the USB plug into the spare USB slot of the computer B B B B Connection Connection Connection Connectionbetween between between betweenComputer Computer Computer Computer and and and andProjector Pro...

Страница 9: ...C 14 F to 113 F Operating Operating Operating Operating Humidity Humidity Humidity Humidity 20 to 85 Chapter Chapter Chapter Chapter V V V V Maintenance Maintenance Maintenance Maintenance and and an...

Страница 10: ...l the drivers to solve the problem 2 USB cable connection is failed Check the USB cable connection 3 3 3 3 The The The The writing writing writing writing stroke stroke stroke stroke is is is isunable...

Отзывы: