background image

21

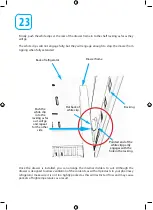
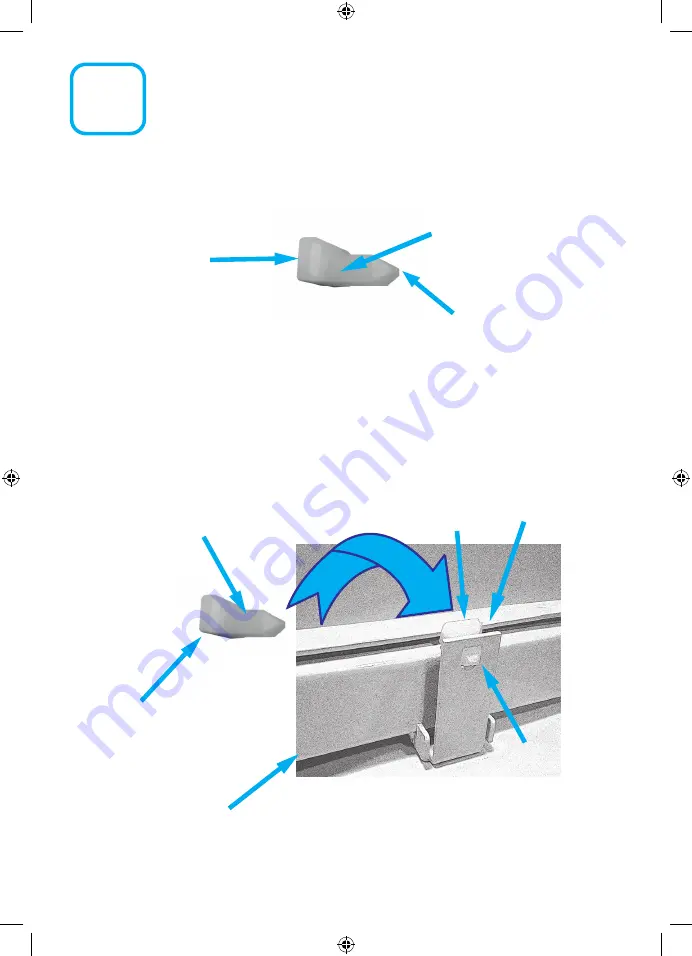
Two plastic white clips are supplied with each draw. These must be pushed in to the holes 

located on either side at the back of the drawer runner frame. 

White plastic clip

Pointed end

Flat back

Use this way 

up with the 

pointed end 

section at the 

bottom of the 

clip

The clips must be inserted with the protruding, pointed part of the clip at the bottom and 

facing outwards of the frame. 

When the drawer is placed in the refrigerator, the clips on either side will need to be pushed 

against the racking to stop the drawer from tipping when fully extended.

Pointed end 

of the clip 

must be at 

the bottom

Pointed end 

of the clip 

goes through 

the drawer 

hole

Flat back

Drawer runner frame

Hole in 

drawer runner 

frame to fi t 

white clips

Insert one 

each side

of drawer

Flat back

Содержание IntelliCold RLDF/G 19

Страница 1: ...www labcold com IntelliCold Pharmacy Refrigerator Operating Instructions RLDF G 19...

Страница 2: ...nts indicates that this refrigerator should not be treated as ordinary waste but must be taken to a special collection centre for the recycling of electrical equipment For more information regarding t...

Страница 3: ...tbite or freezing of the skin If the power supply cord is damaged it MUST be replaced by the manufacturer its service agent or similarly qualified persons in order to avoid a hazard Do not use mechani...

Страница 4: ...are a UKAS calibration laboratory 8898 We can calibrate your refrigerator AND your independent thermometer We don t just use UKAS traceable equipment we use UKAS methodology and training for assured t...

Страница 5: ...probe to2 10 Viewing alarm limits 11 Reviewing the date 11 Viewing Min MaxTemperatures 12 Resetting Min MaxTemperatures 12 Alarm Guide 13 Light Icon Button 14 Door Lock 14 Digital Door Lock 15 Micro S...

Страница 6: ...your fridge in the location in which it is to be used Do not place your fridge near a direct heat source or direct sunlight and leave at least 6cm all round the unit for adequate ventilation Failure t...

Страница 7: ...bcold repeat alarm kit this is where the wires need to be connected Please see the separate instructions for more information The maximum rating for the connection is 1A 30Vdc DO NOT CONNECT TO MAINS...

Страница 8: ...ferent functions Like a mobile phone screen it may not work if you re wearing gloves Where the instructions say touch this means tap the icon button like you would an app on your phone Hold means leav...

Страница 9: ...e fridge so it will alarm and record internal temperatures should it become disconnected from a mains power source The time should NOT be changed when the clocks change to GMT or BST as this may cause...

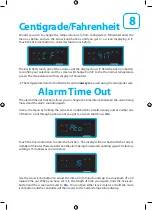
Страница 10: ...igits using the arrow icons buttons as above so if it is 21st June adjust the digits to 21 When adjusted touch the tick icon button as before H L P H L P After setting the day you next need to set the...

Страница 11: ...ate the icons buttons again put your hand across the controller and they will become active after 2 seconds of appearing ALTHOUGH THE REFRIGERATOR WILL REACH 5oC WITHIN ABOUT AN HOUR YOU SHOULD LEAVET...

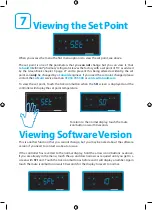
Страница 12: ...e tick icon button when the SEt screen is displayed and the controller will display the set point temperature Viewing the Set Point H L P C H L P To return to the normal display touch the mute icon bu...

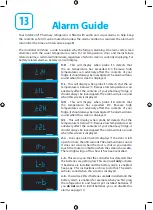
Страница 13: ...allows you to change the time interval between the alarm being muted and the alarm sounding again Access the menu by holding the two arrow icons buttons simultaneously and use either one of them to sc...

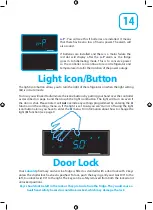
Страница 14: ...h the mute icon buttonorjustleavethecontrolleraloneandthescreenwillreturntothenormaltemperaturedisplay Internal Light H L P H L P H L P H L P Battery Alarm The battery alarm is enabled by default If y...

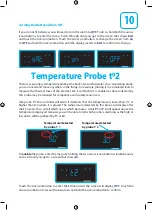
Страница 15: ...s etc Like probe to1 the controller will alarm if it detects that the temperature is lower than 2oC or higher than 8oC where it is placed The temperature detected by this probe will display after the...

Страница 16: ...holding the two arrow icons buttons and scroll through the options until you come to screen L t H L P Reviewing the Date To review or change the date time enter the menu by holding the two arrow icon...

Страница 17: ...ures the controller will revert to the normal display and the icons buttons cease to be active The temperatures recorded by the two probes may differ because they are taking readings from different pa...

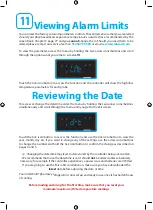
Страница 18: ...s will display when probe t2 detects that the temperature has exceeded 8oC Because high temperatures can adversely affect the contents of your fridge it should always be investigated The alarm will al...

Страница 19: ...controller as described on page 6 and then touch the light icon button The light will turn on even if the door is shut Please note it will not override any settings programmed by entering the Lt func...

Страница 20: ...efrigerator There is also a master override key optional extra that enables you to open the refrigerator in the normal way should you wish to or in an emergency The Labcold digital combination lock is...

Страница 21: ...next button After the fourth digit is entered the lock will make a noise signifying it has unlocked You can then rotate the lock handle 90o in a clockwise direction to open the fridge If the red LED...

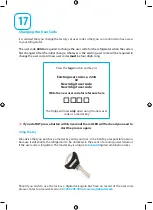
Страница 22: ...cked in the event of a mains power failure or if the user code is forgotten The master key is unique to Labcold digital combination locks Should you wish to use the lock as a digital lock again but ha...

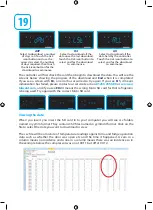
Страница 23: ...nload this information as a CSV file The controller will store this information for 18 months but we recommend that you download the data once a week especially as the more data there is to download t...

Страница 24: ...f you see a screen with Err an error has occurred so try again If you see Er1 it means initialization has failed please contact our service team on 01256 705 580 or service labcold com and if you see...

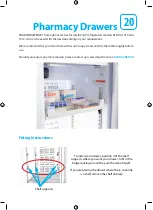
Страница 25: ...warm soapy water and dry them thoroughly before use Should you require any more drawers please contact our sales department on 01256 705 570 Fitting Instructions Shelf supports To install your drawer...

Страница 26: ...inserted with the protruding pointed part of the clip at the bottom and facing outwards of the frame When the drawer is placed in the refrigerator the clips on either side will need to be pushed again...

Страница 27: ...t the shelf supports fully engage with the 4 holes on the reverse of the drawer frame Holes on the reverse of the drawer frame designed to engage with the shelf supports fitted to the refrigerator rac...

Страница 28: ...ame in to the shelf racking as far as they will go The white clips will not engage fully but they will engage enough to stop the drawer from tipping when fully extended Once the drawer is installed yo...

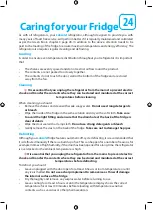
Страница 29: ...trong detergents or bleach Wipe the inside of the fridge in the same solution and dry with a soft cloth Take care to avoid the light fitting and ensure that the drain hole at the back of the fridge is...

Страница 30: ...d close to the door or at the top or bottom of the fridge as these are the areas where the greatest temperature fluctuations occur Small accumulations of ice on the cold plate are quite normal and sho...

Страница 31: ...r fridge directly from Labcold you should contact our service team on 01256 705 580 or Email them at service labcold com When you register your warranty or want to report a performance issue you will...

Страница 32: ...www labcold com...

Отзывы: