background image

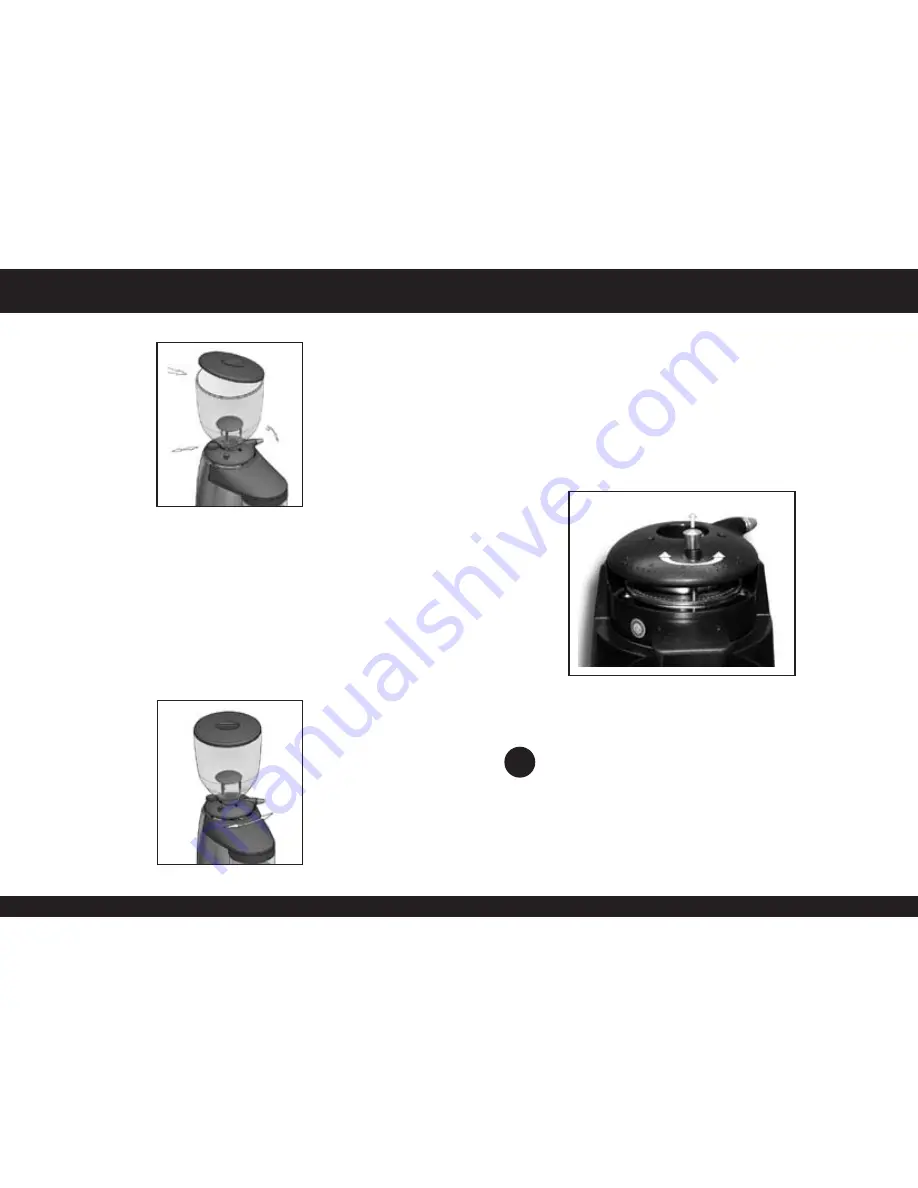
Fig. 3

Connect the machine to the power supply, press the On-Off switch 

(14) and open the shutter (4) to let the coffee through. Remove the 

dispenser lid (8) and turn the grind regulator (6) to the required 

grind setting. By turning it clockwise, the coffee grind will be coarser 

and turning it counter-clockwise, the grind will be finer. Note that 

you should only change grind settings when the machine is on and 

burrs are in motion. If you do not do this, the burrs will gunk up and 

cleaning will be required. Changing grind settings when the burrs 

are not in motion will cause the grinder to only make very coarse 

grinds or no grinds at all. Fig. 4. 

Coffee

beans

Open-

Closed

Anchored

Free

Coarse

Fine

For security reasons, the regulator (6) is limited to a single turn.

In the Stepped models, the grinding positions are set by the place-

ment of the holes shown in Fig. 5. Using these holes, select the 

grind point you desire.

Fig. 4

NOTE: If the coffee comes out slowly, this is because the coffee 

is set to grind very fine. If it comes out very fast, it is because 

the  grind  is  very  thick. A  perfect  espresso  is  achieved  with  a 

grinding point of 25 ml of coffee brewed in 25 seconds.

i

Fig. 5

Содержание K-6

Страница 1: ...09 CE on the approxima tion of the laws of the Member States relating to material and ob jects destinated to make contact with nutritional products 03 108 EC amending Directive 2002 96 EC on waste ele...

Страница 2: ...mation for the correct installation handling and maintenance of the machine and to emphasize the precautions that should be taken into consideration by the operator To ensure the best use of the coffe...

Страница 3: ...NUMBER ELECTRICAL DATA DATE OF MANUFACTURE OPTIONS TEL FAX Technical characteristics 4 K 6 K 6 Sil K 6 Pro K 8 Silenzio K 10 Conic K 10WBC MODEL P in P out P in P out P in P out P in P out P in P out...

Страница 4: ...e a responsible adult and under no cir cumstances a minor or a person unable to deal with said respon sibility When handling the grinder the following precautions must be taken into consideration Do n...

Страница 5: ...ace should be as follows K 6 K 6 Sil K 6 Pro K 8 Sil K 10 Conic 31 5 800 12 1 310 16 400 K 10 Conic WBC Height in mm Width in mm Depth in mm 6 4 Installation of the coffee grinder Before connecting th...

Страница 6: ...ll be required Changing grind settings when the burrs are not in motion will cause the grinder to only make very coarse grinds or no grinds at all Fig 4 Coffee beans Open Closed Anchored Free Coarse F...

Страница 7: ...o that it is positioned under the ground coffee discharge tube Fig 1 Pull the dispensing handle 11 to obtain one coffee serving one serving is equal to one cup of coffee and release it so it returns t...

Страница 8: ...the end of each day to remove excess grounds 9 2 Cleaning of the coffee bean hopper Before cleaning make sure that there are no beans left in the hopper 2 Loosen by hand the setting roller 5 and with...

Страница 9: ...ried out by qualified staff Regular programmed inspections are recommended of the parts subject to wear and tear Systematically check the usage level of the burrs The perfect condition of the burrs gu...

Страница 10: ...ng screw to hold the hopper in place The coffee grinder should only be used for grinding coffee beans Do not use the machine to grind other types of foods such as nuts dried fruits or to fine grind gr...

Отзывы: