La Crosse WS7138 Скачать руководство пользователя страница 6

Minutes flashing

The hour display can be selected to show hours in 12-hour or 24-hour settings.
(Default 24-Hour)
1. 

Use the “MIN/MAX/+” key toggle between “12h” or “24h”.

2.

Press again the “IN/OUT/SET/CH” key to confirm and enter the “

Manual time

setting

”.

MANUAL TIME SETTING

In case the Weather station is not be able to detect the DCF-signal (disturbances,
transmitting distance, etc.), the time can be manually set. The clock will then work like a
normal Quartz clock.

1. 

The hour digit starts flashing.

2. 

Use the “MIN/MAX/+” key to set the hours.

3. 

Press the “IN/OUT/SET/CH” key to enter the minutes. The minute digits start
flashing.

4. 

Press the “MIN/MAX/+” key to set the minutes.

5.

Press the “IN/OUT/SET/CH” key to confirm and enter the “

Calendar setting

”.

Note: 

The unit will still try to receive the signal at each full hour and after manual set time

despite it being manually set. When it does receive the signal, it will change the manually
set time into the received time. During reception attempts the DCF tower icon will flash. If
reception has been unsuccessful, then the DCF tower icon will not appear but reception will
still be attempted the following hour.

CALENDAR SETTING

The date default of the Weather station is 1. 1. in the year 2003. Once the radio-controlled
time signals are received, the date is automatically updated. However, if the signals are not
received, the date can also be set manually. To do this:

1. 

Use the “MIN/MAX/+” key to set the year (the range runs from 2000 to 2029).

2.

Press the “IN/OUT/SET/CH” key and the month digit starts flashing.

3.

Use the “MIN/MAX/+” key to set the month.

4.

Press the “IN/OUT/SET/CH” key again, the day digit starts flashing,

5. 

Use “MIN/MAX/+” key to set the day.

6.

Press the “IN/OUT/SET/CH” key again to exit the manual setting mode or wait for
about 16 seconds for automatic timeout.

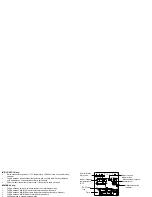
Year flashing

Date flashing

Month flashing

Hour flashing

Содержание WS7138

Страница 1: ...ting manual WEATHER STATION FEATURES DCF radio controlled clock with manual time settings option 12 24 hour time display format Calendar display Indoor temperature display in degrees Celsius C or Fahr...

Страница 2: ...is not being received then see Checking for 433 MHz receptions before resetting the units see Resetting the Weather Station below 4 The Weather Station can take up to 2 optional remote transmitters If...

Страница 3: ...uses 2 x AAA IEC LR3 1 5V batteries To install and replace the batteries please follow the steps below 1 Insert finger or other solid object in the space at the 1 Remove the battery cover 2 Insert the...

Страница 4: ...e than 1 transmitter is used optional MIN MAX key Toggle between time and calendar display in normal display mode Toggle between MIN MAX indoor temperature and humidity data Toggle between MIN MAX out...

Страница 5: ...he received signal is naturally weakened In extreme cases please place the unit close to a window and or point its front or back towards the Frankfurt transmitter 3 During nighttime the atmospheric di...

Страница 6: ...will still try to receive the signal at each full hour and after manual set time despite it being manually set When it does receive the signal it will change the manually set time into the received t...

Страница 7: ...ceived within 2 minutes after inserting the 1 Press the MIN MAX key the Weather Station shows the current date 2 Press the MIN MAX key a second time the MAX indoor temperature and time record will sho...

Страница 8: ...y record shows with the date record humidity record and humidity level bar flashing Note The temperature displayed next to the MIN MAX relative humidity record is not the MIN MAX temperature record bu...

Страница 9: ...rd to the current data CHECKING THE 433 MHz RECEPTION Optional In normal surroundings for example away from interfering sources such as TV sets the outdoor temperature can usually be easily received w...

Страница 10: ...chable stand that gives the option of table standing or wall mounting To wall mount 1 Fix a screw into the desired wall leaving the head extended out The mounting surface can affect the transmission r...

Страница 11: ...1 to 99 with 1 resolution displayed if outside this range LIABILITY DISCLAIMER The manufacturer and supplier cannot accept any responsibility for any incorrect readings and any consequences that occu...

Отзывы: