background image

Model: C89201                      www.lacrossetechnology.com/support            


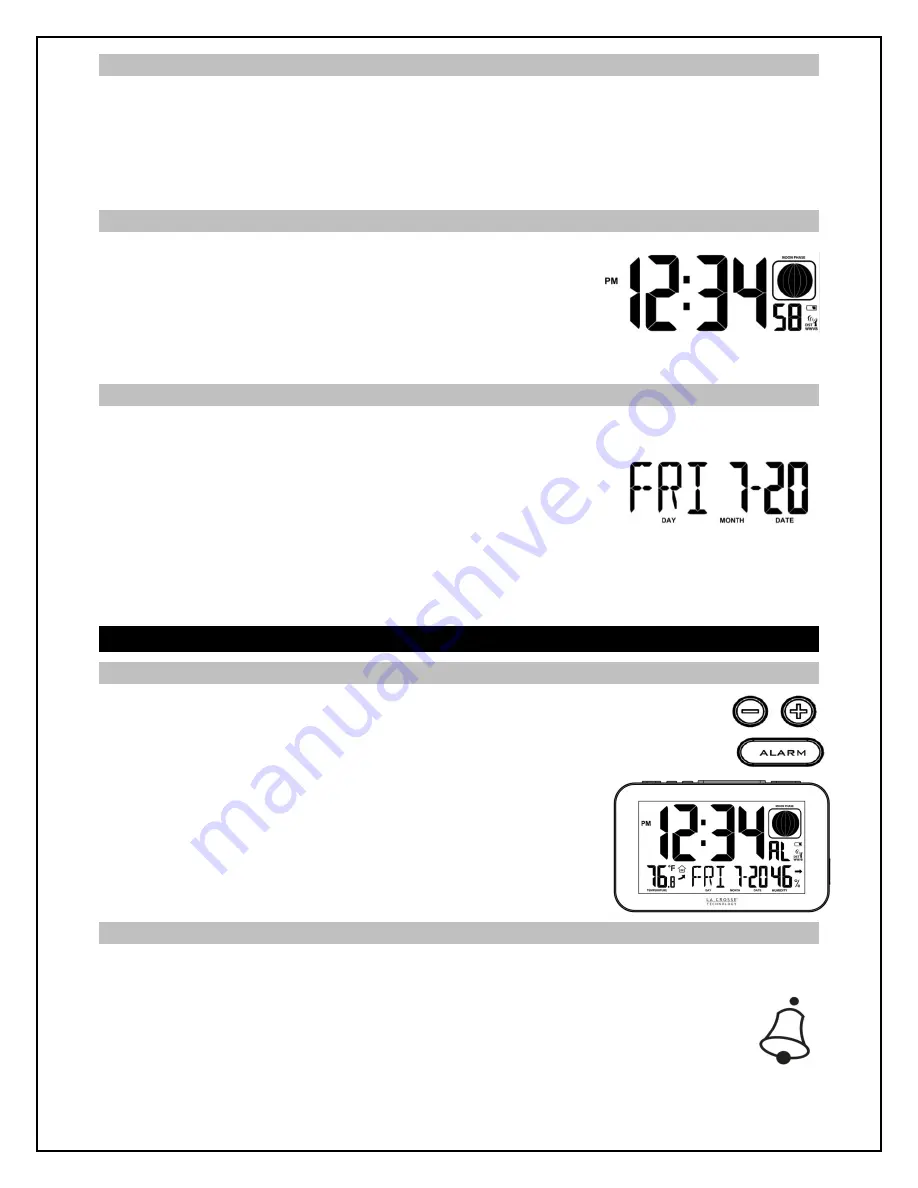
12-hour or 24-hour Time Format 


The Time may be displayed in 12-hour or 24-hour format. Default is 12-hour time. 

Note:

 When in 12-hour format, AM or PM will show in front of the hour.   


1.  Hold the °F/°C SET button for three seconds to enter time set mode. 
2. 

12H

 will flash.  

3.  Use the + or - buttons to choose 12-hour or 24-hour time format. 
4.  Press the °F/°C SET button to confirm and move to set time. 


Set Time 


To set the time manually: 


1.  The 

Hour

 digit will flash.


2.  Use the + or - buttons to choose the hour. 
3.  Press the °F/°C SET button to confirm and move to minutes. 
4.  The 

Minutes

 will flash. 

5.  Use the + or - buttons to choose the minutes. 
6.  Press the °F/°C SET button to confirm and move to set calendar. 


Set Calendar 


To set the calendar: 


1.  The 

Year

 will flash. 

2.  Use the + or - buttons to choose the year. 
3.  Press the °F/°C SET button to confirm and move to the month. 
4.  The 

Month

 will flash. 

5.  Use the + or - buttons to choose the month.


6.  Press the °F/°C SET button to confirm and move to the date. 
7.  The 

Date

 will flash. 

8.  Use the + or - buttons to choose the date. 
9.  Press the °F/°C SET button to confirm and exit. 

Note:

 The day of the week will set automatically once the year, month and date are set. 


Alarm Time


Set Time Alarm 


Setting the time alarm and activating the time alarm are separate steps. Hold the ALARM 
button for three seconds to enter alarm set mode. The letters “

AL

” will show in the seconds 

display. 


1.  The

 Alarm Hour

 will flash.


2.  Use the + or - buttons to set the alarm hour. 
3.  Press the ALARM button to confirm and switch to alarm minutes.  
4.  The 

Alarm Minutes

 will flash. 

5.  Use the + or - buttons to set the alarm minutes. 
6.  Press ALARM button to confirm. 
7.  Press the ALARM button to return to normal time mode 

Note: 

When no buttons are pressed for ten seconds, the atomic alarm 

clock will save the last change and default back to normal time mode. 


Activate/Deactivate Time Alarm 


Press the ALARM button once to show Alarm Time. The letters “

AL

” will show in the seconds display. 


Activate:

 With the alarm time showing, Press the ALARM button to activate the alarm. The 

alarm icon appears when alarm is active.  


Deactivate:

 With the alarm time showing, Press the ALARM button to deactivate the alarm. 

The alarm icon will disappear when alarm is inactive.  

Note: 

The alarm is crescendo sound. The alarm will sound for 2 minutes and then shut off  

completely if no buttons are pressed.


12Hr 

Alarm 

Icon 

Содержание C89201

Страница 1: ...support 1 MULTI COLOR ATOMIC ALARM CLOCK Model C89201 Instruction Manual DC 102814 Moon Phase Low Battery WWVB Icons Calendar Indoor Humidity Trend indicators Indoor Temperature Trend indicators Time Alarm 1A output USB Charging Port Buttons ...

Страница 2: ...ivate Deactivate Alarm 5 Snooze Alarm 6 Backlight 6 USB Charge Port 6 Temperature Humidity Trend Arrows 6 Moon Phase 7 WWVB Radio Controlled Time Reception 7 Position the Atomic Alarm Clock 7 Specifications 8 Indoor 8 Power Requirements 8 Battery Life 8 Dimensions 8 Low Battery Icon 8 Care and Maintenance 8 Warranty Information 8 FCC Statement 9 Features Atomic 12 24 hour time sets itself hours mi...

Страница 3: ...r only the backlight will come on for 10 seconds when the LIGHT button is pressed Restart If there is no indoor temperature data after 60 seconds unplug the AC adapter and remove batteries from the alarm clock press any button 20 times After 15 minutes return to Step 1 above Power the Atomic Alarm Clock The atomic alarm clock can be powered by the 5 volt A C adapter or batteries A C Power Adapter ...

Страница 4: ...Date WWVB Reception ON OFF The F C SET button will move through the program menu The or buttons will change a value 1 Hold the F C SET button 5 seconds WWVB and the word ON will flash 2 Press the or buttons to turn WWVB time reception to OFF 3 Confirm with the F C SET button and move to the time zone Time Zone The time zone is defaulted to Eastern Time EST Select your time zone and the atomic alar...

Страница 5: ...button to confirm and exit Note The day of the week will set automatically once the year month and date are set Alarm Time Set Time Alarm Setting the time alarm and activating the time alarm are separate steps Hold the ALARM button for three seconds to enter alarm set mode The letters AL will show in the seconds display 1 The Alarm Hour will flash 2 Use the or buttons to set the alarm hour 3 Press...

Страница 6: ...ther devices when the alarm clock is plugged into a power outlet with the included 5V AC adapter Note This is a power output charging port It does not supply power to the alarm clock Connect your external device s USB charging cable not included to the USB charging port Charging times will vary USB Power Output 1A maximum current Charge 1A devices or devices that are self regulating Note Some USB ...

Страница 7: ... continuously throughout the United States at 60 kHz The signal can be received up to 2 000 miles away through the internal antenna in the atomic alarm clock However due to the nature of the Earth s Ionosphere reception is very limited during daylight hours The WWVB reception icon with full signal strength will appear on screen if the reception of atomic time is successful When powered up the Atom...

Страница 8: ...nstallation Ensure the batteries are installed with correct polarity and Remove batteries from equipment which is not to be used for an extended period of time Remove expired batteries promptly Do not expose the atomic alarm clock to extreme temperatures vibration or shock Keep dry Clean atomic alarm clock with a soft damp cloth Do not use solvents or scouring agents The atomic alarm clock is not ...

Страница 9: ... measures Reorient or relocate the receiving antenna Increase the separation between the equipment and receiver Connect the equipment into an outlet on a circuit different from that to which the receiver is connected Consult the dealer or an experienced radio TV technician for help This device must not be co located or operating in conjunction with any other antenna or transmitter Operation is sub...

Отзывы: