background image


Model: 616-146A v2      www.lacrossetechnology.com/support           

Page | 4


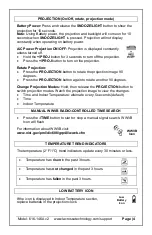
PROJECTION (On/Off, rotate, projection mode) 


Battery Power: 

Press and release the

 SNOOZE/LIGHT

 button to


show the 

projection for 10 seconds. 

Note: 

Using Battery power, the projection and backlight will come on for 10 

seconds when 

SNOOZE/LIGHT

 is pressed.


Projection will not display 

constantly when operating on battery power. 


A/C Power Projection ON/OFF:

 Projection is displayed constantly 

unless turned off. 


Hold the 

+/PROJ

 button for 3 seconds to turn off the projection. 


Press the 

+/PROJ

 button to turn on the projection.


Rotate Projection:


Press the 

PROJECTION

 button to rotate the projection image 90 

degrees.  


Press the 

PROJECTION

 button again to rotate another 90 degrees. 


Change Projection Modes: 

Hold, then release the 

PROJECTION

 button to 

switch projection modes. Watch the projection image to view the changes. 


Time and Indoor Temperature: alternate every 5 seconds (default) 


Time  


Indoor Temperature 


MANUAL WWVB RADIO-CONTROLLED TIME SEARCH 


Press the 

-/TIME 

button to start or stop a manual signal search. WWVB 

Icon will flash 


For information about WWVB visit:  

www.nist.gov/pml/div688/grp40/wwvb.cfm  


TEMPERATURE TREND INDICATORS 


The temperature (2°F/1°C) trend indicators update every 30 minutes or less.  


Temperature has 

risen

 in the past 3 hours.  


Temperature has 

not changed

 in the past 3 hours.  


Temperature has 

fallen

 in the past 3 hours.  


LOW BATTERY ICON 


If the icon is displayed in Indoor Temperature section,  
replace batteries in the projection clock. 


Low  

Battery 

Icon 

WWVB  

Icon 

Содержание 616-146Av2

Страница 1: ...del 616 146Av2 Quick Setup Guide DC 111815 Atomic Projection Alarm Clock BUTTONS Snooze Backlight Battery Compartment 2 AAA AC Power Jack HX 0501500U Time Alarm with Snooze Indoor Temperature Trends Projection Arm Rotates 180 Moon Phase Calendar USB Charge Port 1A ...

Страница 2: ... buttons to adjust values Press and hold for fast adjustment 3 Press the SET F C button to confirm and move to the next item Time and Date setting order 1 WWVB ON OFF 2 Time Zone 3 DST Daylight Saving Time ON OFF 4 12 24 Hour Time Format 5 Hour 6 Minutes 7 Year 8 Month 9 Date Note Day of the week sets automatically Press the SET F C button to exit or wait 20 seconds without pressing buttons to ret...

Страница 3: ...ices when the forecast station is plugged into a power outlet with the included 5V AC adapter NOTE This is a power output charging port It does not supply power to the forecast station Connect your external device s USB charging cable not included to the USB charging port Charging times will vary USB Power Output 1A maximum current Charge 1A devices or devices that are self regulating MOON PHASE T...

Страница 4: ...Press the PROJECTION button again to rotate another 90 degrees Change Projection Modes Hold then release the PROJECTION button to switch projection modes Watch the projection image to view the changes Time and Indoor Temperature alternate every 5 seconds default Time Indoor Temperature MANUAL WWVB RADIO CONTROLLED TIME SEARCH Press the TIME button to start or stop a manual signal search WWVB Icon ...

Страница 5: ...he batteries are installed correctly with regard to polarity and Remove batteries from equipment with is not to be used for an extended period of time Remove expired batteries promptly SPECIFICATIONS Indoor Temperature Range 32 F to 122 F 0 C to 50 C Interval About every 30 seconds USB Charging Port USB Output 1 Amp maximum current Power Projection Alarm Primary Power AC HX 0501500U 5 volt AC powe...

Страница 6: ...on reception which can be determined by turning the equipment off and on the user is encouraged to try to correct the interference by one or more of the following measures Reorient or relocate the receiving antenna Increase the separation between the equipment and receiver Connect the equipment into an outlet on a circuit different from that to which the receiver is connected Consult the dealer or...

Отзывы: