La Crosse Technology V10-TH Скачать руководство пользователя страница 16

Page | 16

Remote Monitoring Color Weather Station

Sensor ID | Sensor Search 

Each of your sensors has an individual ID number, located on its bar code.

This sensor ID is visible on your station by pressing the SENSOR button.

View ID numbers:

• Press and release the SENSOR button to view individual station and sensor ID numbers. All other information 

   will disappear temporarily.

Search for all sensors:

• While viewing sensor ID, hold the SENSOR button for 3 seconds to search for all sensors.

• The station will search for all sensor ID numbers on the station.

• The sensor reception icon will flash for each sensor while searching.

• The sensor reception icon will be solid when sensor signal is acquired.

• Allow up to 3


minutes to receive sensor signal.

Delete Your Sensor ID 

In the rare event you need to replace your sensor, you will first need to delete the old sensor ID from your 

station and remove batteries from your old sensor.

1. Remove batteries from your old sensor.

2. Press and release the SENSOR button to view your sensor ID number.

3. While viewing your sensor ID, hold the MINUS button for 5 seconds to delete your old sensor ID. Dashes 

    will show for the ID number. 

4. Your station will search for a new sensor.  

5. Install batteries in your new sensor and allow up to three minutes for your new sensor readings and ID to 

    appear on your station. 

Note: 

When replacing your Thermo-hygro sensor, press the TX button (under the battery cover) to send a signal 

immediately.  

TX

F/C

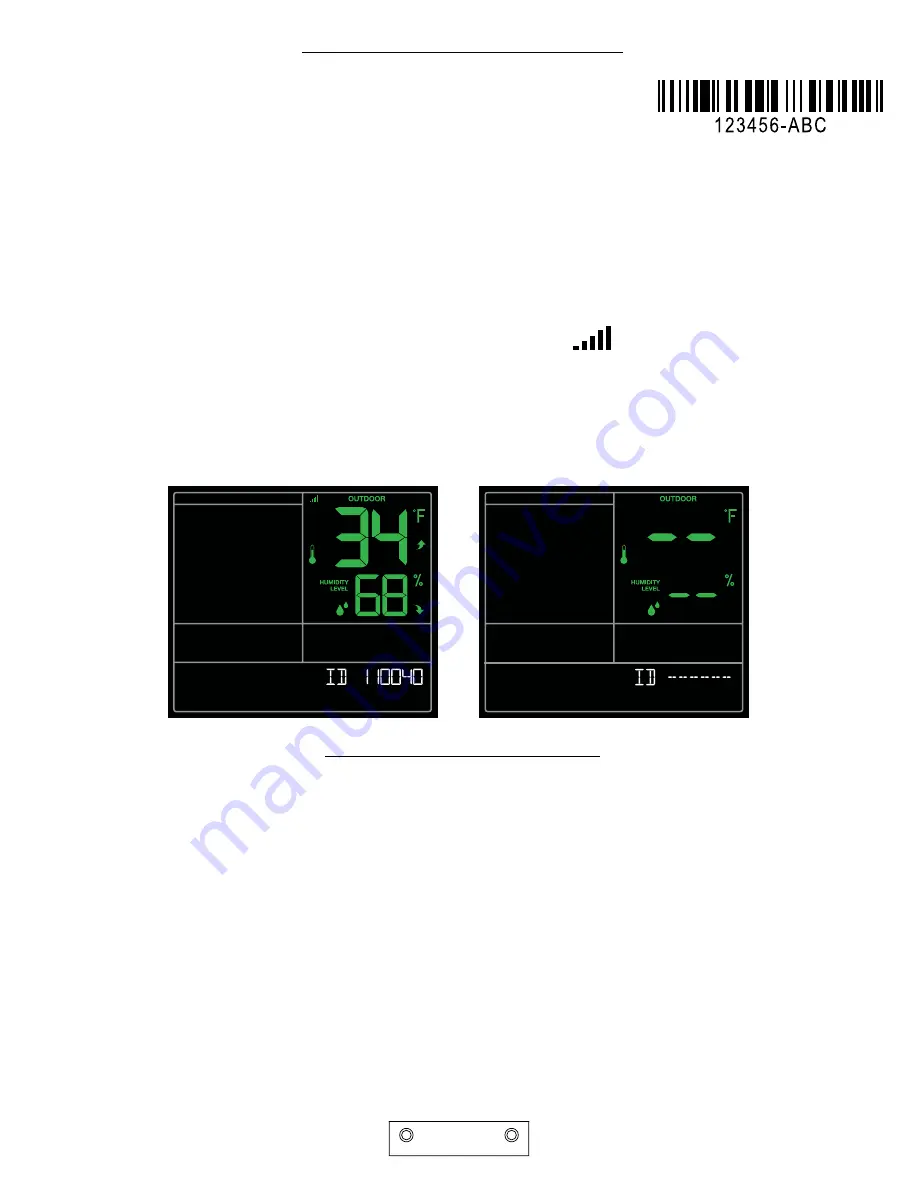
View Sensor ID Number

Deleted Sensor ID Number

Содержание V10-TH

Страница 1: ...ongratulations on your new Professional Weather Station and welcome to the La Crosse Technology family This product was designed with you in mind by our hometown team of weather enthusiasts based in L...

Страница 2: ...Statement 3 3 3 4 4 5 6 7 7 9 10 10 11 12 12 13 13 14 14 14 15 15 15 16 16 17 17 18 18 19 20 20 21 21 Step 1 Power Up Step 2 Station Options Step 3 Mounting Basics Option 1 Connect with La Crosse View...

Страница 3: ...feature set from your La Crosse View app Continue with these instructions on page 4 OPTION 2 OPERATE AS A STANDALONE STATION Full Weather Station Features Monitor your backyard temperature and humidi...

Страница 4: ...recast information will update instantly on your weather station s screen For online support http www lacrossetechnology com lacrosseviewsupport Wi Fi Network Requirements In order for your station to...

Страница 5: ...Wind Speed Rain or Multi Sensors to your La Crosse View app easily expanding your coverage to all areas of your home Your weather station will act as a Wi Fi gateway allowing these additional sensors...

Страница 6: ...d Fog Ice La Crosse View Enhancements Standard Forecast Icons FORECAST FORECAST FORECAST FORECAST FORECAST FORECAST Sunny Partly Sunny Clouds Rain T Storm Snow FORECAST NWS FORECAST NWS FORECAST NWS F...

Страница 7: ...es for all the data to update on your station Data Stream Items National Weather Service NWS Selectable Forecast on Your Display Wind Snow Sky Conditions probability of Thunderstorms Hail or Tornados...

Страница 8: ...resolve this Very rare to have this error NO NWS SERVER This indicates an error on the NWS server NWS Expanded Forecast and selected data streams will not update or show The NWS will resolve this Ver...

Страница 9: ...rs may be purchased and added to your La Crosse View app at any time Compatible additional sensors start with the letters LTV Always check your product page for available sensors www lacrossetechnolog...

Страница 10: ...ing values Hold to adjust quickly 3 Press and release the SET button to confirm and move to the next item Note Press and release the LIGHT button anytime to exit settings Settings menu order 1 BEEP ON...

Страница 11: ...Icons Low Battery Icons Wi Fi Connection Icon Sensor Reception Icon Trend Arrows Fahrenheit or Celsius Temperature Percentage Relative Humidity Relative Humidity Icon Temperature Icon Connected stati...

Страница 12: ...with Time Date Outdoor HI Humidity with Time Date Outdoor LO Humidity with Time Date Indoor HI Temp with Time Date Indoor LO Temp with Time Date Indoor HI Humidity with Time Date Indoor LO Humidity w...

Страница 13: ...to confirm and move to the next alert 7 If you do not wish to set an alert press the ALERTS button again to move the next alert When the alert is OFF disarmed press ALERTS button to skip setting that...

Страница 14: ...drop by 3 RH or more within the current hour Temperature Humidity Trend Arrows Your temperature and humidity trend arrows update every 15 minutes The trend reflects changes over the past one hour peri...

Страница 15: ...c 20th Dec 21st Mar 19th Low Battery Icons Backlight Brightness 5 levels Your station has 5 levels of brightness for the backlight When operating with the power cord press and release the LIGHT button...

Страница 16: ...lid when sensor signal is acquired Allow up to 3 minutes to receive sensor signal Delete Your Sensor ID In the rare event you need to replace your sensor you will first need to delete the old sensor I...

Страница 17: ...LTV TH2 Thermo Hygro Sensor 1 Install 2 AA batteries according to polarity and replace battery cover Mounting 1 Use the hole at the top to hang your sensor from the back using a nail Or insert one mou...

Страница 18: ...counter 4 Your station should remain in good Wi Fi range of your wireless router to use all of the remote monitoring features the La Crosse View app has to offer For more information on manually setti...

Страница 19: ...15 MHz Wi Fi Transmission RF 2 4 GHz Power V10 TH Station Optional Battery Backup LTV TH2 Thermo hygro Sensor 5 0 Volt 600mA power cord included Required AC6 HX06 0500600 AU 001 Input 100 240V 0 3A 50...

Страница 20: ...tteries are installed with correct polarity and Remove batteries from equipment when it is not used for an extended period of time Promptly remove expired batteries Care and Maintenance La Crosse Tech...

Страница 21: ...cations to this equipment Such changes or modifications could void the user authority to operate the equipment This equipment must be installed and operated in accordance with provided instructions an...

Отзывы: