background image

La Crosse Technology, Ltd. 

Page 5 


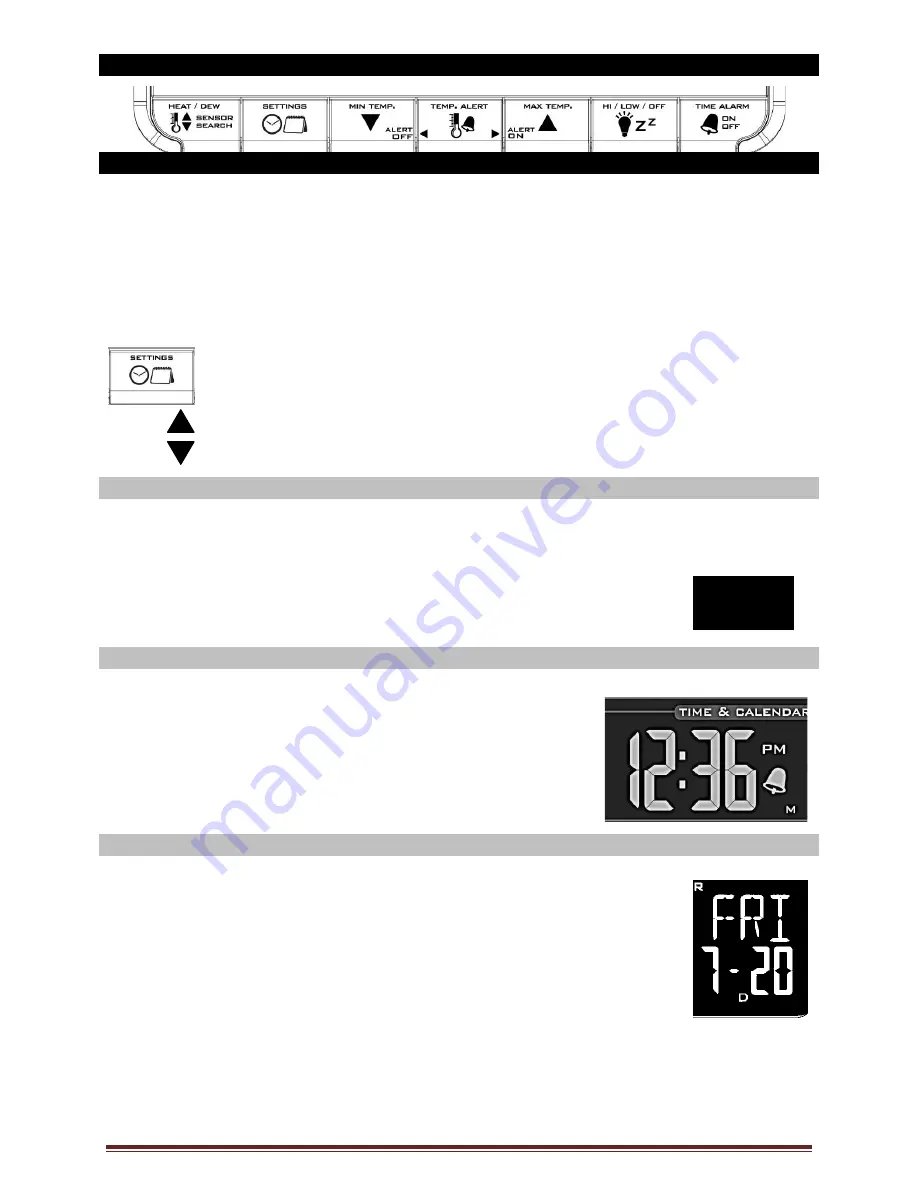
Function Buttons 


Program Menu 

 
The program menu allows you to select your preferences: 


12/24-Hour Time Format 


Hour 


Minutes 


Year 


Month 


Date 


Celsius/Fahrenheit 


The SETTINGS button will move through the program menu, and confirm selections


The UP ARROW increases a value. 
The DOWN ARROW decreases a value. 


12-hour or 24-hour Time Format 
 
The Time may be displayed in 12-hour or 24-hour format. Default is 12-hour time. 

Note:

 When in 12-hour format, AM or PM will show in front of the hour.   


1.  Hold the SETTINGS button for three seconds to enter time set mode. 
2. 

12H

 will flash.  

3.  Use the ARROW buttons to choose 12-hour or 24-hour time format. 
4.  Press the SETTINGS button to confirm and move to hour. 


Set Time 
 
To set the time manually: 


1.  The 

hour

 digit will flash.


2.  Use the ARROW buttons to choose the hour. 
3.  Press the SETTINGS button to confirm and move to minutes. 
4.  The 

minutes

 will flash. 

5.  Use the ARROW buttons to choose the minutes. 
6.  Press the SETTINGS button to confirm and move to the year. 


Set Calendar 
 
To set the calendar: 


1.  The 

year

 will flash. 

2.  Use the ARROW buttons to choose the year. 
3.  Press the SETTINGS button to confirm and move to the month. 
4.  The 

month

 will flash. 

5.  Use the ARROW buttons to choose the month. 
6.  Press the SETTINGS button to confirm and move to the date. 
7.  The 

date

 will flash. 

8.  Use the ARROW buttons to choose the date. 
9.  Press the SETTINGS button to confirm and move to Fahrenheit/Celsius. 

Note:

 The day of the week will set automatically once the year, month and date are set. 


12H 

Содержание K84308

Страница 1: ...ures a wireless transmission range of over 200 feet 60 meters in open air from the transmitter to the Forecast Station THIS STATION LEARNS The Forecast Station calibrates barometric pressure based on...

Страница 2: ...lsius 6 Alarm Time 6 Set Alarm 6 Activate Deactivate Alarm 6 Snooze Alarm 6 USB Charge Port 6 Backlight 7 A C Power Adapter 7 Batteries 7 Weather Forecast Icon 7 Forecast Trend Arrows 8 Min Max Temper...

Страница 3: ...arking inside the battery compartment The Forecast Station will light up and show indoor temperature humidity and time Backlight will illuminate for 8 seconds when using only battery power with a pres...

Страница 4: ...tation Batteries 1 Remove battery cover Slide tab down and pull off to remove battery cover 2 Install three new AAA batteries according to the polarity markings Do Not Mix Old and New Batteries Do Not...

Страница 5: ...Press the SETTINGS button to confirm and move to hour Set Time To set the time manually 1 The hour digit will flash 2 Use the ARROW buttons to choose the hour 3 Press the SETTINGS button to confirm a...

Страница 6: ...Note When no buttons are pressed for ten seconds the Forecast Station will save the last change and default back to normal mode Activate Deactivate Time Alarm In normal mode press and release the TIME...

Страница 7: ...the backlight is off press any button to activate the backlight for 10 seconds Battery Power When operating on battery power only press and release any button and the backlight will show for 10 second...

Страница 8: ...arrow the pressure is steady Temperature Trend Arrows The indoor and outdoor temperature trend indicators will update every 30 minutes or less These trends represent temperature changes over the past...

Страница 9: ...ues Temperature Alert value will flash individually in the outdoor or indoor temperature area when selected to be set The alert is not active just from selecting the value To activate or deactivate a...

Страница 10: ...select the alert to turn off 2 Select the HI or LO alert in the window TEMP ALERT 3 Press the MIN TEMP button to turn that alert OFF Heat Index and Dew Point Temperature Heat Index Heat Index combine...

Страница 11: ...ems televisions microwaves routers baby monitors etc which can prevent signal reception Be aware of electrical wires and plumbing within a wall Best reception is achieved when the front or the back of...

Страница 12: ...ormed by a La Crosse Technology Ltd authorized service center The original dated bill of sale must be presented upon request as proof of purchase to La Crosse Technology Ltd or La Crosse Technology Lt...

Страница 13: ...the FCC Rules These limits are designed to provide reasonable protection against harmful interference in a residential installation This equipment generates uses and can radiate radio frequency energy...

Отзывы: