background image

6

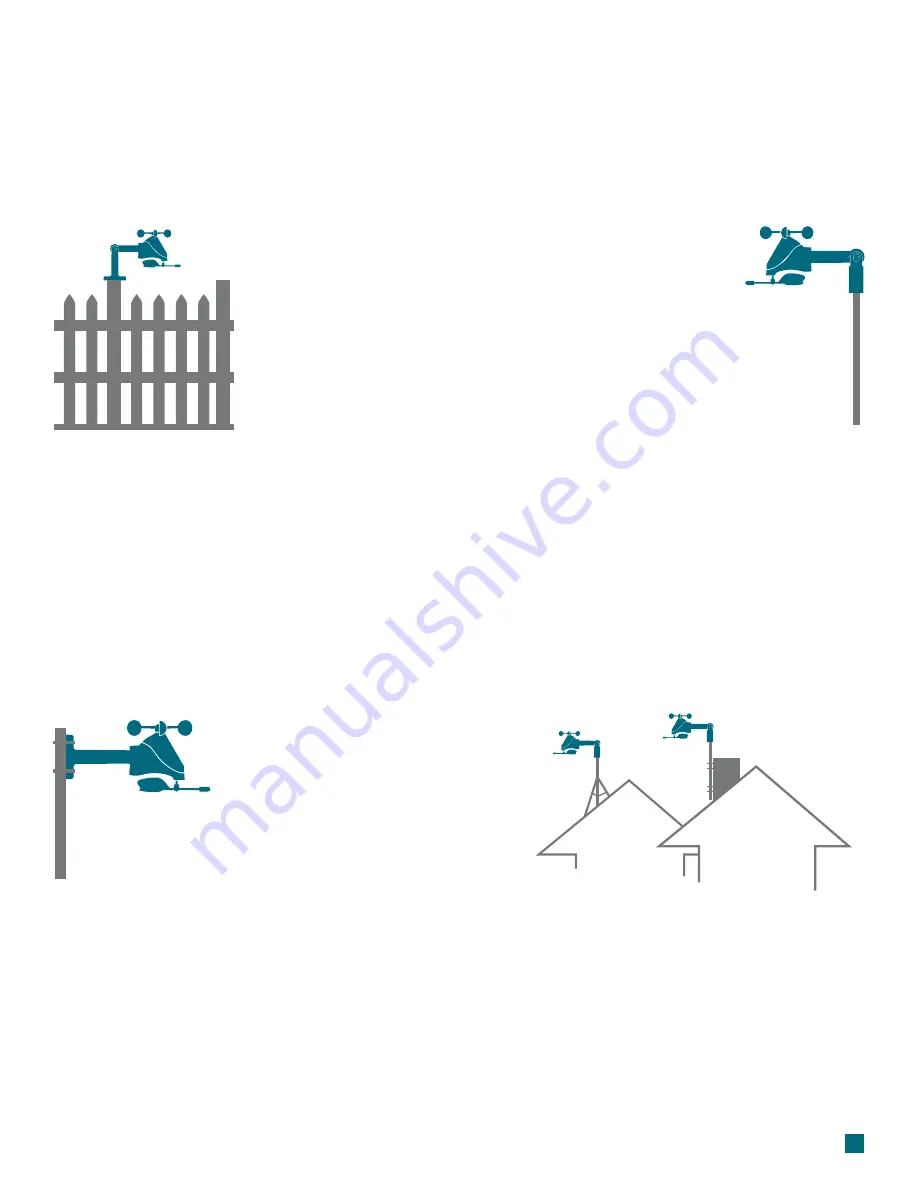
Basic Installation Options

1A Adjustable Base

1B Pole Adapter

Fence posts, poles, decks, and even mailboxes are all common mounting options due to their 

convenience. Many users prefer these types of locations as the data they provide is accurate from their 

ground level perspective. However, because wind in these spots is often affected by obstructions, the  

readings may differ compared to local reporting stations.

1A.

   Mount the Adjustable Base onto a flat surface using the four provided 

        screws.

1B. 

  Secure the Pole Adapter to a cylindrical conduit using the two 

        provided screws.

2. 

   Insert the Mast into the Breeze Pro Sensor and tighten the provided 

       screws on the sides.

3.

    Use the Hand Screw to attach the Mast to either the Adjustable Base 

       or Pole Adapter. Ensure the sensor is level, facing south, and securely

       fastened at all mounting points.

Advanced Installation Options

Some advanced installation options include tripods, wall mounts, eave cross mounts, chimney mounts, 

and many others. Any of these can be combined with U-bolts for attachment onto a tall cylindrical 

conduit using our Adjustable Base. Please note that these advanced options will require additional 

equipment and possibly professional help for best results.

U-bolt Adapters

Tripod Setup

Chimney Mount

The illustrations above are not to scale and are for informative purposes only.

La Crosse Technology is not responsible for any damages or injury that may occur during installation.

Содержание 79400

Страница 1: ...port connected features and will not connect to WiFi Some of the on screen elements may not apply Please disregard the following items and messages WiFi Icon SEE APP TO CONNECT LOST WIFI CONNECT TO WI...

Страница 2: ...ata History Records and Alerts Feels Like Temp Seasonal Trees Forecast Icons Relative Pressure Specifications Warranty Recycling Disposal Cautions Statements Add On TH Sensor Additional Add On Sensors...

Страница 3: ...om your station s Battery Compartment Bottom of Breeze Pro Sensor Model No LTV WSDTH01 Back of Station Model No 79400 Station Settings Use the buttons on the top of the station to adjust the values Pr...

Страница 4: ...Wind Alert on off 2 WIND Press to view Wind Speed History While viewing hold the MINUS button to delete the history reading 3 TEMP Press to view Temperature and Humidity History While viewing hold MI...

Страница 5: ...uring preselected times Press the buttons to turn the Auto Dim feature on or off Press LIGHT to confirm Press the buttons to adjust the starting hour Press LIGHT to confirm Press the buttons to adjust...

Страница 6: ...feet from sensor to display Positioning the Breeze Pro Sensor For Accurate Measurements 5 Included Mounting Accessories The horizontal conduit where the sensor attaches This piece will connect to eith...

Страница 7: ...and tighten the provided screws on the sides 3 Use the Hand Screw to attach the Mast to either the Adjustable Base or Pole Adapter Ensure the sensor is level facing south and securely fastened at all...

Страница 8: ...icates if the station is receiving data from the sensor 8 TOP WIND SPEED The top wind speed in the past 60 minutes 3 LOW BATTERY ICON Appears when the sensor battery needs to be replaced 6 NOW WIND SP...

Страница 9: ...he LCD The alert is defaulted to be off When the armed alert value is reached the Alert Icon will flash and your station will beep five times each minute until the value moves out of the alert range P...

Страница 10: ...Temperature Humidity History and Alerts Viewing History Records Press the TEMP button to toggle through indoor outdoor temperature humidity records with time and date stamps History Records Viewing Or...

Страница 11: ...6 forecast scenes below Forecast Icons Please Note The Forecast Icons may not represent your current weather They are a future prediction of the weather to come over the next 12 hours Sunny Clouds T...

Страница 12: ...Outdoor Temperature and Humidity section light up on screen ID WTH 123 and TWH SENSOR will appear below 4 5 Install new batteries into the add on sensor and press the TX button inside its battery com...

Страница 13: ...e displayed on the LCD The Auto Scroll Icon will appear if activated Follow La Crosse Technology on Youtube Facebook Twitter and Instagram Factory Reset Stay in Touch If you re still experiencing issu...

Страница 14: ...cket 6 21 L x 8 25 W x 6 67 H 15 77cm L x 20 96cm W x 16 94cm H WARNING KEEP BATTERIES OUT OF REACH OF CHILDREN Swallowing may lead to serious injury in as little as 2 hours or death due to chemical b...

Страница 15: ...io frequency energy and if not installed and used in accordance with the instructions may cause harmful interference to radio communications However there is no guarantee that interference will not oc...

Отзывы: