background image

STR APJACK INSTALL ATION

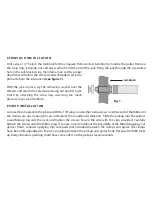
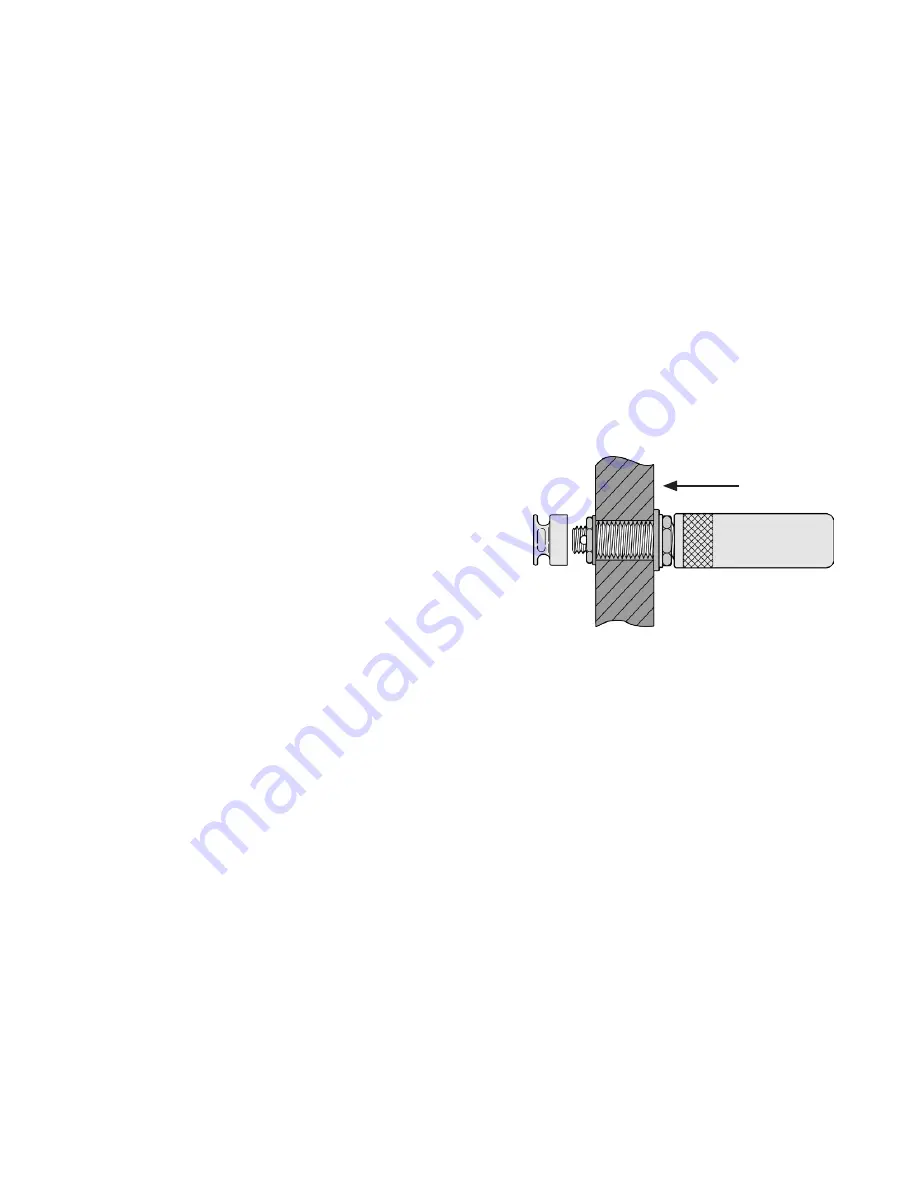
Drill a clean 1/2” hole in the tail-block for the strapjack. Remove dust & debris from inside the guitar. Remove 
the strap ring, retaining nut and one washer from the end of the jack. Bring the jack through the pre-drilled 
hole in the tail-block. Using the internal nut, set the proper 
depth that will allow the entire smaller threaded section to 
protrude from the instrument 

(see 

fi

gure 1)

.

With the jack in place, lay the remaining washer over the 
threads and attach the external retaining nut until it’s tight. 
Finish  by  attaching  the  strap  ring.  Asserting  too  much 
pressure may crack the 

fi

nish.

PICKUP INSTALLATION

Connect the strapjack to the pickup with the 1/8” plug. Loosen the clamp screws on either end of the M80 until 
the clamps are open enough to accommodate the soundboard thickness. Slide the pickup into the guitar’s 
soundhole up towards the neck and tighten the screws. Secure the wire with the clips provided. Carefully 
tighten the screws until the M80 is snug. If you are concerned about the possibility of the M80 damaging your 
guitar’s 

fi

nish, consider applying thin cork pads (not included) between the clamps and guitar. The clamps 

have been left unpadded to improve coupling between the pickup and guitar body. Because the M80 picks 
up body vibrations, padding could have some a

ff

ect on the pickup’s responsiveness.

Fig. 1

tail-block

Содержание M80

Страница 1: ...User s Guide ...

Страница 2: ...guitars with soundholes larger than 3 55 Make sure that the M80 will fit the guitar properly before installing the strapjack Any woodworking for instance drilling the strapjack hole must be performed by a professional dealer in staller We do not provide advice or support for home or hobbyist woodworking Installers Please read the instructions carefully before proceeding We will not be responsible ...

Страница 3: ...h pressure may crack the finish PICKUP INSTALLATION Connect the strapjack to the pickup with the 1 8 plug Loosen the clamp screws on either end of the M80 until the clamps are open enough to accommodate the soundboard thickness Slide the pickup into the guitar s soundhole up towards the neck and tighten the screws Secure the wire with the clips provided Carefully tighten the screws until the M80 i...

Страница 4: ...y dies during a performance you can continue using the M80 by switching to the passive setting and making the proper external adjustments Passive setting In this setting the M80 bypasses the preamp for a battery free performance This setting also allows you to use the pickup with an external soundhole cable sold separately to avoid permanently modifying high end or vintage guitars and also makes t...

Страница 5: ...ole pieces on the M80 are factory set for bronze acoustic strings but this is just a starting place They are adjustable with the 3 32 Allen wrench to obtain the optimum balance and tone Raising the pole pieces will increase the output of the strings lowering them will decrease the output We have provided two additional 3 4 pole pieces for use in the B and little E string positions with nickel or e...

Страница 6: ...REGISTER THIS PRODUCT online at www lrbaggs com ...

Отзывы: