background image

CHAPTER 4  PRINTER OPERATION

4-5

If the printer operation stops or becomes unstable, reset the printer
and reboot the internal server computer.

1

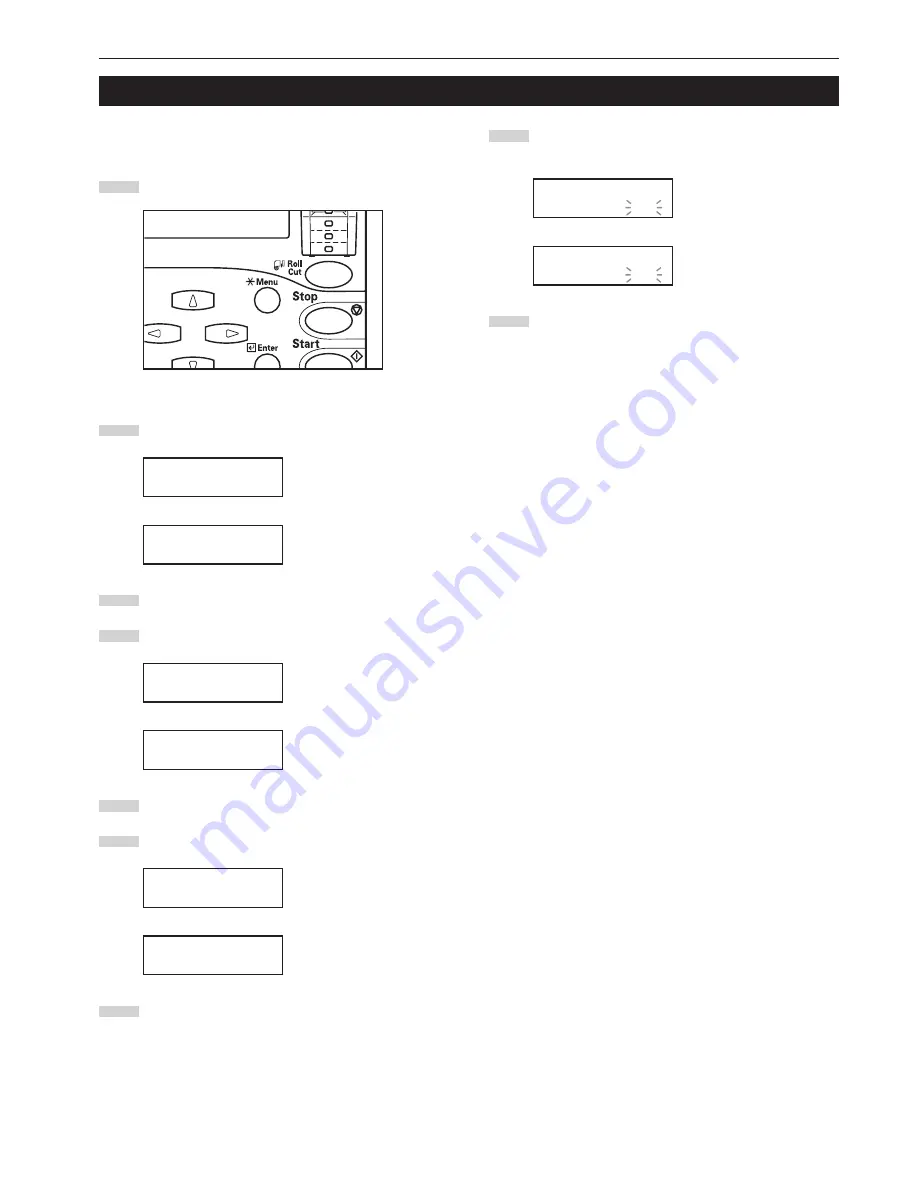
Press the */Menu key.

2

Press the 

N

 or 

M

 key to select “2. Set/user”.

Inch specifications

Menu:

2.Set/user.

Metric specifications

Menu:

2.Set/user

3

Press the Enter key.

4

Press the 

N

 or 

M

 key to select “2. Set printer”.

Inch specifications

Set/user:

2.Set printer

Metric specifications

Set/user:

2.Set printer

5

Press the Enter key.

6

Press the 

N

 or 

M

 key to select “1.Reset”.

Inch specifications

Set printer:

1.Reset

Metric specifications

Set printer:

1.Reset

7

Press the Enter key.

5. Resetting the printer

8

The selected option will flash. Press the 

N

 or 

M

 key to

select “Yes”.

Inch specifications

Reset?

            Yes

Metric specifications

Reset?

            Yes

9

Press the Enter key.
All scheduled print jobs will be canceled.

Содержание KM-P4845w

Страница 1: ...Wide Format Printer Operation Guide Please read the Operation Guide before using the printer Keep it in the designated location for easy reference...

Страница 2: ...For more information see Auto Shutoff Function Paper Recycling The Energy Star Program encourages the use of environmentally friendly recycled paper Your sales or service representative can provide in...

Страница 3: ...ntion to or incorrect compliance with the related points Symbols The m symbol indicates that the related section includes safety warnings Specific points of attention are indicated inside the symbol G...

Страница 4: ...ames contained in this Operation Guide are trademarks or registered trademarks of their respective companies The designations and will not be used in this guide About This Operation Guide There are tw...

Страница 5: ...ii Reading the On Line Manual for This Machine Insert the CD ROM that is included with the printer into the CD ROM drive of your computer and then operate in accordance with the message on the screen...

Страница 6: ...ettings Configuring the IP Address etc Page 3 2 DHCP server setting Page 3 4 Configuring Your Computer Computer 2 Name Settings Changing the Work Group and Host Names Page 3 5 3 Installing the Printer...

Страница 7: ...Roll unit To add a paper source Key counter To count the number of sheets output Scanner unit To add scanner and copier functions System diagram with options installed Roll unit Key counter Scanner un...

Страница 8: ...on heater 3 9 4 How to Use the Paper Tray Support Plate 3 9 CHAPTER 4 PRINTER OPERATION 4 1 1 Basic printing 4 1 2 Printing with manually fed media 4 2 3 Making a Test Print 4 3 4 Canceling Printing 4...

Страница 9: ...ts in this area because there is a danger of getting burned Label 5 6 7 High voltage inside NEVER touch parts in this area because there is a danger of electric shock Label 3 High temperature inside D...

Страница 10: ...r away from children The plastic may cling to their nose and mouth causing suffocation Environment CAUTION Avoid placing the printer on or in locations which are unstable or not level Such locations m...

Страница 11: ...rinter WARNING DO NOT place metallic objects or containers with water flower vases flower pots cups etc on or near the printer This type of situation presents a danger of fire or electrical shock shou...

Страница 12: ...toner containers or the waste toner tank avoid inhalation and ingestion as well as contact with your eyes and skin If you do happen to inhale toner move to a place with fresh air and gargle thoroughly...

Страница 13: ...case of a paper jam 8 Paper tray Printed sheets will be stored here 9 Paper tray support plate Set in accordance with paper size 0 Main switch Turn this switch ON in order to use the printer Converse...

Страница 14: ...nit paper source 1 option Roll unit paper source 2 Roll unit paper source 3 Operation Guide box Keep the Operation Guide here Waste toner tank Paper transport knob Operate this knob in case of a paper...

Страница 15: ...CHAPTER 2 PRIOR TO SET UP 2 3...

Страница 16: ...hen the print data s page size and or media type do not match those of the current roll 0 Enter key Press this key when you want to register a setting The Enter key is also used to return to the print...

Страница 17: ...5 2 Required Items The following items are not included with the printer and must be purchased separately Network cable Twisted pair 10BASE T or 100BASE TX category 5 NOTE Be sure to use a shielded ty...

Страница 18: ...tion The auto shutoff function consists of shutoff mode and sleep mode The factory default is set to sleep mode Shutoff mode Power is automatically turned OFF when the printer has not been used for a...

Страница 19: ...3 1 CHAPTER 3 GETTING READY FOR PRINTING 1 Setup 1 System Configuration Printing from Windows Printer driver Network hub Computer Print command 100BASE TX or 10BASE T cable Printout...

Страница 20: ...r the printer will differ depending upon your network Confirm the address that you need to use in advance with your network manager When you input the network address be sure to check in advance that...

Страница 21: ...IP address 192 168 0 0 Metric specifications IP address 192 168 0 0 4 Press the P key The next value will flash Inch specifications IP address 192 168 0 0 Metric specifications IP address 192 168 0 0...

Страница 22: ...ions Enter pin code _ _ _ _ Metric specifications Enter pin code _ _ _ _ NOTE The pin code may be changed see 11 Mgr code change on page 5 10 5 Press the N or M key to select 2 Set printer Inch specif...

Страница 23: ...key Inch specifications Menu End Metric specifications Menu End Name Settings Changing the Work Group and Host Name Perform this procedure in order to register the required name settings the Work Gro...

Страница 24: ...stered See 1 Paper width in the default setting Page 5 6 For switching between standard sizes architecture engineering A sizes B sizes see 9 Standard size in the default settings Page 5 9 Storage of p...

Страница 25: ...Grasp the flange and turn its lever in the direction indicated by the arrow to align the inside and outside m marks on the flange The flange will be secured to the paper roll IMPORTANT If the lever o...

Страница 26: ...rasp the flange and wind the paper roll to remove the slack If not the paper may be fed obliquely 11 Insert the roll unit securely into the main body of the machine 12 Close the front cover 13 To alig...

Страница 27: ...to Use the Paper Tray Support Plate Set the paper tray support plate based on the paper to be used for printing 1 Incline the paper tray support plate and slide it to the size indication on the size l...

Страница 28: ...CHAPTER 3 GETTING READY FOR PRINTING 3 10...

Страница 29: ...Make sure that the Ready indicator is lit 3 Perform the appropriate printing procedure on your computer NOTE Refer to the On Line Manual for more detailed information on printing from your computer CA...

Страница 30: ...ndication When placing paper in the bypass table set the paper quickly all the way into the feed slot Once the paper is fed release the paper If the paper is not set properly a paper jam may be detect...

Страница 31: ...ess the N or M key to select 2 Set printer Inch specifications Set user 2 Set printer Metric specifications Set user 2 Set printer 5 Press the Enter key 6 Press the N or M key to select 2 Test print I...

Страница 32: ...Now printing is shown in the message display press the Stop key The current print job will be cancelled Inch specifications Processing data Printing Metric specifications Processing data Now printing...

Страница 33: ...he N or M key to select 2 Set printer Inch specifications Set user 2 Set printer Metric specifications Set user 2 Set printer 5 Press the Enter key 6 Press the N or M key to select 1 Reset Inch specif...

Страница 34: ...CHAPTER 4 PRINTER OPERATION 4 6...

Страница 35: ...e Paper material 4 Roll end Description If this item is set to Input size a non standard paper width can be set Use the N or M key to enter the paper width for each paper source If this item is set to...

Страница 36: ...rinter is not used for long periods of time it is recommended that the time be shorter The fixing temperature can be changed for each media type Set a higher temperature for thick paper and a lower te...

Страница 37: ...s When the printer runs out of paper during printing When the data page size and or media type differ from those of the selected paper tray When there is a paper jam When the printer runs out of toner...

Страница 38: ...ne 1 Paper width Configure each item referring to the following pages 1 Paper width Page 5 6 2 Media Type Pre set Temp Page 5 6 3 Paper type Paper material Page 5 6 4 Roll end Page 5 7 The in a list o...

Страница 39: ...Set Machine 1 Paper width Metric specifications Set Machine 1 Paper width Configure each item referring to the following pages 1 Paper width Page 5 6 2 Media Type Pre set Temp Page 5 6 3 Paper type P...

Страница 40: ...Metric specifications input size 2nd paper 920mm 6 Press the Enter key The display will show set value and return to the step 1 screen 7 Press the N or M key to select End back 8 Press the Enter key T...

Страница 41: ...g edge is attached to the roll core by pressing the N or M key to select Fixed or Unfix Unfixed Inch specifications Plain Unfix Metric specifications Plain Unfixed 4 Press the Enter key The display wi...

Страница 42: ...t Metric specifications Timer set 1 Auto preheat 2 Press the Enter key 3 Press the N or M key to set the time that elapses before the selected function is activated If 1 Auto preheat has been selected...

Страница 43: ...yed 4 Press the Enter key The display will show set value and return to the step 1 screen 5 Press the N or M key to select End back 6 Press the Enter key The printer will return to the machine setting...

Страница 44: ...tions Buzzer ON 2 Press the Enter key The display will show set value and return to machine settings screen 11 Mgr code change 1 The arrows will flash Use the MNOP cursor keys to input the pin code In...

Страница 45: ...ible by manager Setting 3 DHCP server 4 IP address 5 Subnet mask 6 Gateway 7 DNS server Description Toggles the DHCP server ON OFF Configuration of this setting depends on the environment in which the...

Страница 46: ...the Menu key 2 Press the N or M keys to select 1 Language Inch specifications Menu 1 Language Metric specifications Menu 1 Language 3 Press the Enter key 4 The selected item will flash Press the N or...

Страница 47: ...securely The eject cover is open Close the eject cover securely The toner tank cover is open Close the toner tank cover securely The right cover is open Close the right cover securely The main body o...

Страница 48: ...ank is not properly installed Replace it with a new tank or install the tank properly When this message is displayed with the Ready to print message printing is possible for a short period of time How...

Страница 49: ...perform toner replenishment Inch specifications Ready to print Add toner Metric specifications Ready to print Add toner 1 Turn the screws on both sides of the toner replenishing slot and align them a...

Страница 50: ...maining toner 7 Press the toner bottle down turn it to the original position and gently remove it 8 Close the toner replenishing slot and turn the toner replenishing slot screws to the location shown...

Страница 51: ...over and remove the waste toner tank by pulling it out toward you 2 Seal the waste toner tank opening with the seal located on it 3 Insert a new waste toner tank into the machine 4 Close the right cov...

Страница 52: ...ter and perform the following procedure Inch specifications Call service CXXXX Error Occurred CXXXX Metric specifications Call service CXXXX Error occurred CXXXX 1 Pull the main body release lever to...

Страница 53: ...Paper misfeed Open fix unit Paper has jammed in the printer Perform the following procedure to remove the jammed paper 1 If Press cut key appears press the Roll Cut key IMPORTANT Do not open any cover...

Страница 54: ...ection release lever toward you The ejection cover will be opened 7 Remove the jammed paper IMPORTANT When opening the ejection cover be sure to pull out the original table in advance WARNING High vol...

Страница 55: ...proceed to the next step 2 Grasp the printer body release lever and pull it toward you The printer body will be opened 3 If the paper is present remove it from inside the printer 4 Close the printer...

Страница 56: ...under the paper roll insertion guide and advance the edge past the guide approximately 1 2 10 mm as shown in the illustration 7 Grasp both of the paper roll insertion latches and close the paper roll...

Страница 57: ...the printer Are the IP addresses for the printer and or the corresponding computer device name and host name correctly registered in your computer PROCEDURE Make sure that the power cord is securely...

Страница 58: ...OCEDURE Remove the portion of the paper roll that contains the wrinkles or folds Remove them by following the appropriate procedure Check the paper setting method The leading edge may have been damage...

Страница 59: ...per wet Is the network cable appropriate and is it connected properly Is your computer configured correctly PROCEDURE Select film for the media type setting Select film for the media type setting Adju...

Страница 60: ...CHAPTER 6 TROUBLESHOOTING 6 14...

Страница 61: ...printer 256 MB as standard Paper feed system Two roll units and bypass Compatible print media Standard paper 64 to 80 g m2 vellum film Writing system LED Resolution 600 dpi x 600 dpi Developing system...

Страница 62: ...s 2000 with Service Pack 1 or later installed Refer to the On Line Manual for more detailed information on Software Operating Environment Due to operating system restrictions when printing out using a...

Страница 63: ...CHAPTER 7 SPECIFICATIONS 7 3...

Страница 64: ...conformity with the following specifications Limits and methods of measurement for immunity characteristics of information technology equipment EN55024 Limits and methods of measurement for radio int...

Страница 65: ...KYOCERA MITA products KYOCERA MITA CORPORATION 750g Item No Toner KM 4850w P4845w P4850w KM 4850w P4845w P4850w MADE IN JAPAN DEVELOPER 130 0 g 460 OZ NET Lot No 602 0A 2A78 KYOCERA MITA CORPORATION C...

Страница 66: ...A CORPORATION 2 28 1 chome Tamatsukuri Chuo ku Osaka 540 8585 Japan Phone 06 6764 3555 KYOCERA MITA EUROPE B V Hoeksteen 40 2132 MS Hoofddorp The Netherlands Phone 020 6540000 Home page http www kyoce...

Отзывы: