background image

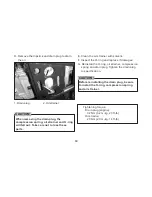
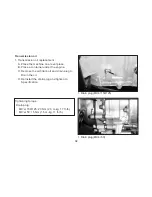
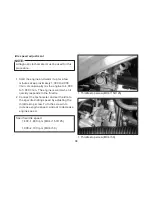
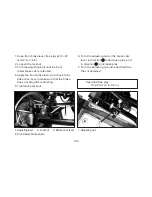
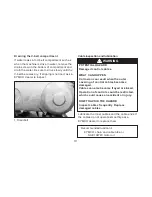
C. Remove the air filter element, and

separate it from the box.

D. Wash the element gently but thoroughly in

solvent.

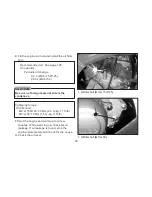
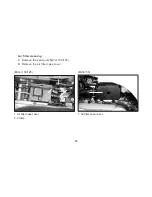
1. Air filter element

1. Air filter element

(MX'er 150/125)

(MX'er 50)

96

Содержание MX'er 125

Страница 1: ...DRIVER S MANUAL KWANG YANG MOTOR CO LTD MX er 150 125 50 ON ROAD...

Страница 2: ......

Страница 3: ...h new motorcycle drained off to ensure the excellent performance and safety of the motorcycle Therefore when first starting a new motorcycle it is normal to take 20 30 seconds The quality of each KYMC...

Страница 4: ...ions included in this manual may be different from the motorcycle in case specifications are changed To enable you to have a safe and comfortable riding we recommend you to read this manual carefully...

Страница 5: ...nd unsafe to operate this machine on any hills and rough or loose terrain This machine complies with all applicable ON ROAD noise level and spark arrester laws and regulation in effect at the time of...

Страница 6: ...llowing notations The Safety Alert Symbol means ATTENTION BECOME YOUR SAFETY IS INVOLVED Failure to follow WARNING instructions could result in severe injury or death to the machine operator a bystand...

Страница 7: ...ever 31 I n s t r u m e n t s 1 9 Starter kick lever only MX er 50 24 Brake pedal only MX er 150 125 28 Locking steering only MX er 150 125 30 only MX er 150 125 Fuel tank cap 31 WARNING Indicates a p...

Страница 8: ...ATION 44 Starting a cold engine only Starting a warm engine only MX er 150 125 46 Warming up only MX er 150 125 46 Starting a cold engine only MX er 50 47 Use the electric starter button only MX er 50...

Страница 9: ...100 Front and rear brake shoe inspection Brake fluid inspection disk brake 101 150 125 99 Rear brake adjustment only MX er 150 125 104 Brake pedal adjustment only MX er 150 125 105 Drive chain slack...

Страница 10: ...CLEANING AND STORAGE 121 A Cleaning 121 B Storage 123 SPECIFICATIONS 124 NOISE REGULATION 128 MAINTENANCE RECORD 129 H...

Страница 11: ...LOCATION OF THE WARNING AND SPECIFICATION LABELS 1...

Страница 12: ...INJURY or DEATH NEVER operate Without proper training or instruction At speeds too fast for your skills the conditions Do not operate the vehicle after consuming ALCOHOL OR DRUGS ALWAYS Use proper rid...

Страница 13: ...30 35 kpa 0 3 0 35 kgf cm 4 2 5 0 psi 2 WARNING Never carry passenger this carrier Maximum load 20 Kg 44 lbs on CAUTION Operating this ATV if you are under the age of 16 increases your chance of seve...

Страница 14: ...reater than 90cc Read this manual and all labels carefully and follow the operating procedures described Never operate an ATV without proper training or instruction Beginners should receive training f...

Страница 15: ...at is proper for the terrain visibility and operating conditions and your experience Never attempt wheel jump or other stunt Always inspect your ATV each time you use it to make sure it is in safe ope...

Страница 16: ...ever open the throttle suddenly Never go over the top of a slope at high speed Always follow proper procedures for going down slopes and for braking on slopes as described in this manual Check the ter...

Страница 17: ...g out of control Never operate an ATV in fast flowing water or in water deeper than that recommended in this manual Remember that wet brakes may have reduced stopping ability Test your brakes after le...

Страница 18: ...mes or other sources of ignition such as the pilot lights of water heaters and clothes dryers When transporting the machine in another vehicle be sure it is kept upright and that the fuel cock is in t...

Страница 19: ...e engine in a closed area WHAT CAN HAPPEN Exhaust fumes are poisonous and may cause loss of consciousness and death within a short time HOW TO AVOID THE HAZARD Always operate your machine in an area w...

Страница 20: ...dimmer switch Turn signal switch Horn button 5 Starter choke Only MX er 150 125 6 Fuel cock 7 Footboard 8 Rear wheel 9 L Rear turn signal light 10 Taillight Stoplight Rear turn signal light Drive sel...

Страница 21: ...you have purchased may differ slightly from those shown in the figures of this manual 11 11 24 25 26 27 28 29 10 17 18 19 20 21 22 23 17 Throttle lever 18 Front Brake lever 19 R Back mirror 20 Instrum...

Страница 22: ...30 Engine stop switch Only MX er 50 31 Starter kick lever Only MX er 50 30 31 NOTE The machine you have purchased may differ slightly from those shown in the figures of this manual 12...

Страница 23: ...th Main switch Functions of the respective switch positions are as follows Engine can be started only at this position and the headlight and taillight come on when the light switch is on OFF All elect...

Страница 24: ...tor light When the turn signal switch is operated this indicator light will wink and the buzzer will sound High beam indicator light Neutral indicator light N only MX er 150 125 Reverse indicator ligh...

Страница 25: ...everal seconds and then goes out If the light does not go gut it means that the motor oil is insufficient Please refill with the specified motor oil 15 1 Motor oil indicator light Only MX er 50 Hazard...

Страница 26: ...rection or shifting to another lane The turn signal light will wink when the switch is operated For turning to the For turning to the The instrument turn signal indicator light will also wink when the...

Страница 27: ...he taillight Turn the switch to the position to switch on the position light Hazard switch Only MX er 150 125 At this position the front and rear right and left turn signal lights wink together At thi...

Страница 28: ...NOTE 1 Start switch 18 Engine stop switch Only MX er 50 Make sure that the engine stop switch is in the position The engine stop switch controls ignition and can be used at all times to stop the engin...

Страница 29: ...nts Disply ODO M O D E TM DST P T T S O S AUTO mile h km h 1 TM start symbol 2 3 4 5 6 Bar graph speed symbol Mode symbol Auto automatic start stop mode symbol Distance scale symbol Data display TM DS...

Страница 30: ...arted or stopped While the unit is operating the TM symbol flashes MODE ST STOP Button When the mode button and ST STOP button are pressed DST TM are cleared DST ODO CLOCK simultaneously MODE TM ODO D...

Страница 31: ...n motion TM Elpased time is measures from the starting point of a trip DST Trip distance is measures traveled since the time of the last reset ODO Total distance Mileage is continuously measured accum...

Страница 32: ...22 CLOCK The 24HR clock always displayed the current time on the screen...

Страница 33: ...l change between km h mile h Press the MODE button and press the ST STOP button to setting wheel circumference the body to set wheel circumference is 1760mm Press the MODE button and press the ST STOP...

Страница 34: ...r only MX er 50 If the starter kick lever is pushed with the main switch at position and the engine stop switch Only MX er 50 at the engine will not start To start the engine be sure to position the e...

Страница 35: ...HAPPEN The throttle could be hard to operate making it difficult to speed up or slow down when you need to This could cause an accident HOW TO AVOID THE HAZARD Check the operation of the throttle lev...

Страница 36: ...NTIAL HAZARD Improper adjustment of the speed limiter and throttle WHAT CAN HAPPEN The throttle cable could be damaged Improper throttle operation could result You could lose control have an accident...

Страница 37: ...d on the left handlebar Pull it toward the handlebar to apply the rear brake Front Brake lever The front brake lever is located on the right handlebar Pull it toward the handlebar to apply the front b...

Страница 38: ...ar and front brake 1 Rear brake lock plate not all type Parking brake Use the parking brake when you have to start the engine or park the machine especially on a slope Apply the rear brake lever and p...

Страница 39: ...start moving unexpectedly if the parking brake is not applied before starting the engine This could cause loss of control or a collision The brake could overheat if you ride the ATV without releasing...

Страница 40: ...ng handlebar is released automatically The key can be taken out POTENTIAL HAZARD Improper use of the locking steering WHAT CAN HAPPEN The ATV could cause loss of control or overturn HOW TO AVOID THE H...

Страница 41: ...ed for driving the machine either forward or in reverse Refer to page 49 for drive select lever operation Fuel tank cap Remove the fuel tank cap by turning it counterclockwise 31 A Drive select lever...

Страница 42: ...the lever to this position when the engine is not running With the lever in this position fuel flows to the carburetor Normal riding is done with the lever in this position This indicates reserve If y...

Страница 43: ...arate starter circuit supplies this mixture Move in direction to turn on the starter choke Move in direction to turn off the starter choke Seat To remove the seat pull the seat lock lever upward and p...

Страница 44: ...To install the seat insert the projections on the front of the seat into the seat holders and push down on the seat at the rear Make sure that the seat is securely fitted 34 NOTE...

Страница 45: ...s Battery Lights Check fuel level Fill with fuel if necessary Check oil level MX er 150 125 Fill with oil if necessary Check motor oil indicator light MX er 50 Check chain slack and condition Adjust i...

Страница 46: ...he Owner s Manual Brake levers and pedal Check for correct free play in the brake levers If the free play is incorrect adjust it See pages 102 107 Check operation of the levers and the pedal They shou...

Страница 47: ...f every ride Do not ride the ATV if you find any problem with the brakes If a problem cannot be corrected by the adjustment procedures provided in this manual have the ATV inspected by a KYMCO dealer...

Страница 48: ...ost POTENTIAL HAZARD Improper care when refueling WHAT CAN HAPPEN Fuel can spill which can cause a fire and severe injury Fuel expands when it heats up If the fuel tank is overfilled fuel could spill...

Страница 49: ...ng contain anti friction additives which will cause clutch and or starter clutch slippage resulting in reduced component life and poor engine performance Oil quantity Engine oil only MX er 150 125 Per...

Страница 50: ...itch and any other switches Repair as necessary for proper operation Battery Check fluid lever and fill if necessary Use only distilled water if refilling is necessary See pages 114 116 Throttle lever...

Страница 51: ...tires listed below have been approved by Kwang Yang Motor Co Ltd for this model Other tire combinations are not recommended 41 WARNING Size Type Front Rear 2 The tires should be set to the recommended...

Страница 52: ...dirt in the gauge could cause the first reading to be incorrect Set pressure tires cold Set tire pressures to the following 42 4 Higher pressures may cause the tire to burst Inflate the tires very sl...

Страница 53: ...43 Tire wear limit When the tire groove decreases to 3 mm 0 12 in due to wear replace the tire A 3mm 0 12 in...

Страница 54: ...here is a control or function you do not understand ask your KYMCO dealer POTENTIAL HAZARD Freezing control cables in cold weather WHAT CAN HAPPEN You could be unable to control the ATV which could le...

Страница 55: ...e in reference to the figure Position Cold engine start ambient temperature below 5 C 40 F Position Cold engine start ambient temperature at 0 C 30 F 30 C 90 F and warming up position Position Cold en...

Страница 56: ...started with the starter choke in position 2 keep the starter choke in this position to warm up the engine 8 Continue warming up the engine until it idles smoothly and return the starter choke to pos...

Страница 57: ...n without pushing the throttle lever If the engine fails to start after the electric starter button is pressed for 3 4 seconds push the throttle lever slightly to facilitate starting When the ATV is n...

Страница 58: ...does not start afer the kick lever is depressed for 3 4 times push the throttle lever slightly to facilitate starting Warm up the engine is started do not accelerate suddenly and keep riding at low sp...

Страница 59: ...e D Open the throttle lever gradually B Apply the parking brake A Bring the machine to a complete stop and return the throttle lever to the closed position B Apply the parking brake C Shift the gear f...

Страница 60: ...he rear while backing If the drive select lever is shifted into reverse while the engine is running the engine will stop unless the parking brake is applied POTENTIAL HAZARD Improperly operation in re...

Страница 61: ...h might result in excessive engine heating must be avoided However momentary 2 3 seconds maximum full throttle operation under load does not harm the engine Each full throttle acceleration sequence sh...

Страница 62: ...but do not use full throttle at any time 3 After break in Avoid prolonged full throttle operation Vary speeds occasionally Parking When parking stop the engine and shift into neutral Turn the fuel loc...

Страница 63: ...or other inclines If you must park on an incline place the machine transversely across the incline apply the parking brake and block the front and rear wheels with rocks or other objects Do not park t...

Страница 64: ...em Choose a genuine KYMCO accessory or one that is equivalent in design and quality Accessories should be rigidly and securely mounted An accessory which can shift position or come off while you are r...

Страница 65: ...ing points in mind Never exceed the weight limit shown An overloaded ATV can be unstable Front carrier Maximum load 15 kg 33 lbs Rear carrier Maximum load 20 kg 44 lbs Maximum towing capacity 100 kg 2...

Страница 66: ...can cause an accident Make sure the load does not interfere with controls or your ability to see where you are going Ride more slowly than you would without a load The more weight you carry the slower...

Страница 67: ...cause changes in vehicle handling which could lead to an accident HOW TO AVOID THE HAZARD Never exceed the stated load capacity for this ATV Cargo should be properly distributed and securely attached...

Страница 68: ...Indicates a potential hazard that could result in serious injury or death 58 WARNING...

Страница 69: ...Riding Your ATV 59...

Страница 70: ...actice over a period of time Take the time to learn the basic techniques well before attempting more difficult maneuvers Riding your new ATV can be a very enjoyable activity providing you with hours o...

Страница 71: ...rtified training course offered by KYMCO They should then regularly practice the skills learned in the course and the operating techniques described in this Owner s Manual For more information about t...

Страница 72: ...ow the age recommendations for this ATV WHAT CAN HAPPEN Use by children of ATVs that are not recommended for their age can lead to severe injury or death of the child HOW TO AVOID THE HAZARD A child u...

Страница 73: ...HAPPEN Greatly reduces your ability to balance and control this ATV Could cause an accident resulting in harm to you and or your passenger HOW TO AVOID THE HAZARD Never carry a passenger on the carri...

Страница 74: ...the event of an accident Operating without eye protection can result in a n a c c i d e n t a n d increases your chances of a severe injury in the event of an accident Operating without protective clo...

Страница 75: ...s POTENTIAL HAZARD Operating this ATV after consuming alcohol or drugs WHAT CAN HAPPEN Could seriously affect your judgment Could cause you to react more slowly Could affect your balance and perceptio...

Страница 76: ...rating condition Always follow the inspection and maintenance procedures and schedules described in the Owner s Manual POTENTIAL HAZARD Operating this ATV with improper tires or with improper or uneve...

Страница 77: ...the ATV which can result in an accident HOW TO AVOID THE HAZARD Always go at a speed that is proper for the terrain visibility and operating conditions and your experience Speed limiter For riders in...

Страница 78: ...5 Towing capacity 100 kg 220 lbs POTENTIAL HAZARD Overloading this ATV or carrying or towing cargo improperly WHAT CAN HAPPEN Could cause changes in vehicle handling which could lead to an accident HO...

Страница 79: ...operation WHAT CAN HAPPEN Removing even one hand or foot can reduce your ability to control the ATV or could cause you to lose your balance and fall a footboard your foot or leg may come into contact...

Страница 80: ...achine or overturn POTENTIAL HAZARD Attempting wheelies jumps and other stunts WHAT CAN HAPPEN Increases the chance of an accident including an overturn HOW TO AVOID THE HAZARD Never attempt stunts su...

Страница 81: ...ich in some situations could lead to an accident HOW TO AVOID THE HAZARD Never modify this ATV through improper installation or use of accessories All parts and accessories added to this vehicle shoul...

Страница 82: ...ine in a place where pedestrians or children are not likely to touch it POTENTIAL HAZARD Hot exhaust system WHAT CAN HAPPEN Someone touching the exhaust system during or after operation could be burne...

Страница 83: ...ng and afterwards do not allow skin or clothing to come in contact with these components rough surfaces With the engine idling return the starter knob to the closed position and shift the drive select...

Страница 84: ...ntrol causing a collision or overturn HOW TO AVOID THE HAZARD Always follow proper procedures for turning as described in this Owner s Manual Practice turning at low speeds before attempting to turn a...

Страница 85: ...over the front wheels by moving forward on the seat Once you have learned this technique you should be able to perform it at higher speeds or in tighter curves Improper riding procedures such as abru...

Страница 86: ...se control POTENTIAL HAZARD Operating on excessively steep slopes WHAT CAN HAPPEN The vehicle can overturn more easily on extremely steep slopes than on level surfaces or small slopes HOW TO AVOID THE...

Страница 87: ...pes as described in this Owner s Manual Always check the terrain carefully before you start up any slope Never climb slopels with excessively slippery or loose surfaces Shift your weight forward Never...

Страница 88: ...ual Avoid slopes with excessively slippery or loose surfaces Shift your weight to the up of slope side of the ATV POTENTIAL HAZARD Improperly crossing slopes or turning on slopes WHAT CAN HAPPEN Could...

Страница 89: ...e the rear brake to stop The ATV could easily tip over backwards Instead dismount the ATV immediately on the up of slope side POTENTIAL HAZARD Stalling rolling backwards or improperly dismounting whil...

Страница 90: ...fully stopped apply rear brake as well and then lock parking brake Dismount on up slope side or to a side if pointed straight up slope Turn the ATV around and remount following the procedure describe...

Страница 91: ...ATV to tip or roll over Carefully choose your path and ride no faster than you will be able to react to obstacles which may appear POTENTIAL HAZARD Going down a slope improperly WHAT CAN HAPPEN Could...

Страница 92: ...82...

Страница 93: ...ur ATV begins to tip while turning Lean more into the turn to regain balance If necessary gradually let off the throttle and or steer to the outside of the turn See pages 74 75 If your ATV can t make...

Страница 94: ...s otherwise specified PERIODIC MAINTENANCE AND ADJUSTMENT Periodic inspection adjustment and lubrication will keep your machine in the safest and most efficient condition possible Safety is an obligat...

Страница 95: ...dealer to check the torque settings and adjust them as necessary POTENTIAL HAZARD Operating this ATV with improper modifications WHAT CAN HAPPEN Improper installation of accessories or modification o...

Страница 96: ...st if necessary Check condition Adjust gap and clean Replace if necessary Clean Replace if necessary Check idle speed starter operation Adjust if necessary Check breather hose for cracks or damage Rep...

Страница 97: ...balance damage runout Replace if necessary Check bearing assembly for looseness damage Replace if damaged Check operation Replace if damaged Check toe in Adjust if necessary Lubricate every 6 months...

Страница 98: ...ect the oil level E The oil level should be between the maximum and minimum marks If the level is low add oil to raise it to the proper level Wait a few minutes until the oil level settles before chec...

Страница 99: ...plug be sure to install the O ring compression spring and oil strainer E Clean the oil strainer with solvent F Inspect the O ring and replace if damaged G Reinstall the O ring oil strainer compressio...

Страница 100: ...ill with the specified Motor oil 2 Motor oil level inspection and refilling 1 Motor oil indicator light Recommended oil see page 125 Oil quantity Periodic oil change 0 9 L 0 79 lmp qt 0 95 US qt Total...

Страница 101: ...d 2 stroke motor oil and close the mortor oil Tank cap When adding the motor oil the oil level shall not exceed the upper limit Be careful not to allow foreign matters or dust to enter the oil tank Us...

Страница 102: ...container under the engine C Remove the oil filler bolt and drain plug to Drain the oil D Reinstall the drain plug and tighten to Specification 1 Drain plug MX er 150 125 1 Drain plug MX er 50 Tighten...

Страница 103: ...0 2 L MX er 150 125 0 09L MX er 50 Be sure no foreign material enters the crankcase CAUTION Tightening torque Oil filler bolt MX er 150 125 23 Nm 2 3 m kg 17 ft lb MX er 50 15 Nm 1 5 m kg 11ft lb F S...

Страница 104: ...spark plug because heat and deposits will cause the spark plug to slowly break down and erode If electrode erosion becomes excessive you should replace the spark plug with one of the proper type Stan...

Страница 105: ...Air filter cleaning A Remove the seat only MX er 150 125 B Remove the air filter case cover 95 1 Air filter case cover 2 Clamp 1 Air filter case cover MX er 150 125 MX er 50...

Страница 106: ...C Remove the air filter element and separate it from the box D Wash the element gently but thoroughly in solvent 1 Air filter element 1 Air filter element MX er 150 125 MX er 50 96...

Страница 107: ...e excess solvent out of the filter and let it dry Do not twist the filter element when squeezing it G Inspect the element If damaged replace it H Apply KYMCO foam air filter oil or other quality foam...

Страница 108: ...5 000 r min The engine is warm when it quickly responds to the throttle 2 Connect the tachometer and set the idle to the specified idling speed by adjusting the throttle stop screw Turn the screw in t...

Страница 109: ...The correct valve clearance changes with use resulting in improper fuel air supply or engine noise To prevent this the valve clearance must be adjusted regularly This adjustment however should be left...

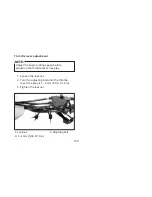
Страница 110: ...idling speed before adjusting the throttle lever free play 1 Loosen the locknut 2 Turn the adjusting bolt until the throttle lever free play is 1 4 mm 0 04 0 16 in 3 Tighten the locknut NOTE 1 Locknut...

Страница 111: ...aches the wear limit line ask a KYMCO dealer to replace the shoes as a set Brake fluid inspection Disk brake Add recommended brake fluid DOT4 into the tank until the fluid level reaches the upper limi...

Страница 112: ...fully turn in the adjusting bolt 2 Loosen the lower locknut 3 Turn the lower adjusting bolt until specified free play is obtained 4 Tighten the lower locknut 5 While applying the front brake turn out...

Страница 113: ...lose braking ability which could lead to an accident HOW TO AVOID THE HAZARD After servicing Make sure the brakes operate smoothly and that the free play is correct Make sure the brakes do not drag R...

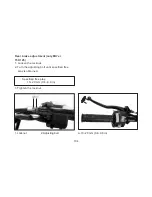
Страница 114: ...n 1 Locknut 2 Adjusting bolt Rear brake adjustment only MX er 150 125 1 Loosen the locknut 2 Turn the adjusting bolt until specified free play is obtained 3 Tighten the locknut Specified free play 10...

Страница 115: ...ate smoothly and that the free play is correct Make sure the brakes do not drag Replacement of brake components requires professional knowledge These procedures should be performed by a KYMCO dealer W...

Страница 116: ...e cam lever to make sure that the brake does not drag after adjusting 5 Tighten the locknut 6 Turn the adjusting nut on the brake cam lever in direction to decrease play and in direction to increase p...

Страница 117: ...ility which could lead to an accident HOW TO AVOID THE HAZARD After servicing Make sure the brakes operate smoothly and that the free play is correct Make sure the brakes do not drag Replacement of br...

Страница 118: ...ure The normal vertical deflection is approximately 30 mm 1 18 in If the deflection exceeds 30 mm 1 18 in adjust the chain slack Drive chain slack adjustment 1 Loosen the hub stopper bolt locknut and...

Страница 119: ...lack within the specified limit 4 After adjusting be sure to tighten the axle holding bolts 5 Finger tighten the hub stopper bolt and tighten the hub stopper bolt locknut Tightening torque Axle holdin...

Страница 120: ...Steam cleaning high pressure washes and certain solvents can damage these O rings Use only kerosene to clean the drive chain Wipe it dry and thoroughly lubricate it with SAE 30 50 motor oil Do not use...

Страница 121: ...HAZARD Damaged control cables WHAT CAN HAPPEN Corrosion can result when the outer covering of control cables becomes damaged Cables can also become frayed or kinked Operation of controls could be rest...

Страница 122: ...parts of the brake levers Recommended lubricant Lithium soap based grease All purpose grease Knuckle shaft lower arms and steering shaft lubrication Lubricate the pivot points using a grease gun Recom...

Страница 123: ...the frame 2 Remove the nuts from the wheel 3 Remove the wheel assembly Wheel installation When installing the wheel reverse the removal procedure Pay attention to the following Wheel nut torque Front...

Страница 124: ...sed type battery electrolyte cap If the motorcycle will not be used for a long time the battery will discharge electricity by itself Remove the battery and put it in a cool place after it is fully cha...

Страница 125: ...n eyes or clothing Always shield eyes when working near batteries Keep out of reach of children Antidote EXTERNAL Flush with water INTERNAL Drink large quantities of water or milk Follow with milk of...

Страница 126: ...in consult a KYMCO dealer Specified fuse 7A POTENTIAL HAZARD Using an improper fuse WHAT CAN HAPPEN An improper fuse can cause damage to the electrical system which could lead to a fire HOW TO AVOID T...

Страница 127: ...body 2 Remove the bulb holder cover remove the bulb holder screw and the defective bulb 117 POTENTIAL HAZARD The headlight bulb is hot when it is on and immediately after it is turned off WHAT CAN HAP...

Страница 128: ...m loosen the adjusting screw and pull the headlight assembly toward you To lower the beam push it away from you After adjusting be sure to tighten the screw CAUTION 1 Adjusting screw 3 Put a new bulb...

Страница 129: ...ve the tools experience and know how to properly service your machine Imitation parts may look like KYMCO parts but they are often inferior Consequently they have a shorter service life and can lead t...

Страница 130: ...uickly Engine turns over slowly Check fluid recharge check connections Use electric starter to see if there is compression Water or dirt mixed in fuel Turn the fuel cock to ON Clean filter element and...

Страница 131: ...les 3 Rinse the dirt and degreaser off with a garden hose Use only enough pressure to do the job Excessive water pressure may cause water seepage and deterioration of wheel bearings brakes transmissio...

Страница 132: ...tain abrasives which may mar the paint or protective finish When finished start the engine and let it POTENTIAL HAZARD Operation with wet brakes after washing WHAT CAN HAPPEN Wet brakes may have reduc...

Страница 133: ...on of SAE 10W40 motor oil in the spark plug hole and reinstall the spark plug Ground the spark plug wire and turn the engine over several times to coat the cylinder wall with oil 3 Clean the drive cha...

Страница 134: ...ight With oil and full fuel tank 166 kg 365 2 lbs 150 kg 330 lbs Engine Type Cylinder arrangement Displacement Bore x stroke Compression ratio Starting system Lubrication system Air cooled 4 stroke OH...

Страница 135: ...L 0 87 lmp qt 1 05 US qt 0 2 L 0 17 lmp qt 0 21 US qt 125 Be sure to use motor oils that do not contain anti friction modifiers Passenger car motor oils often labeled Energy Conserving contain anti f...

Страница 136: ...ED FUEL 8 1 L 7 12 lmp gal 8 55 US gal 1 0 L 0 88 lmp gal 1 05 US gal PD PB DR8 EA NGK Br9 HAS 0 6 0 7 mm 0 024 0 028 in Dry centrifugal automatic 126 Bulb voltage wattage quantity Headlight Position...

Страница 137: ...Rear Drum brake Disk brake Swing Swing arm axle Coil spring Oil damper Coil spring Oil damper 127 Electrical Ignition system Generator system Battery type C D I C D I Magneto 12V 8AH 12V 4AH Tire Typ...

Страница 138: ...le for the purpose of noise control prior to its sale or delivery to the ultimate purchaser or while it is in use or 2 the use of the vehicle after such device or element of design has been removed or...

Страница 139: ...with the warranty The chart below is printed only as a reminder to you that the maintenance work is required It is not acceptable proof of maintenance work MAINTENACE INTERVAL DATE OF SERVICE MILEAGE...

Страница 140: ......

Страница 141: ......

Страница 142: ...OR DRUGS ALWAYS Use proper riding techniques to avoid vehicle overturns on hills and rough terrain and in turns For your safety wear gear to include helmet gloves and foot protection Gasoline is flamm...

Отзывы: