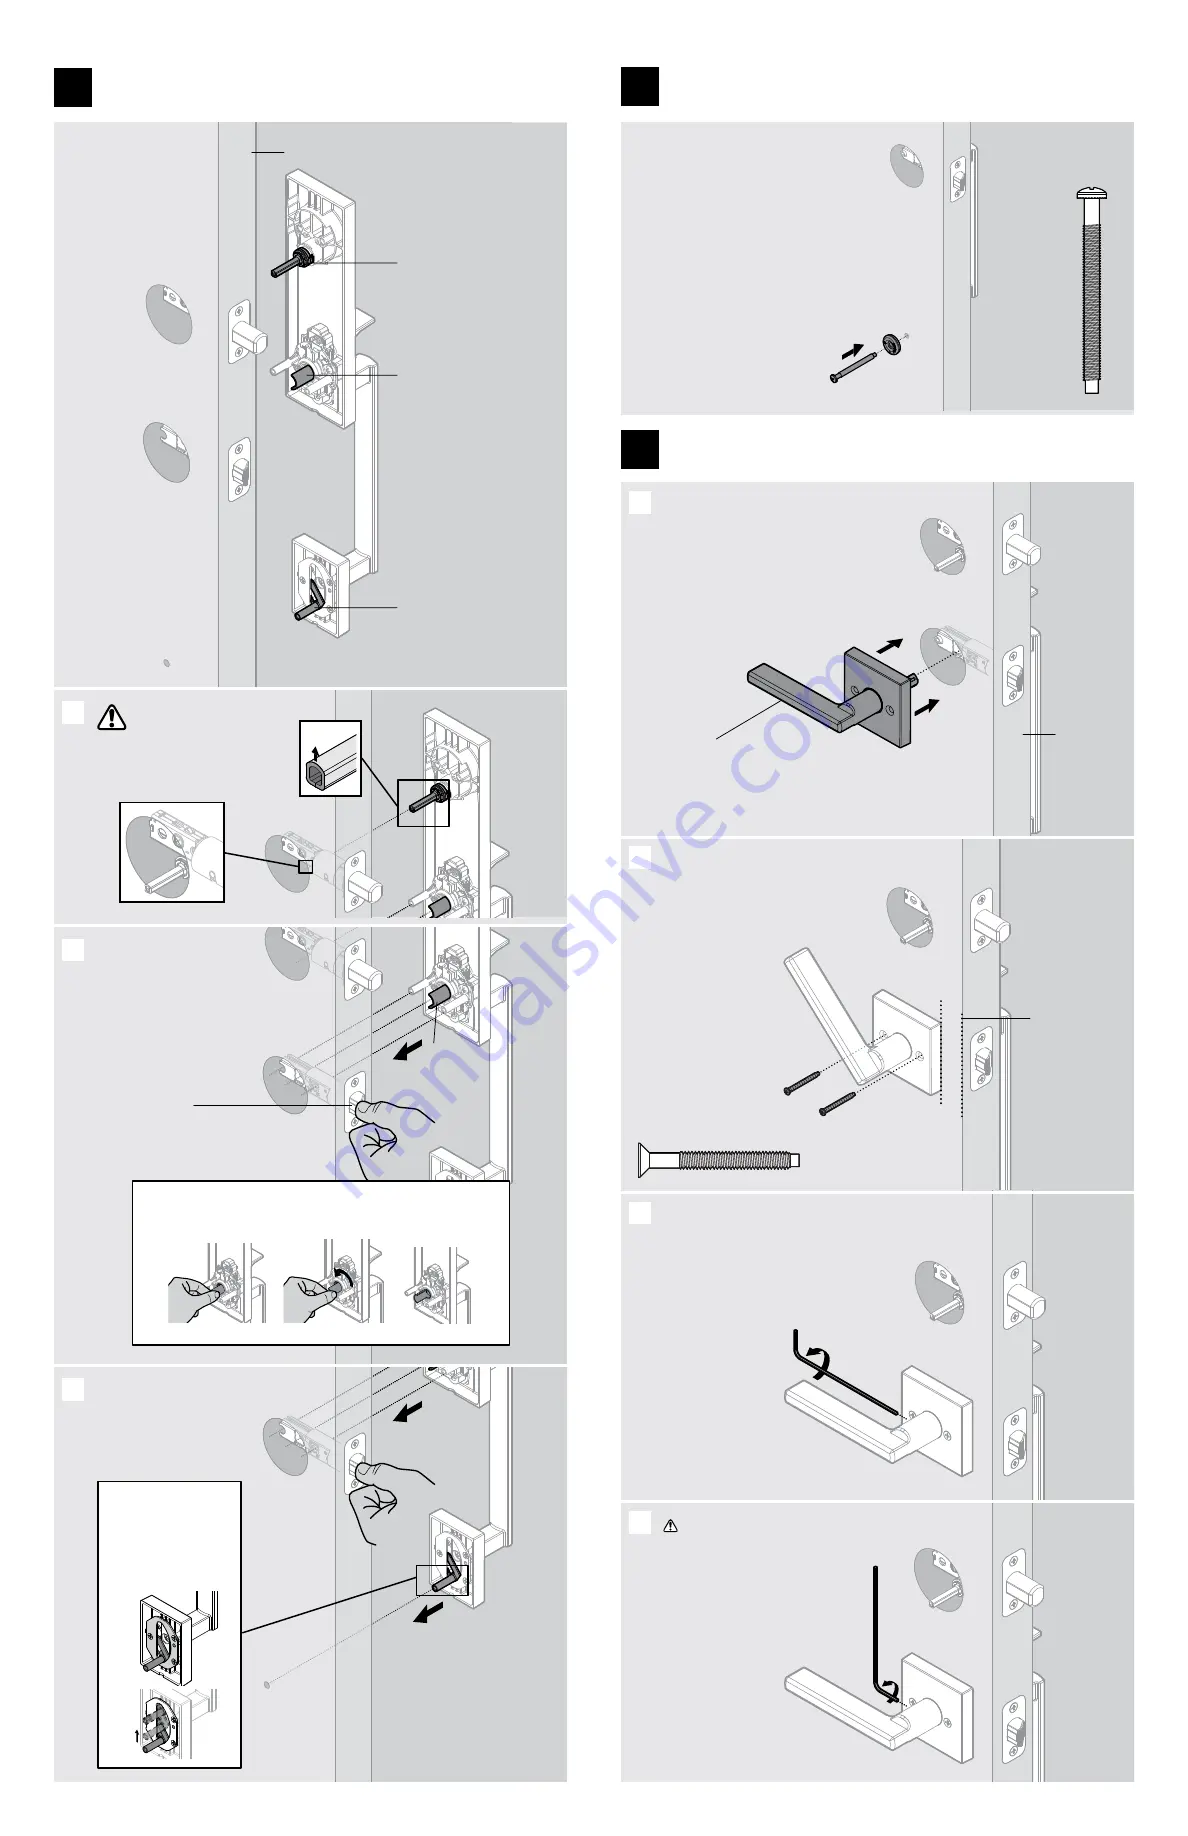
EXTERIOR torque blade
curve faces up and goes
UNDER the latch.
La curva de la cuchilla de torsión
EXTERIOR está orientada hacia
arriba y pasa BAJO el pestillo.
If adjustment is required, pull and rotate the spindle.
Si el ajuste es necesario, tire y gire el husillo.
door edge
borde de la puerta
spindle
husillo
180°
H
exterior
exterior
P3
P3
(2x)
J
R
actual size
tamaño real
Lever handle faces away
from the door edge.
La palanca hacia fuera
del borde de la puerta.
Rotate the lever
upward to insert and
tighten the screws.
Gire la palanca hacia
arriba para insertar y
apretar los tornillos.
Tighten the pre-
installed set screw.
Apriete el tornillo preinstalado.
clockwise
horario
Insert the lever spindle
into the semicircular hole
in the bottom latch.
Inserte el husillo de la
palanca en el orificio
de medio círculo en
el pestillo inferior.
door edge
borde de
la puerta
A
B
C
A
D
clockwise
horario
exterior torque blade
paleta de torsión exterior
adjustable throughbolt
el perno ajustable
Insert the spindle THROUGH
the semicircular hole in
the bottom latch.
Inserte el eje A TRAVÉS del orificio
semicircular en el cierre inferior.
B
spindle
husillo
Press the latch bolt
to insert the spindle.
Presione el perno para
insertar el husillo.
Post is adjustable and
can be moved to any
position within the slot.
El poste es ajustable
y se puede mover a
cualquier posición
dentro de la ranura.
Insert the adjustable
throughbolt THROUGH the
bottom hole in the door.
Inserte el perno ajustable
a TRAVÉS del orificio
inferior de la puerta.
C
M2
M2
M1
actual size
tamaño real
Secure the handleset with
the washer and screw.
Fije el conjunto de manija
con la arandela y el tornillo.
Secure the handleset
Fije el conjunto de manija
10
Fully tighten the set
screw using the short
end of the allen wrench.
Apriete completamente
el tornillo de fijación
con el extremo corto
de la llave Allen.
3 / 4
Install handleset
Instale el conjunto de manija
9
Install lever
Instale la palanca
11
Make sure
the edges of
the lever are
parallel to the
door edge.
Asegúrese de
que los bordes
de la palanca
son paralelos
al borde de
la puerta.


