


First
Aid
kvm-tec
SMARTFLEX
smart connection
1.
First check your delivery content SMARTfl ex
....
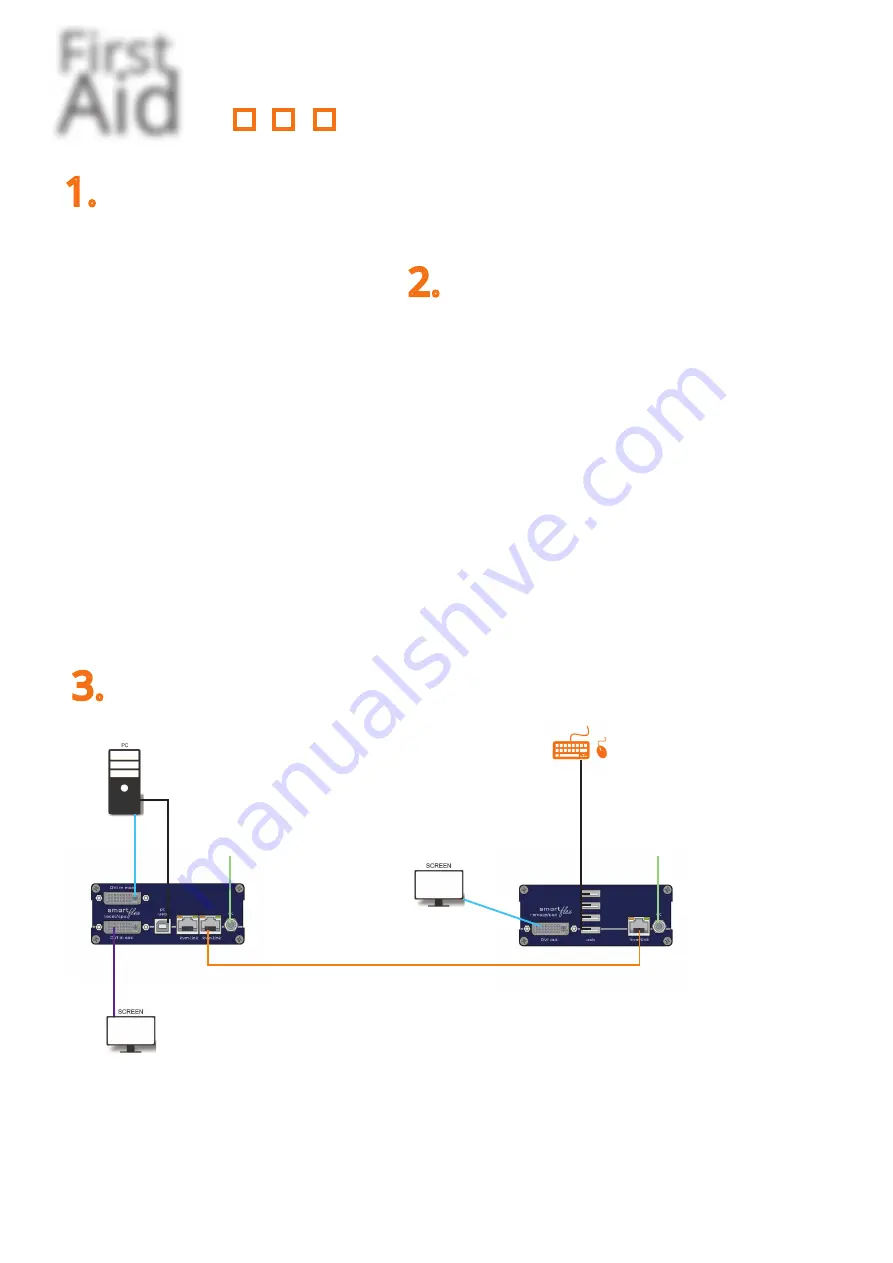
3.
Than check your installation....
LOCAL/CPU Unit
o
1 x SV 1 local (CPU)
o
1 x wall power supply 12V 1A
o
EU-plug or INT Plug
o
1 x DVI - DVI cable 1,8m/5,9ft
o
1 x USB cable 1,8m/ 5,9 ft
o
4 x rubber feet
REMOTE/CON Uni
t
o
1 x SV1 remote (CON)
o
1 x wall power supply 12V 1A (EUplug) or
INT plug
o
1 x DVI - DVI cable 1,8m/5,9ft
o
4 x rubber feet
2.
Are your upgrades for SMARTfl ex
unlocked
possible upgrades for SMARTFLEX SV1
USB Memory
PoE Version (Switch supports PoE)
to unlock upgrades, please send an email or give us a
call. Please have your ID code ready. You fi nd your ID in
the OSD menu by pressing the button „M“ - Device ID
You´ll get a code from our support team.
Please, enter the code
1. Power plug
12V 1A
1.
Power plug
12V 1A
2. USB to PC
4. DVI in from PC
4. DVI to Monitor
2. USB from Keyboard and mouse
3. Network cable CAT5e/6/7/ up to 150m/492ft
4. D
VI out
to Monitor
Quick Installation SMARTfl ex Single
local / CPU – remote / CON
1.
Connect the CON / Remote and the CPU / Local Unit to the included 12V 1A power supply.
2. Now connect the USB cable to a USB port on your PC and connect the other end of the USB
cable to the CPU / Local Unit. Connect keyboard and mouse to the CON / Remote Unit.
3.
Connect the CPU / Local and the CON / Remote Unit with a network cable.
4.
Now connect the DVI cable to the DVI socket of the PC and the other end to the DVI socket of
the CPU / Local Unit (PC-in). Then connect the monitor with the DVI cable to the CON / Remo-
te Unit.
5. Using a switch: Connect all endpoints to the switch. Ensure that all connections have a band-
with of 1Gbit/sec. For video sharing the network has to support IGMP snooping.