background image

6

IMPLEMENT LIMITATIONS

A

Implement size may vary depending on soil operating conditions.

Implement

Remarks

B2630 / B3030 / B3000

Mower

Mid-mount

Max. cutting width
Max. weight 

mm (in.)

kg (lbs.)

1830 (72)
205 (451)

Rotary-cutter

(1 Blade)

Max. cutting width
Max. weight

mm (in.)

kg (lbs.)

1220 (48)
227 (500)

Rear-mount

(2 or 3 Blades)

Max. cutting width
Max. weight

mm (in.)

kg (lbs.)

1830 (72)
227 (500)

Flail-mower

Max. cutting width

mm (in.)

1220 (48)

Sickle bar

Max. cutting width

mm (in.)

1524 (60)

Rotary tiller

Max. tilling width
Max. weight
Slip clutch

mm (in.)

kg (lbs.)

1270 (50)
250 (550)

Necessary

Bottom plow

Max. size

mm (in.)

305 (12) x 2

Disc plow

Max. size

mm (in.)

559 (22) x 2

Cultivator

Max. size

mm (in.)

1524 (60)

1 Row

Disc harrow

Max. harrowing width
Max. weight

mm (in.)

kg (lbs.)

1676 (66)
250 (550)

Sprayer

Max. tank capacity

 L (U.S.gals.)

246 (65)

Front blade

Max. cutting width
Sub frame

mm (in.)

1676 (66)

Necessary

Rear blade

Max. cutting width
Max. weight

mm (in.)

kg (lbs.)

1676 (66)
250 (550)

Front loader

Max. lifting capacity
Max. width

kg (lbs.)

mm (in.)

400 (880)
1524 (60)

Box blade

Max. cutting width
Max. weight

mm (in.)

kg (lbs.)

1372 (54)
227 (500)

Back hoe

Max. digging depth
Max. weight
Sub frame

mm (in.)

kg (lbs.)

2295 (90)
400 (880)

Necessary

Snow blower

Max. working width
Max. weight

mm (in.)

kg (lbs.)

1542 (60)
227 (500)

Trailer

Max. load capacity
Max. drawbar load

kg (lbs.)
kg (lbs.)

1500 (3300)

500 (1100)

Содержание B2630

Страница 1: ...B2630 B3030 B3000 MODELS OPERATOR S MANUAL B 2 6 3 0 B 3 0 3 0 B 3 0 0 0 KUBOTA Corporation 2011 PRINTED IN JAPAN READ AND SAVE THIS MANUAL 1AGAEDPAP0010 English Australia Code No 6C265 6311 1...

Страница 2: ...rom the soil and from the sea industrial development architecture and construction transportation Thousands of people depend on KUBOTA s know how technology experience and customer service You too can...

Страница 3: ...Preheat Glow Plugs Low Temperature Start Aid Starter Control Power Take Off Control Off Position Disengaged Power Take Off Control On Position Engaged Differential Lock Position Control Raised Positio...

Страница 4: ...m It will give you long satisfactory service To obtain the best use of your tractor please read this manual carefully It will help you become familiar with the operation of the tractor and contains ma...

Страница 5: ...the Tractor at Full Speed for the First 50 Hours 16 Changing Lubricating Oil for New Tractors 16 OPERATING FOLDABLE ROPS 16 To Fold the ROPS 16 To Raise the ROPS to Upright Position 17 Adjustment of F...

Страница 6: ...Selecting the Top Link Mounting Holes 33 Drawbar 33 Lifting Rod Right Ratchet type 33 Top Link 33 Telescopic Stabilizers 34 Telescopic Lower Links 34 DRAWBAR 34 Adjusting Drawbar Length 34 HYDRAULIC U...

Страница 7: ...ling 57 Checking Engine Oil Level 58 Checking Transmission Fluid Level 58 Checking Coolant Level 59 Cleaning Air Conditioner Condenser Screen 59 Cleaning Grill and Radiator Screen 60 Checking Brake Pe...

Страница 8: ...ction Nozzle Injection Pressure 72 EVERY 3000 HOURS 72 Checking Injection Pump 72 EVERY 1 YEAR 73 Replacing Air Cleaner Primary Element and Secondary Element 73 Checking the Air Conditioner Pipe and H...

Страница 9: ...ed in the upright and locked position and the seat belt fastened for all other operations If the CAB or ROPS is loosened or removed for any reason make sure that all parts are reinstalled correctly be...

Страница 10: ...ypassed 4 Do not operate or idle engine in a non ventilated area Carbon monoxide gas is colorless odorless and deadly 5 Check before each use that operator presence controls are functioning correctly...

Страница 11: ...Avoid changing gears speed when climbing or going down a slope If on a slope changing gears to neutral could cause loss of control C Driving the tractor on the road 1 Lock the two brake pedals togethe...

Страница 12: ...ver in place at all times Replace the PTO shaft cap when the shaft is not in use 3 Before installing or using PTO driven equipment read the manufacturer s manual and review the safety labels attached...

Страница 13: ...y explosion do not use or charge the refillable type battery if the fluid level is below the LOWER lower limit level mark Check the fluid level regularly and add distilled water as required so that th...

Страница 14: ...not use hands to search for suspected leaks use a piece of cardboard or wood Use of safety goggles or other eye protection is also highly recommended If injured by escaping fluid see a medical doctor...

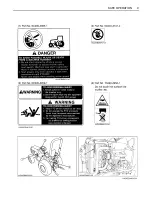
Страница 15: ...7 SAFE OPERATION 7 DANGER WARNING AND CAUTION LABELS...

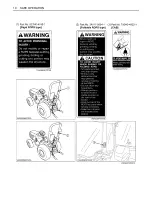
Страница 16: ...SAFE OPERATION 8...

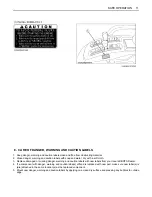
Страница 17: ...9 SAFE OPERATION...

Страница 18: ...SAFE OPERATION 10...

Страница 19: ...r warning and caution labels with new labels from your local KUBOTA Dealer 4 If a component with danger warning and caution label s affixed is replaced with new part make sure new label s is are attac...

Страница 20: ......

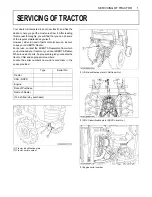
Страница 21: ...r For service contact the KUBOTA Dealership from which you purchased your tractor or your local KUBOTA Dealer When in need of parts be prepared to give your dealer the tractor CAB and engine serial nu...

Страница 22: ...80 min CCA 430 A Capacities Fuel tank L U S gals 31 8 1 Engine crankcase with filter L U S qts 3 0 3 2 4 1 4 3 Engine coolant L U S qts 4 5 4 7 5 2 5 5 Transmission case L U S gals 15 4 0 Dimensions...

Страница 23: ...2 5 6 Power steering 16 0 4 2 3P 19 7 5 2 Power steering 14 8 3 9 Three point hitch SAE Category 1 Max lift force At lift points kg lbs 970 2139 24 in behind lift point kg lbs 760 1676 PTO Rear PTO SA...

Страница 24: ...o 11 5 0 to 19 0 0 to 11 8 Reverse Low 0 to 3 8 0 to 2 4 0 to 3 9 0 to 2 4 Middle 0 to 7 1 0 to 4 4 0 to 7 3 0 to 4 5 High 0 to 14 8 0 to 9 2 0 to 15 2 0 to 9 4 Model B3030 B3000 Tire size Rear 12 4 1...

Страница 25: ...improper implements are not covered by the warranty A Implement size may vary depending on soil operating conditions Tread max width with farm tires Lower link end max loading weight W 0 Front Rear 93...

Страница 26: ...ry Bottom plow Max size mm in 305 12 x 2 Disc plow Max size mm in 559 22 x 2 Cultivator Max size mm in 1524 60 1 Row Disc harrow Max harrowing width Max weight mm in kg lbs 1676 66 250 550 Sprayer Max...

Страница 27: ...and Hand Controls ILLUSTRATED CONTENTS 1 Coolant temperature gauge 26 2 Turn signal Hazard light indicator 20 3 Tachometer 26 4 Easy Checker TM 25 5 Fuel gauge 26 6 Hourmeter 26 7 Turn signal light sw...

Страница 28: ...dal Location Label The label is located on the cover under seat 1 Steering wheel tilt pedal 2 Brake pedal left 3 Brake pedal right 4 Brake pedal lock 5 Speed control pedal forward 6 Speed control peda...

Страница 29: ...Brake pedal 21 3 3 Point hitch lowering speed knob 35 13 Speed control pedal 23 4 Differential lock pedal 27 14 Position control lever 35 5 PTO clutch lever 30 15 Cruise control lever 24 6 PTO select...

Страница 30: ...round Check item Walk around inspection Check engine oil level Check transmission oil level Check coolant level Clean air conditioner condenser screen Clean grill and radiator screen Check air cleaner...

Страница 31: ...pedals 3 Latch the brake pedals with the parking brake lever 2 To release the parking brake depress the brake pedals again A It is recommended that the operator practice engaging and disengaging the...

Страница 32: ...t sufficient Never fail to conduct physical daily checks carefully by referring to DAILY CHECK section See DAILY CHECK in PERIODIC SERVICE section 4 Place the position control lever in LOWEST position...

Страница 33: ...d the starter make sure that the starter is not continuously turned for more than 30 seconds BBlock Heater Option A block heater is available as an option from your dealer It will assist you in starti...

Страница 34: ...t jump start engine A Do not connect other end of negative jumper cable to negative terminal of tractor battery When jump starting engine follow the instructions below to safely start the engine 1 Bri...

Страница 35: ...or jump starting A Use of a higher voltage source on tractors electrical system could result in severe damage to tractor s electrical system Use only matching voltage source when Jump starting a low o...

Страница 36: ...w down to suitable speeds Do not operate the tractor at fast speed The above precautions are not limited only to new tractors but to all tractors But it should be especially observed in the case of ne...

Страница 37: ...ecured with the hair pins BTo Raise the ROPS to Upright Position 1 Remove both hair pins and set bolts 2 Raise ROPS to the upright position To avoid personal injury A Raise the ROPS slowly and careful...

Страница 38: ...personal injury A Make sure that the seat is completely secured after each adjustment A Do not allow any person other than the driver to ride on the tractor C Position adjustment Pull in the position...

Страница 39: ...the seat belt if a foldable ROPS is down or there is no ROPS Adjust the seat belt for proper fit and connect to the buckle The seat belt is auto locking retractable type BTilt Steering Adjustment To...

Страница 40: ...n after turning C Hazard Light Switch When hazard light switch is pushed the hazard lights flash along with the indicator on the instrument panel Press the hazard light switch again to turn off the li...

Страница 41: ...on icy wet or loose surfaces make sure the tractor is correctly ballasted to avoid skidding and loss of steering control Operate at reduced speed 1 Before operating the tractor on the road or before a...

Страница 42: ...ss of steering control Operate at reduced speed and engage front wheel drive A An accident may occur if the tractor is suddenly braked such as by heavy towed loads shifting forward or loss of control...

Страница 43: ...oe of your right foot to move forward Reverse Pedal Depress the speed control pedal with the heel of your right foot to move backward A To prevent serious damage to the HST do not adjust the stopper b...

Страница 44: ...in this condition The set speed will be resumed if you release the pedal C To disengage Cruise Control Device A Move the lever all the way back and then to NEUTRAL position to release the cruise contr...

Страница 45: ...find the cause as shown below Never operate the tractor while Easy Checker TM lamp is on A For checking and servicing of your tractor consult your local KUBOTA Dealer for instructions 1 Easy checker T...

Страница 46: ...e removing cap completely 1 With the key switch at ON this gauge indicates the temperature of the coolant C for cold and H for hot 2 If the indicator reaches the H position red zone engine coolant is...

Страница 47: ...id personal injury due to loss of steering control A Do not operate the tractor at high speed with differential lock engaged A Do not attempt to turn with the differential lock engaged A Be sure to re...

Страница 48: ...ation A Avoid changing gears when climbing or descending a slope A If operating on a slope never disengage shift levers to neutral Doing so could cause loss of control A Do not drive the tractor close...

Страница 49: ...position C Rear PTO To use rear PTO shift the PTO select lever to rear PTO position and the PTO clutch lever to ON position A To avoid shock loads to the PTO reduce engine throttle from full to half s...

Страница 50: ...A Tractor engine will not start if the PTO clutch lever is in the engaged ON position A When you stand up from the seat with the PTO clutch lever at ON position the engine will stop regardless of the...

Страница 51: ...ect lever to rear only position 4 Dismount the seat and tilt up 5 Set the PTO clutch lever to engage ON 6 Set the engine speed to provide recommended rear PTO speed A If the PTO clutch lever is shifte...

Страница 52: ...32 THREE POINT HITCH DRAWBAR THREE POINT HITCH DRAWBAR 1 Top link 2 Top link holder 3 Lifting rod Left 4 Telescopic stabilizers 5 Lower link Telescopic type 6 Lifting rod Right Ratchet type 7 Drawbar...

Страница 53: ...on a firm flat and level surface A Whenever an implement or other attachment is connected to the tractor 3 point hitch check full range of operation for interference binding or PTO driveline separatio...

Страница 54: ...degree of sway will be permitted BTelescopic Lower Links To attach an implement follow the instructions below 1 Push the levers pull out the lower link ends and attach to the implement 2 Back up the...

Страница 55: ...DRAULICS Two hydraulic outlets mid and rear are provided on the tractor BHydraulic Block Type Outlet Hydraulic block type outlet is useful when adding hydraulically operated equipment such as front en...

Страница 56: ...e implement control valve has a relief valve the tank port flow from implement should be connected to the port located on the right hand side of transmission case 1 Return port 1 Block cover 2 Block o...

Страница 57: ...37 HYDRAULIC UNIT 1 Return port...

Страница 58: ...2 is used only when there is some obstacle that prevents you from using the standard Position control YES NO Loose Insert the set pin through the slot on the outer tube that align with one of the hole...

Страница 59: ...nder tractor or any machine elements for servicing or adjustment securely support them with stands or suitable blocking beforehand A Never operate tractor with a loose rim wheel or axle BFront Wheels...

Страница 60: ...S AND BALLAST 40 BTreads C USA models C Except USA models Front 7 12 Farm 24x8 50 14 Turf 23x8 50 14 Ind Rear 12 4 16 Farm 13 6 16 Turf 12 4 16 Ind Front A6 12 Farm 24x8 50 12 Turf Rear 12 4 16 Farm 1...

Страница 61: ...rear wheels if needed to improve traction or for stability The amount of rear ballast should be matched to job and the ballast should be removed when it is not needed The weight should be added to the...

Страница 62: ...clockwise to unlock the door To lock the door turn the key in the opposite direction The key can be removed when it is in the vertical direction From the inside Push down the lock knob to lock the doo...

Страница 63: ...itch The work light and the switch s indicator light up Press the bottom half of the work light switch to turn off the light and indicator BFront Work Light BRear Work Light if equipped 1 Front work l...

Страница 64: ...ront wiper washer switch Washer liquid jets out to the front window also A Do not activate the wipers when the windows are dry they may be scratched Be sure to jet washer liquid first and then activat...

Страница 65: ...ndshield C Side air outlet and door air outlet The side and door air outlets can be adjusted to direct air on to the operator door window or the rear of the CAB A If the airflow rate at the face is to...

Страница 66: ...lps prevent dust from coming into the CAB BControl Panel C Mode lever Set the mode lever to the desired position C Temperature Control Lever Set this lever at the desired position to obtain the optimu...

Страница 67: ...esh air selection lever to the FRESH AIR position To reduce the temperature in the CAB quickly set this lever to the RECIRCULATION position 4 Press and turn on the air conditioner switch with indicato...

Страница 68: ...on 2 In the cooling or dehumidifying heating mode set the temperature control lever at the center position 3 Open the front air outlet and direct it to your feet 4 You can feel your head cool and your...

Страница 69: ...front air outlet door air outlet and direct it to the windshield 3 Shut the side air outlet 4 Set the recirculation fresh air selection lever to the FRESH AIR position 5 Set the blower switch and the...

Страница 70: ...he defogger off push down the switch marked OFF A The battery will discharge if the defogger and the key switch remain in the ON or ACC positions with the engine stopped Always use the defogger with t...

Страница 71: ...e every 300 Hr 70 6 Front axle case oil Change every 300 Hr 72 7 Front axle pivot Adjust every 400 Hr 72 8 Engine start system Check every 50 Hr 62 9 Greasing every 50 Hr 61 10 Wheel bolt torque Check...

Страница 72: ...2 year 74 3 22 Intake air line Check every 200 Hr 69 Replace every 2 year 74 3 23 Toe in Adjust every 200 Hr 70 24 Engine valve clearance Adjust every 800 Hr 72 4 25 Fuel injection nozzle Injection p...

Страница 73: ...re registered as emission related critical parts by KUBOTA in the U S EPA nonroad emission regulation As the engine owner you are responsible for the performance of the required maintenance on the eng...

Страница 74: ...e crankcase 3 0 L 3 2 U S qts 4 1 L 4 3 U S qts Engine oil API Service Classification CD CE or CF Above 25 77 SAE30 SAE10W 30 or 15W 40 0 to 25 32 to 77 SAE20 SAE10W 30 or 15W 40 Below 0 32 SAE10W SAE...

Страница 75: ...l used to lubricate the transmission is also used as hydraulic fluid To insure proper operation of the hydraulic system and to complete lubrication of the transmission it is important that a multi gra...

Страница 76: ...while unlocking support link BHood To open the hood twist the mascot to release the latch and open the hood A To close the hood hold the hood and release the support rod BFront Grille 1 To remove the...

Страница 77: ...start the engine To avoid personal injury A Be sure to check and service the tractor on a flat place with the engine shut off and the parking brake ON BWalk Around Inspection Look around and under th...

Страница 78: ...it and draw it out again Check to see that the oil level lies between the two notches If the level is too low add new oil to the prescribed level at the oil inlet See LUBRICANTS in MAINTENANCE section...

Страница 79: ...ull level See Flushing Cooling System and Changing Coolant in EVERY 2 YEARS in PERIODIC SERVICE section A If the radiator cap has to be removed follow the caution above and securely retighten the cap...

Страница 80: ...radiator open the shutter plate and clean the front of radiator completely BChecking Brake Pedal 1 Inspect the brake pedals for free travel and smooth operation 2 Adjust if incorrect measurement is fo...

Страница 81: ...rectly to battery wiring connectors electrical components or instrument panel Inspect the following regularly 1 Check wiring for chafed or cracked insulation 2 Check wiring harness clamps Replace if n...

Страница 82: ...key to START position 4 The engine must not crank 5 If it cranks consult your local KUBOTA Dealer for this service C Test Switches for the operator s seat and the PTO clutch lever 1 Sit on the operat...

Страница 83: ...needs some servicing If the battery is weak the engine will be difficult to start and the lights will be dim It is important to check the battery periodically C How to read the indicator Check the ba...

Страница 84: ...evel and store in a dry place out of direct sunlight 2 The battery self discharges while it is stored Recharge it once every three months in hot seasons and once every six months in cold seasons BChan...

Страница 85: ...acuator valve will not function and dust will adhere to the element A Do not touch the secondary element except in cases where replacing is required See Replacing Air Cleaner Secondary Element in EVER...

Страница 86: ...falls within acceptable limits 4 Replace fan belt if it is damaged BAdjusting Brake Pedal To avoid personal injury A Stop the engine and chock the wheels before checking brake pedal 1 Release the park...

Страница 87: ...nting surface Tighten filter by hand an additional 1 2 turn only 4 After the new filter has been replaced the engine oil normally decreases a little Make sure that the engine oil does not leak through...

Страница 88: ...team blows out 4 Check that there are no dangers such as burns Get rid of the causes of overheating according to the manual see TROUBLESHOOTING section and then start again the engine BAdjusting Air C...

Страница 89: ...ish washing detergent Move it up and down as well as left and right to loosen dirt Rinse the filter with clean water and let it air dry A Do not use gasoline thinner or similar chemicals to clean the...

Страница 90: ...ging Transmission Fluid To avoid personal injury A Allow engine to cool down sufficiently oil can be hot and can burn 1 To drain the used oil remove the drain plug at the bottom of the transmission ca...

Страница 91: ...ly into the oil pan 2 After draining reinstall the drain plugs 3 Remove the oil filter 4 Put a film of clean transmission oil on the rubber seal of the new filter 5 Quickly tighten the filter until it...

Страница 92: ...e steering wheel C Adjusting procedure Loosen the lock nut and tighten the adjusting screw so that the oscillating load is 50 to 100 N 5 1 to 10 2 kgf 11 2 to 22 5 lbf If the adjusting screw is tighte...

Страница 93: ...e radiator drain cock and remove radiator cap The radiator cap must be removed to completely drain the coolant 3 After all coolant is drained close the drain cock 4 Fill with clean soft water and cool...

Страница 94: ...e ambient temperature Refer to SAE J1034 standard more specifically also to SAE J814c A When the antifreeze is mixed with water the antifreeze mixing ratio must be less than 50 D At 1 013 x 10 Pa 760m...

Страница 95: ...shed water may get into the clutch housing Remove the drain plug and drain the water then install the plug again BReplacing Fuse The tractor electrical system is protected from potential damage by fus...

Страница 96: ...goggles Escaping refrigerant can cause severe injuries to eyes A In contact with a flame R134a refrigerant gives a toxic gas FUSE No CAPACITY A Protected circuit ROPS CAB ROPS CAB 1 5 OPC 2 10 15 Hea...

Страница 97: ...s indicated that the amount of refrigerant is extremely low ask your dealer to inspect and charge C Checking procedure 1 Run the air conditioner in the following conditions 2 Look into the sight glass...

Страница 98: ...place where the tractor is sheltered from the elements Cover the tractor 9 Store the tractor indoors in a dry area that is protected from sunlight and excessive heat If the tractor must be stored outd...

Страница 99: ...the engine charge and store it indoors Install it on the tractor only when the tractor is going to be used Insufficient engine power A Insufficient or dirty fuel A The air cleaner is clogged A Check t...

Страница 100: ...ler for further detail A Rear Work Light High visibility for night work A Engine Block Heater For extremely cold weather starting A Front end weights For front ballast A Mounting Kit Front end weights...

Отзывы: