background image

INFORMA

TION


KTM PowerParts, HUSQV

ARNA

 Husky Power

,  HUSABERG Pure 

Tech

KTM - Sportmotorcycle AG 
Stallhofnerstraße 3
A-5230 Mattighofen 
www.ktm.com

Husqvarna Motorcycles GmbH
Stallhofnerstraße 3
A-5230 Mattighofen
www.husqvarna-motorcycles.com

KTM - Sportmotorcycle AG
Division HUSABERG
Stallhofnerstraße 3
A-5230 Mattighofen
www.husaberg.com

ALARM SYSTEM MOUNTING KIT

3.213.218

*3213218*

61312935044

05.2014

Содержание 61312935044

Страница 1: ...erstraße 3 A 5230 Mattighofen www ktm com Husqvarna Motorcycles GmbH Stallhofnerstraße 3 A 5230 Mattighofen www husqvarna motorcycles com KTM Sportmotorcycle AG Division HUSABERG Stallhofnerstraße 3 A 5230 Mattighofen www husaberg com ALARM SYSTEM MOUNTING KIT 3 213 218 3213218 61312935044 05 2014 ...

Страница 2: ...ities Correct installation of the pro duct is essential to ensure that a maximum degree of safety and functionality is achieved Therefore please follow the installation instructions or contact your authorized dealer The quasi manufacturer or supplier cannot be held responsible for products that are incorrectly mounted or inappropriately used Thank you Grazie per aver scelto questo prodotto Questo ...

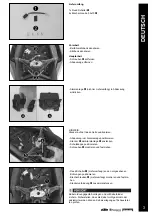
Страница 3: ...nken Seite positionieren Abdeckung inkl Alarmanlage positionieren Stecker der Alarmanlage anstecken Schutzkappe positionieren Schrauben montieren und festziehen Reed Schalter Lieferumfang an den vorgesehenen Bohrungen positionieren Blechschrauben Lieferumfang montieren und festzie hen Steckerverbindung zusammenstecken Kabel ordnungsgemäß verlegen und mit Kabelbinder sichern Sicherstellen dass die ...

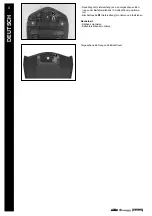
Страница 4: ...d Magnet Lieferumfang an den vorgesehenen Boh rungen der Beifahrersitzbank SoloSeatCover positionie ren Blechschraube Lieferumfang montieren und festziehen Nacharbeit Sitzbank montieren Beifahrersitzbank montieren Vorgesehene Bohrungen SoloSeatCover ...

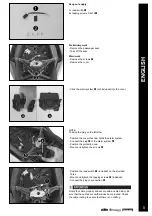
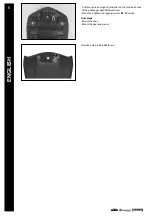
Страница 5: ...the plug on the left side Position the cover that now holds the alarm system Connect the plug of the alarm system Position the protection cap Mount and tighten the screws Position the reed switch included on the provided holes Mount and tighten the tapping screws included Connect the plug in connection Route the cable properly and secure with a cable binder En sure that the cables are neither kink...

Страница 6: ...H DEUTSCH 6 Position the reed magnet included on the provided holes of the passenger seat SoloSeatCover Mount and tighten the tapping screws included Final steps Mount the seat Mount the passenger seat Provided holes in SoloSeatCover ...

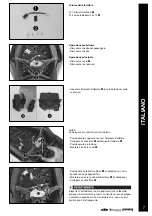
Страница 7: ...tore sul lato sinistro Posizionare la copertura con incl l impianto d allarme Collegare il connettore dell impianto d allarme Posizionare la protezione Montare e serrare le viti Posizionare l interruttore Reed in dotazione in corri spondenza degli appositi fori Montare e serrare la vite autofilettante in dotazione Collegare il connettore Disporre correttamente i cavi e assicurarli con la fascetta ...

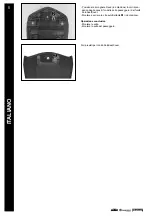
Страница 8: ...Reed in dotazione in corrispon denza degli appositi fori della sella passeggero dell unità SoloSeatCover Montare e serrare la vite autofilettante in dotazione Operazione conclusiva Montare la sella Montare la sella del passeggero Fori previsti per l unità SoloSeatCover ...

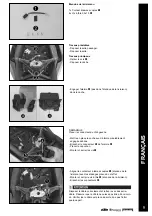
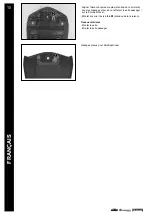
Страница 9: ...côté gauche Mettre en place le cache avec l alarme préalablement engagée dedans Brancher le connecteur de l alarme Placer le capuchon Monter et serrer les vis Aligner le contacteur à lames souples étendue de la livraison avec les alésages prévus à cet effet Monter et serrer le vis à tôle étendue de la livraison Brancher les connecteurs Disposer le câble correctement et le fixer avec des serre câbl...

Страница 10: ...ames souples étendue de la livraison avec les alésages prévus à cet effet sur la selle passager sur le SoloSeatCover Monter et serrer la vis à tôle étendue de la livraison Travaux ultérieurs Monter la selle Monter la selle passager Alésages prévus pour SoloSeatCover ...

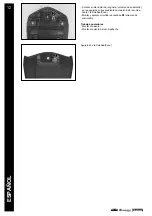
Страница 11: ... debe colocarse en el lado izquierdo Colocar la cubierta con el equipo de alarma Conectar el conector del equipo de alarma Colocar la cubierta de protección Montar y apretar los tornillos Colocar el interruptor de lengüeta volumen de suminis tro en los agujeros correspondientes Montar y apretar el tornillo roscachapa volumen de suministro Enchufar la conexión Tender el cable de forma correcta y as...

Страница 12: ...lengüeta volumen de suministro en los agujeros correspondientes del asiento del acompa ñante la SoloSeatCover Montar y apretar el tornillo roscachapa volumen de suministro Trabajos posteriores Montar el asiento Montar el asiento del acompañante Agujeros de la SoloSeatCover ...

Отзывы: