101
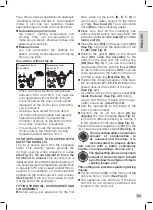
MODE MANUEL :
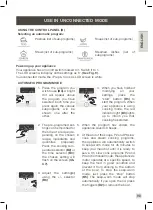
1. Press directly on the button
for the setting you want to
adjust, i.e. the speed selec-
tor
(B1)
or the cooking tem-
perature selector
(B2)
or
the time selector
(B3)
, the
chosen parameter flashes
on the screen
(C5-C6-C7)
.
The program is then in pause mode
and you have the possibility of
restarting by pressing “start” again. If
you have chosen the wrong program
and if you want to cancel it, press and
hold the “stop” button for 2 seconds.
4. When the program has ended,
the appliance sounds 3 beeps.
5. Press the locks
(D2)
and then
remove the bowl assembly
(D)
(See Fig.12)
.
YOUR APPLIANCE IS EQUIPPED
WITH A FLATBASED CAP
The flat-based cap lets you free-up
space in the bowl for cooking or
browning without being hindered by
the guide
(See Fig.15)
.
COOKING WITHOUT THE LID
You can brown foods in your bowl
without the lid while stirring and
monitoring the cooking.
(See Fig.16)
.
For this method of cooking you must
select a temperature ranging from
135°C to 150°C. Set the operating
time (up to 20 min).
The COOKING WITHOUT A LID
mode is not suitable for making jams
and milk-based preparations (risk of
overflowing).
2. Then adjust the setting
(s)
using the +/- selector
(B6)
.
For safety reasons, it is not
possible to set a tempera-
ture without setting a cook-
ing time.
3. When you have finished
entering all your settings,
press the
“start”
button
(B5)
. When your appliance
is using cooking mode, the
red indicator light, lights up
to inform you that cooking
has started. When the pro-
gram has started, you have
the possibility of stopping
the appliance at any time
by pressing the
“stop”
but-
ton
(B5)
.
CLEANING YOUR APPLIANCE
The appliance should not be immersed.
Never put the motor unit
(A)
under running
water. Once you have finished using it,
disconnect the appliance.
Clean the bowl immediately after use to
avoid staining.
Press the locks
(D2)
then lift the bowl
assembly
(D)
.
Place the bowl on a flat surface.
Unlock the lid by rotating one quarter of a
turn clockwise. Carefully remove the lid.
Take care with the knives of the ultrablade
knife (F1) and the kneading / grinding
knife (F4) when you are cleaning them
and when you empty the bowl, they are
extremely sharp.
When the parts have cooled down:
– dismantle the common spindle
(D3)
, the
seal
(D4)
and the locking ring
(D6)
(See
Fig.13)
.
– clean the bowl
(D)
, the common spindle
(D3)
, the seal
(D4)
,or the XL bottom
accessory
(D5)
and the seal
(D4)
, the
locking ring
(D6)
, the accessories
(F1)
,
(F2)
,
(F3)
,
(F4)
,
(F5)
, the steam regulator
cap
(E1)
, the lid
(E2)
, the seal
(E3)
,and
lid seal
(E4)
using a sponge and some
soapy water.
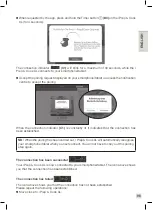
Содержание HP60A115
Страница 1: ...i Prep Cook XL www krups com FR NL DE IT EN...
Страница 2: ...A B C4 C5 B6 H B C C6 C7 B5 B1 B2 B3 B4 C3 C2 C1 D I E...
Страница 3: ...D3 D2 D1 D6 D I D4 x2 E3 E2 E1 E E4 D5 D4 x2 F G F1 F2 F3 F4 F0 F5...
Страница 4: ...3 2 D3 D4 1 1 D4 D5 1 2 3 4 1 4 2 4 3...
Страница 5: ...2 1 clic a MAX b MIN 5 6 7 8 9 10 1...
Страница 6: ...2 1 3 D5 D3 D2 1 D3 D5 D4 D6 10 2 11 12 13 14 15...
Страница 7: ...2 1 3 50 C 5 10s 16 17 18a 18b 19...
Страница 117: ......
Страница 118: ......
Страница 119: ......
Страница 120: ...8020003773 FR P 1 21 NL P 22 42 DE P 43 64 IT P 65 85 EN P 86 105...

