44
7.12 DRIVING THE MACHINE
Model “KF36E”
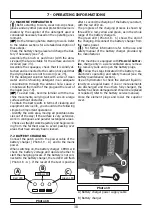
- Connect the power cable of the machine ( Photo
6 - A ) to the power mains using a patch cord.
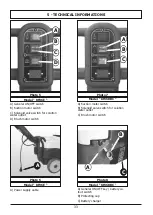
- Switch ON the general ON-OFF switch ( Photo 5 -
A ).
- Switch ON the brush motor switch ( Photo 5 - D )
(
!
) The brush will start the rotation only
when the operator will pull the brush opera-
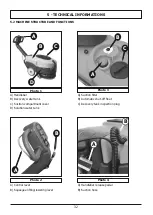
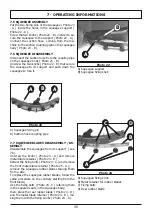
tion lever ( Photo 2 - A )
.
- Switch ON the suction motor switch ( Photo 5 - B
).
- Switch ON the solenoid valve switch for solution
water outlet ( Photo 5 - C ).
- Open the solution water valve rotating the lever (
Photo 31, 32, 33 ).
- Lower the squeegee unit by using the lift/lower
lever ( Photo 2 - B ).
- Wash the floor moving forward slowly, pulling the
brush operation lever ( Photo 2 - A ) to start the
brush rotation and the solution water outlet; re-
leasing the lever the brush rotation will stop after
few seconds.
(
!
)
Remember to lift the squeegee before driving
reverse to avoid damaging it.
Model “KF36BBC”
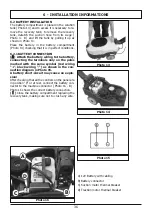
- Verify that the battery connector placed under the
recovery tank ( Photo 16 - B ) is connected.
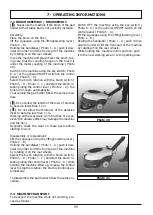
- Put the ignition key ( Photo 8 - A ) in and turn ON
the machine.
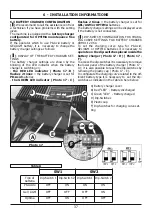
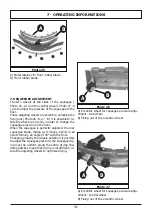
- On the on-board battery charger ( Photo 19 )
check the battery charge status ( Photo 18 ).
- Switch ON the brush motor switch ( Photo 7 - C )
(
!
) The brush will start the rotation only
when the operator will pull the brush opera-
tion lever ( Photo 2 - A )
.
- Switch ON the suction motor switch ( Photo 7 - A
).
- Switch ON the solenoid valve switch for solution
water outlet ( Photo 7 -B ).
- Open the solution water valve rotating the lever (
Photo 31, 32, 33 )
- Lower the squeegee unit by using the lift/lower
lever ( Photo 2 - B ).
- Wash the floor moving forward slowly, pulling the
brush operation lever ( Photo 2 - A ) to start the
brush rotation and the solution water outlet; re-
leasing the lever the brush rotation will stop after
few seconds.
(
!
)
Remember to lift the squeegee before driving
reverse to avoid damaging it.
7.13 WORK METHOD
7.13.1 PREPARATION AND WARNINGS
Remove any loose solid residue from the surface to
be treated (using suitable tools, such as vacuum
cleaners, sweepers, etc.). It this is not done, the
solid dirt might prevent the squeegee from operat-
ing correctly, reducing drying efficiency.
Only trained personnel can drive this machine.
7.13.2 BATTERY CHARGE LEVEL CONTROLS
The sequence of lights of the battery charge control
( Photo 18 - C, B, A ) shows the battery dischar-
ging. When the red light turns on ( Photo 18 - A ),
turn off the brush motor, close the detergent solu-
tion outlet, finish drying the small residual moisture
and go to the battery charging area to charge the
battery.
(
!
) The battery may be irreparably damaged
if the residual charge level drops too low (see
the battery operating manual). Do not force
the battery discharge beyond the safety lim-
its, turning the key off and on or in any other
manner.
7.13.3 DIRECT SCRUBBING OR FOR
SLIGHTLY DIRTY SURFACES
Scrubbing and drying in a single pass.
Prepare the machine as previously described and
use it as described in paragraph 7.12 .
(
☞
)
Never use the machine without the detergent
solution: the floor might be damaged.
7.13.4 INDIRECT SCRUBBING OR FOR VERY
DIRTY SURFACES
Scrubbing and drying in various passes.
Prepare the machine as previously described.
First set of operations:
Wash the floor as described in paragraph 7.11 with-
out drying the floor
Allow the detergent solution to work on the
dirty floor according to what is indicated in
the information relative to the detergent
used.
Second set of operations:
Proceed as explained in the previous “Direct Wash-
ing” paragraph (7.13.3) to also proceed with dry-
ing the floor.
(
☞
)
Never use the machine without the detergent
solution: the floor might be damaged.
7.13.5 POST-SCRUBBING OPERATIONS
Close the detergent solution outlet.
After having completely dried any traces of water
on the surface, wait a few seconds and then lift the
squeegee and turn off the suction motor.
Move to a suitable location to drain the tanks;
empty and clean the tanks (see 7.10).
7 - OPERATING INFORMATIONS
Содержание KF36BBC
Страница 2: ......
Страница 3: ...2 ESPAÑOL PAG 3 E ENGLISH PAG 26 GB ...
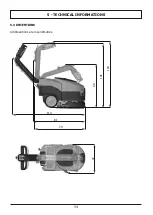
Страница 35: ...34 69 101 79 114 47 5 3 DIMENTIONS All dimentions are in centimetres 104 81 5 TECHNICAL INFORMATIONS ...
Страница 52: ......

