background image


Knives   are   sharpened   by   grinding   in   two   stages   -­‐   coarse   grinding,   then   fine.   At   each   stage,   most   knives   are   
sharpened   on   both   sides,   but   some   must   be   sharpened   on   only   one   side,   which   is   readily   determined   by   
examining   the   knife;   the   instructions   below   are   for   knives   that   are   sharpened   on   both   sides   
   
The   left   hand   slots   are   used   to   sharpen   the   right   hand   side   of   the   knife   blade   and   the   right   hand   slots   are   
used   to   sharpen   the   left   hand   side   of   the   knife   blade.   
   
Until   you   are   familiar   and   comfortable   using   the   knife   sharpener,   it   is   recommended   that   you   practise   the   
appropriate   sharpening   technique   described   below   with   the   knife   sharpener   switched   off.   After   this,   start   
the   knife   sharpener   as   described   in   the   following   steps,   then   proceed   as   described   under   Knife       
Sharpening,   Scissor   Sharpening,   or   Screwdriver   Restoring,   as   required.   
-­‐   Insert   the   Mains   Plug   into   a   mains   socket   and   switch   on   the   socket.   
-­‐   Set   the   ON/OFF   (I/0)   switch   of   the   sharpener   to   the   ON   position;   the   switch   will   illuminate   and   the   
grinding   wheels   will   revolve.   
   

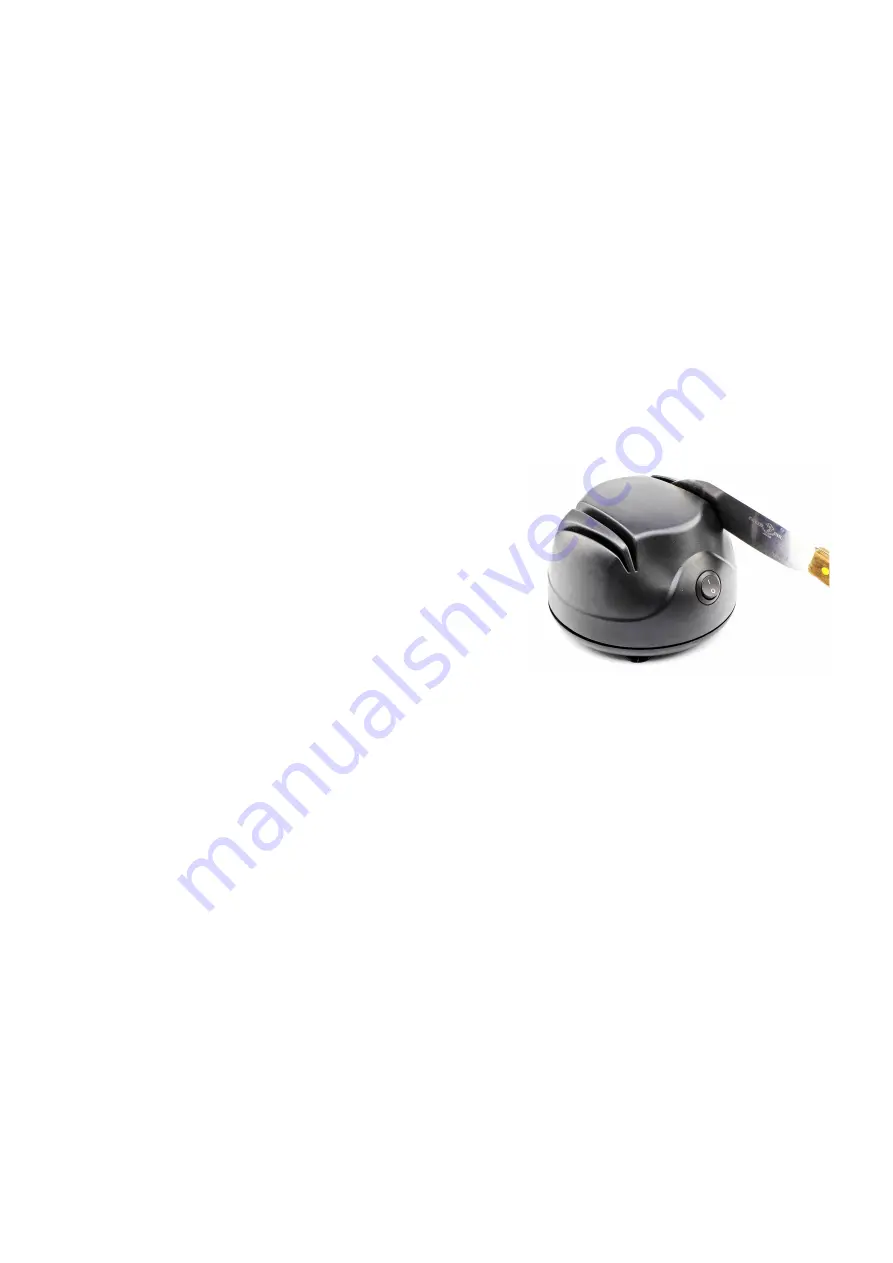
Knife   sharpening   

   
Knife   sharpening   is   performed   in   two   stages   -­‐   a   coarse   grind,   
followed   by   a   fine   grind,   alternating   between   one   side   of   the   
knife,   then   the   other,   and   repeating   three   times,   at   each   stage.   
The   grinding   technique,   used   at   both   stages,   is   described   in   
steps   A   and   B.   The   sequence   to   follow   is   detailed   in   steps   1   to   7.   
   
A.   With   the   sharpener   switched   on,   insert   the   knife   blade   into   
one   of   the   knife   slots,   keeping   the   blade   sufficiently   high   in   the   
slot   to   avoid   contact   with   the   grinding   wheel   and   ensuring   that   
the   cutting   edge   of   the   blade   is   pushed   fully   into   the   slot.   
   
B.   In   a   single   motion,   move   the   knife   blade   downwards   into   the   slot,   until   you   feel   the   blade   is   in   good   
contact   with   the   spinning   grinding   wheel,   then   steadily   pull   the   entire   length   of   the   knife   blade   through   the   
slot   towards   you,   maintaining   a   constant   light   pressure.   
   
-­‐   The   rate   at   which   you   pull   the   knife   should   be   about   4cm   per   second,   so   a   20cm   blade   will   take   about   5   
seconds.   Do   not   pause   as   you   withdraw   the   knife.       
-­‐   If   the   knife   blade   has   a   curved   cutting   edge   near   its   end,   raise   the   handle   as   you   withdraw   the   end   of   the   
blade,   so   as   to   keep   the   cutting   edge   in   line   with   the   slot.   
   
1.   Grind   one   side   of   the   knife   using   one   of   the   Coarse   Grind   Knife   Slots,   as   described   in   A   and   B.   
2.   Repeat   for   the   other   side   of   the   knife   in   the   other   Coarse   Grind   Knife   Slot.   
3.   Repeat   steps   1   and   2   two   more   times.   
4.   Grind   one   side   of   the   knife   using   one   of   the   Fine   Grind   Knife   Slots,   as   described   in   A   and   B.   
5.   Repeat   for   the   other   side   of   the   knife   in   the   other   Fine   Grind   Knife   Slot       
6.   Repeat   steps   4   and   5   two   more   times.   
7.   Set   the   ON/OFF   Switch   to   the   OFF   position,   to   switch   the   sharpener   off.   
   
If   the   knife   blade   has   burrs   after   you   have   performed   the   process   described   in   steps   1   to   7   of   Knife   
Sharpening,   you   can   hone   the   blade   manually,   as   follows:   
   
1.   With   the   sharpener   switched   off,   insert   the   knife   into   the   left   hand   Fine   Grind   Knife   Slot,   ensuring   that   
the   cutting   edge   of   the   blade   is   pushed   fully   forward   into   the   slot.   
2.   Move   the   knife   downwards,   so   that   it   is   firmly   in   contact   with   the   stationary   grinding   wheel,   then   pull   it   
out   slowly   towards   you,   maintaining   firm   contact   with   the   wheel.   

Содержание 36551

Страница 1: ...E SHARPENER MODELO Nº 36551 AMOLADOR ELÉTRICO DE FACAS 220 240V 50 60Hz 60W MANUAL DE INSTRUCCIONES INSTRUCTION MANUAL MANUAL DE INSTRUÇÕES ANTES DE USAR LEA ATENTAMENTE ESTE MANUAL PLEASE READ CAREFULLY THIS MANUAL BEFORE USE POR FAVOR LEIA ATENTAMENTE ESTE MANUAL ANTES DE USAR ...

Страница 2: ...tar un peligro El aparato no está previsto para su operación por medio de un temporizador externo o un sistema de control remoto separado Solo el conector apropiado debe ser usado Para evitar descargas eléctricas no coloque esta unidad en agua u otro líquido Vea las instrucciones para la limpieza No utilizar al aire libre o mientras esté en un lugar húmedo No permita que el cable cuelgue del borde...

Страница 3: ... la ranura para evitar el contacto con la muela y asegurándose de que el filo de la hoja es introducido completamente en la ranura B En un solo movimiento mueva la hoja del cuchillo hacia abajo en la ranura hasta que sienta que la hoja está en buen contacto con la muela de afilado a continuación tire de manera constante en toda la longitud de la hoja del cuchillo a través de la ranura hacia usted ...

Страница 4: ...jera 5 Ajuste el interruptor a la posición de apagado para terminar y apagar Restauración de destornilladores 1 Con el afilador encendido inserte la punta de un destornillador dañado en el agujero para destornilladores hasta que haga contacto con la muela de afilado Manténgalo en posición brevemente y luego retire el destornillador La acción de afilado es muy eficaz así que no use una presión inde...

Страница 5: ...ado contra defectos en materiales y mano de obra por un período de dos años a partir de la fecha de compra Bajo esta garantía el fabricante se compromete a reparar o reemplazar cualquier pieza que se encuentre defectuosa siempre que el producto sea devuelto a uno de nuestros centros de servicio autorizados Esta garantía solo es válida si el aparato ha sido utilizado según las instrucciones y siemp...

Страница 6: ...ce department or similar sector professionals This appliance is not intended to be operated by means of an external timer or separate remote control system Only the appropriate connector must be used To protect against electrical shock do not place this unit in water or other liquid See instructions for cleaning Do not use outdoors or while standing in a damp area Do not let cord hang over edge of...

Страница 7: ...d contact with the grinding wheel and ensuring that the cutting edge of the blade is pushed fully into the slot B In a single motion move the knife blade downwards into the slot until you feel the blade is in good contact with the spinning grinding wheel then steadily pull the entire length of the knife blade through the slot towards you maintaining a constant light pressure The rate at which you ...

Страница 8: ...he point of the damaged screwdriver blade into the Screwdriver Slot until it makes contact with the spinning grinding wheel Hold it in position briefly then withdraw the screwdriver The grinding action is very effective so do not use undue pressure or apply for longer than a second or two at a time Use only with flat bladed screwdrivers 2 Examine the screwdriver to determine if the damage has been...

Страница 9: ... of purchase Under this guarantee the manufacturer undertakes to repair or replace any parts to be defective providing the product is returned to one of our authorised service centres This guarantee is only valid if the appliance has been used in accordance with the instructions and provided that it has not been modified repaired or interfered with by any unauthorised person or damaged through mis...

Страница 10: ... com o fim de evitar qualquer perigo O aparelho não está previsto para a sua operação por meio de um temporizador externo ou um sistema de controle remoto separado Só o conector adequado deve ser usado Para evitar um choque elétrico não coloque esta unidade em água ou outro líquido Veja as instruções para a limpeza Não utilizar ao ar livre ou enquanto esteja num lugar húmido Não permita que o cabo...

Страница 11: ...emente alta na ranhura para evitar o contato com a mó e assegurando se de que o fio da folha é introduzido na ranhura por completo B Num movimento só mova a folha da faca para baixo na ranhura até que sinta que a folha esteja em contato firme com a mó de afiado a seguir puxe de maneira constante por toda a longitude da folha da faca a través da ranhura em direção a você mantendo uma ligeira pressã...

Страница 12: ...e fenda 1 Com o amolador aceso insira a ponta de uma chave de fenda danada no buraco para chaves de fenda até que faça contato com a mó de afiado Mantenha o nessa posição por um período breve de tempo e depois remova a chave de fenda A ação de afiado é muito eficaz assim que não use uma pressão indevida ou esteja mais de um segundo ou dois Use o só com chaves de fenda de ponta plana 2 Examine a ch...

Страница 13: ...oberto por uma garantia legal de 2 anos pelos defeitos dos materiais ou produção O produtor compromete se à reparação ou substituição dos produtos quando o consumidor devolve o produto a um centro autorizado Esta garantia só é válida quando o aparelho tem sido usado corretamente sem ser modificado ou reparado por uma pessoa não autorizada ou danado por um mal uso Esta garantia não se refere ao des...

Страница 14: ... ...

Страница 15: ... ...

Отзывы: