background image

Содержание Amplifier KAV-250a

Страница 1: ...Leader in Audio Engineering KAV 250a Stereo PowerAmplifier KAV 250a 3 Three Channel PowerAmplifier Instructionsfor Use v 99 2 Owner s Reference ...

Страница 2: ... or KAV 250a 3 Beforeconnectingthe KAV 250aor KAV 250a 3 makesure the amplifier is off andany output device suchas a preamplifier is in muteor stand bymode Make sure all cable terminations are of the highestquality andfree fromfrayedends short circuits or cold solderjoints Useonly oneset of inputs to the amplifier at a time After reconfiguring for MAT do not usemorethan oneinput at the same time A...

Страница 3: ... 250aJ3 AMPLIFIER TO YOUR SYSTEM Input and Output Connections OPTIONAL SYSTEMCONFIGURATIONS Multi Amp Throughput Bridged Operation Examplesof ConnectionScenarios AMPLIFIER OPERATION On Off and Operation AMPLIFIER TROUBLESHOOTING Howto Troubleshoot SystemNoise QUESTION AND ANSWER WARRANTY RETURN AUTHORIZATION PROCEDURE SPECIFICATIONS Page 1 1 2 3 3 5 7 10 12 14 14 15 15 20 22 25 25 26 26 27 28 29 3...

Страница 4: ...50aFront Panel The KAV 250aBack Panel The KAV 250a 3Front Panel The KAV 250a 3Back Panel Reconfiguring the KAV 250a for MAT or BridgedOperation FIGURE 6 Reconfiguring the KAV 250a 3for MAT or BridgedOperation Page 4 6 9 11 16 19 iv KAV 250aand KAV 250a 3Amplifiers ...

Страница 5: ...lifiers Pleaseread this information carefully A thoroughunderstanding of thesedetails helpsensuresatisfactory operation andlong life for your KAV 250a or KAV 250aJ3 amplifier andrelated system components Definition of Terms Multi AmpThroughput Aninternal connectionoption that sendsthe same musicsignal to all amplifier channels using onebalancedor single endedconnection MAT reducesinstallation comp...

Страница 6: ...ualandthe warrantyregistration card Grasp the undersideof the foamend caps that encase the amplifier andlift the amplifier straight out of the shippingbox Placethe amplifier in a safe location andremove the protective plastic wrapping Notes If anyof theseitemsare not includedin the shippingbox pleasecontactyour authorized Krell dealer distributor or Krell for assistance Save all packingmaterials I...

Страница 7: ...ion For the dimensions of your amplifier seeSpecifications on pages30 and31 Place the amplifier as close to the loudspeakers as possible andkeepthe speaker cable length to a minimum Speakercable addsimpedance to the load the amplifier mustdrive regardlessof the cable s gauge Krell amplifiers drive the lowest impedances with ease but long speakercables reducethe maximum powerthat is delivered to th...

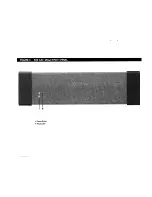
Страница 8: ...FIGURE 1 THE KAV 250a FRONTPANEL 1 2 1 Power Button 2 Power LED ...

Страница 9: ...igure 1 on page 4 1 Power Button Usethis button to turn the KAV 250a poweron andoff andalso to switch the 12 VDC output 12V trigger onandoff 2 Power LED Theblue powerLEDilluminates whenthe amplifier is on KAV 250aand KAV 250a 3Amplifiers 5 ...

Страница 10: ...nput 4 Left Input Bridged Single endedInputs 5 Right Input 6 Left Input Bridged Amplifier ChannelOutputs 7 Right Output Bridged 8 Left Output Bridged Fuses 9 AGC Fuses 10 Line Fuse RemoteControls 11 12 VDCRemotePower Out 12 12 VDCRemotePower In Power 13 IEC Power Connector ...

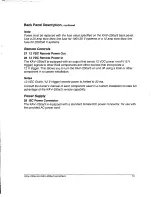
Страница 11: ...20 Amplifier Channel Outputs 7 OutputBridged 8 Output Bridged Theseare the right 7 andleft 8 KAV 250a amplifier channeloutputswith five way loudspeakerbinding posts Theloudspeakerbinding post terminals acceptspadelugs barewire banana plugs or pins Usethe red terminal for the positive connectionand the black terminal for the negativeconnection For information on loudspeaker connectionsfor bridged o...

Страница 12: ... This allows youto turn the KAV 250a onandoff usinga Krell or other component in a custominstallation Notes 12VDC Out in 12 V trigger remotepoweris limited to 30ma Consultthe owner smanualof anycomponent usedin a custom installation to take full advantage of the KAV 250aremotecapability PowerSupply 13 IEC Connector TheKAV 250a is equippedwith a standard female IEC powerconnector for use with the p...

Страница 13: ...FIGURE3 THE KAV 250a 3 FRONTPANEL 1415 14 PowerButton 15 Power LED ...

Страница 14: ...3 on page 9 14 Power Button Usethis button to turn the KAV 250a 3 poweron andoff andalso to switch the 12 VDC output 12V trigger onandoff 15 Power LED Theblue powerLEDilluminates whenthe amplifier is powered on 10 KAV 250aand KAV 250a 3Amplifiers ...

Страница 15: ...ight Input 17CenterInput 18 Left Input Single endedInputs 19 Right Input 20 CenterInput 21Left Input Amplifier ChannelOutputs 22 Right Output 23 Center Output 24 Left Output Fuses 25 AGCe Euses 26 Line Fuse RemoteControls 27 12 VDCRemotePower Out 28 12 VDCRemotePower tn Power 29 IEC PowerConnector ZOO0 ...

Страница 16: ...utput devices with single ended RCA connectors Amplifier Channel Outputs 22 23 24 Outputs Theseare the right 22 center 23 andleft 24 KAV 250a 3 amplifier channel outputs with five way loudspeakerbinding posts Theloudspeakerbinding post terminals acceptspadelugs barewire banana plugs or pins Usethe red terminal for the positive connectionandthe black terminal for the negativeconnection For informat...

Страница 17: ...igger signals to other Krell components andother devicesthat incorporate 12V trigger This allows youto turn the KAV 250aJ3 onandoff usinga Krell or other component in a custom installation Notes 12VDC Out In 12 V trigger remotepoweris limited to 30 ma Consultthe owner smanual of eachcomponent usedin a custominstallation to take full advantage of the KAV 250a 3remotecapability PowerSupply 29 IEC Po...

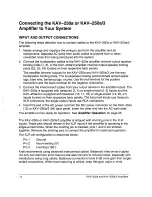
Страница 18: ...uts and KAV 250a 3 is equippedwith balanced 16 17 18 or single ended 19 20 inputs located on their respective backpanels Thebalanced inputs usethree pin XLRconnectors the single ended inputs use RCA connectors 4 Insert the end of the ACpowercord into the IEC powerconnectoron the KAV 250a 13 or KAV 250a 3 29 backpanel Insert the other endinto the ACwall outlet Theamplifier is nowreadyfor operation ...

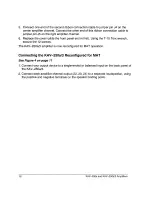
Страница 19: ...he cover locate andstay awareof the location of the powersupply Avoidmaking contactwith that areaof the amplifier 3 Remove jewelry Rings necklaces bracelets andother pieces of metal jewelry can conductan electrical charge Considerremovingthembefore attempting any reconfiguration 4 Always replacecover Make sure the amplifier s cover is properly replaced and securedby the 12 screwsbefore resumingope...

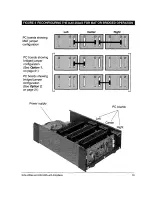
Страница 20: ...RING THE KAV 250a FORMATOR BRIDGED OPERATI tN PCboards showing MATjumper configuration Left Right PCboards showing bridged jumper configuration Left Right Powersupply PCboards Right 16 KAV 250a andKAV 250 a 3 Amplifiers ...

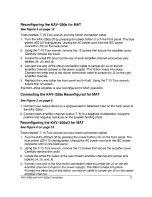
Страница 21: ...tion Connectingthe KAV 250aReconfigured for MAT See Figure 2 on page6 1 Connect your output device to a single endedor balancedinput onthe backpanelof the KAV 250a 2 Connect eachamplifier channeloutput 7 8 to a separateloudspeaker using the positive andnegativeterminals onthe speakerbinding posts Reconfiguring the KAV 250a 3for MAT SeeFigure 6 on page 19 Tools needed T 15 Torx wrenchand two ribbon...

Страница 22: ...st Usingthe T 15Torxwrench secure the 12 screws TheKAV 250a 3 amplifier is nowreconfigured for MAT operation Connecting the KAV 250a 3 Reconfigured for MAT SeeFigure 4 on page11 1 Connect your output device to a single endedor balancedinput on the backpanelof the KAV 250a 3 2 Connect eachamplifier channeloutput 22 23 24 to a separateloudspeaker using the positive andnegativeterminals onthe speaker...

Страница 23: ...ION PCboards showing MATjumper configuration PCboards showing bridged jumper configuration SeeOption 1 on page21 PCboards showing bridged jumper configuration SeeOption 2 on page21 Left Center Right Powersupply PCboards ht KAV 250a andKAV 250 a 3 Amplifiers 19 ...

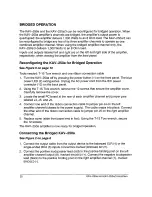
Страница 24: ... connector 13 onthe backpanel 2 Usingthe T 15Torxwrench remove the 12screws that securethe amplifier cover Carefullyremove the cover 3 Locate the smallPC boardat the rear of eachamplifier channel andjumper pins labeledJ4 J5 andJ6 4 Connect oneendof the ribbonconnection cableto jumper pin J4 onthe left amplifier channel closestto thepower supply Thecablesnaps into place Connect theotherendof therib...

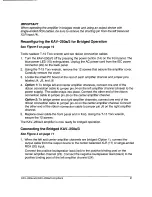
Страница 25: ...fier channel closest to the powersupply Thecable snapsinto place Connect the other endof the ribbon connectioncable to jumperpin J6 on the center amplifier channel Option2 Tobridge center andright amplifier channels connectoneendof the ribbon connectioncable to jumperpin J4 on the center amplifier channel Connect the other endof the ribbonconnectioncableto jumperpin J6 onthe right amplifier channe...

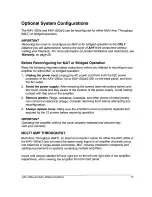
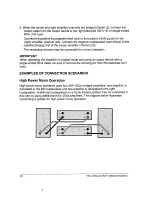
Страница 26: ...ation IMPORTANT When operating the amplifier in bridged mode andusing an output device with a single ended RCA cable be sure to removethe shorting pin from the balancedXLR input EXAMPLESOF CONNECTIONSCENARIOS High PowerMonoOperation High powermono operation usestwo KAV 250a bridged amplifiers one amplifier is dedicatedto the left loudspeaker andoneamplifier is dedicatedto the right loudspeaker Add...

Страница 27: ...n When the KAV 250a is reconfigured for MAT one channelof the amplifier powersthe Ioudspeaker shigh frequencyend andthe other channelpowersthe Ioudspeaker slow frequencyend This connectionscenariois usedonly with loudspeakers that feature twosets of binding posts For moreinformation consult the owner sreferencefor your loudspeakers Thediagrambelowillustrates connectinga systemfor power biamplifica...

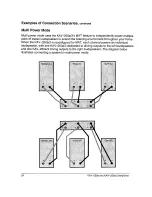
Страница 28: ...xtendthe listening environment throughout yourhome When the KAV 250a 3 is reconfiguredfor MAT eachchannelpowers anindividual loudspeaker with oneKAV 250a 3 dedicated to driving outputsto the left loudspeakers andoneKAV 250a 3 driving outputsto the right loudspeakers Thediagram below illustrates connecting a system for multi power mode 24 KAV 250aand KAV 250aJ3 Amplifiers ...

Страница 29: ...owered select anoutput device Decrease or increasethe volume control to the desiredlistening level 3 Beforeturning the systemoff muteor lower the output device volume Pressthe front panelpower buttonto turn the amplifier off It is now safeto turn off the rest of the system IMPORTANT Always turn off the amplifier before changing input connections andmuteor fully attenuate the preamplifier level whe...

Страница 30: ...ndconstruction 2 With the amplifier off remove the interconnect cables then pressthe KAV 250a powerbutton 1 or KAV 250a 3 powerbutton 14 to turn the amplifier 3 If the humdisappears pressthe power button againto turn the amplifier off and reinsert oneof the interconnectcables 4 Turnthe amplifier backon If the hum reappearswith oneor both interconnect cables inserted there maybea defective cable Ha...

Страница 31: ...f soundconstruction SeeHowto Troubleshoot SystemNoise on page26 If the connectionsandcables are sound youmaybe experiencinga groundloop This canoften beeasily eliminated PleasecontactyourauthorizedKrell dealer distributor or Krell for suggestions onhowto solve this problem Q When I connectthe amplifier to mysystemusing the single endedinputs a loud buzzcomes from myloudspeakers Is the amplifier br...

Страница 32: ...ryis yourresponsibility Return freight withinthe UnitedStates U S A is included in the warranty If youhavepurchased your Krell productoutsidethe U S A andwishto haveit servicedat the factory all freight and associated charges to the factory are your responsibility Krell will payreturnfreight to the U S A based freight for warder of yourchoice Freightandothercharges to ship the unit fromthe freight...

Страница 33: ...amage to this product during ship mentto the Krell factory andprepayall shipping charges Please see the Warrantypagein this manual concern ing liability for shipping damage and shipping charges This product may also be handdelivered if arrangements with the Service Department havebeenmade in advance Proof of pur chasewill berequiredfor warrantyvalida tion at the timeof hand delivery IMPORTANT Uset...

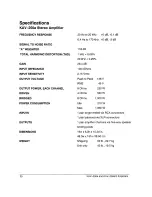
Страница 34: ...EIGHT 20 Hz to 20 kHz 0 dB 0 1 dB 0 4 Hz to 170 kHz 0 dB 3 dB 118dB 1 kHz 0 06 20 kHz 0 25 26 4 dB 100 kOhms 2 15 Vrms Peakto Peak RMS 8 Ohms 4 Ohms 8 Ohms Idle Max 138 V 49 V 250 W 500 W 1 000 W 210W 1 850 W 1 pair single endedvia RCA connectors 1 pair balancedvia XLRconnectors 1 pair amplifier channelsvia five way speaker binding posts 19wx 6 3hx 15 3din 48 3wx 16h x 38 9d cm Shipping 50 lb 22 7...

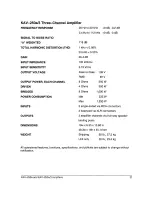
Страница 35: ... 0 dB 3 dB 118dB 1 kHz 0 06 20 kHz 0 25 26 4 dB 100 kOhms 2 15 Vrms Peak to Peak RMS 8 Ohms 4 Ohms 8 Ohms Idle Max 138 V 49 V 250 W 500 W 1 000 W 235 W 1 930 W 3 single ended via RCA connectors 3 balancedvia XLRconnectors 3 amplifier channelsvia five way speaker binding posts 19wx 6 3hx 15 8din 48 3w x 16h x 40 1d cm Shipping 60lb 27 2kg Unit only 52lb 23 5kg All operationalfeatures functions spec...

Страница 36: ...ries Inc 45 ConnairRoad Orange CT06477 3650USA TEL203 799 9954 FAX203 799 9796 E MAIL krell krellonline com WEBSITE http www krellonline corn KAV 250a Stereo PowerAmplifier KAV 250a 3 Three Channel Power Amplifier ...

Отзывы: