background image

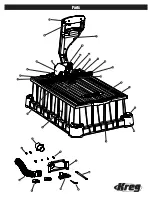
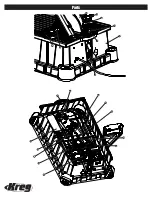
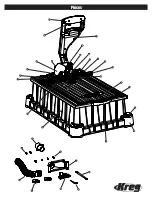
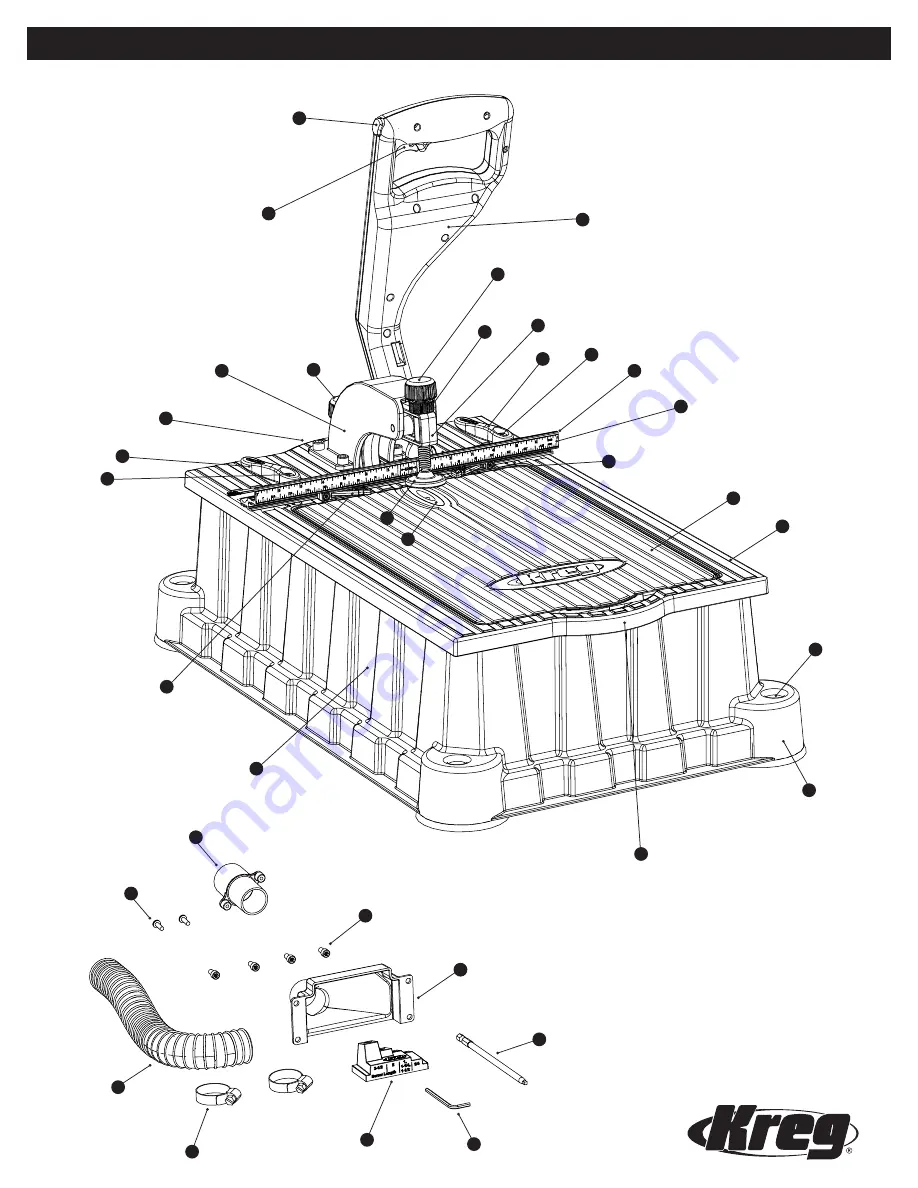
Parts

10

6

5

7

4

32

32

36

37

11

4

15

25

31

30

1

33

16

15

29

28

27

9

22

34

13

8

12

26

23

21

17

17

3

Содержание FOREMAN DB210

Страница 1: ...FOREMAN DB210 OWNER S MANUAL GUIDE D UTILISATION MANUAL DEL PROPIETARIO www kregtool com 800 447 8638 NK9348 Version 3 10 2018 DB210 ...

Страница 2: ...wer tool on A wrench or a key left attached to a rotating part of the power tool may result in personal injury f Do not overreach Keep proper footing and balance at all times This enables better control of the power tool in unexpected situations g Secure workpieces Use clamps or a vise to hold work when practical This is safer than using your hand and it frees both hands to operate the tool h Neve...

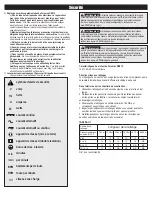
Страница 3: ...umber s varies depending on how often you ce your exposure to these chemicals ea and work with approved safety t masks that are specially designed to t with dust from power sanding and other construction activities g and wash exposed areas with dust to get into your mouth eyes or e absorption of harmful chemicals or respirator should be worn by all a The filter should be replaced daily or ulty bre...

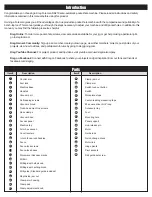
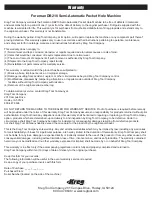
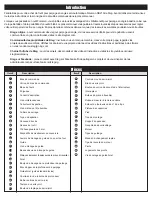
Страница 4: ...29 Congratulations on choosing a Kreg Foreman DB210 semi automatic pocket hole machine Please read all instructions and safety information contained in this manual before using this product Owning a Foreman gives you all the advantages of a true production pocket hole machine with the compactness and portability of a bench top tool This manual guides you through the steps necessary to adjust your ...

Страница 5: ...Parts 10 6 5 7 4 32 32 36 37 11 4 15 25 31 30 1 33 16 15 29 28 27 9 22 34 13 8 12 26 23 21 17 17 3 ...

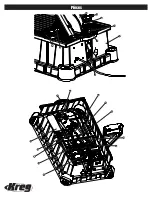
Страница 6: ...Parts 4 2 24 15 21 25 15 19 3 40 4 35 39 38 14 43 46 14 23 41 20 ...

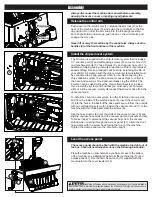
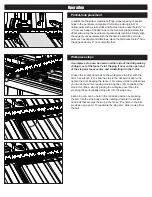
Страница 7: ...k of the base and secure it from the outside with two self tapping screws 6 Fasten the vacuum shroud 7 to the machine with four truss head machine screws 8 Slip the hose clamps 9 over the ends of the vacuum hose 10 and slip the vacuum hose ends onto the vacuum port and vacuum shroud To make it easy to disconnect the vacuum hose from the vacuum shroud when working through the access panel 11 orient...

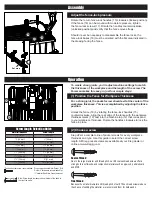
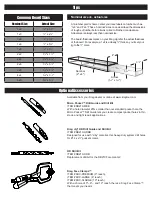
Страница 8: ... of the workpiece and the length of the screw The Foreman makes this easy in just four simple steps Screw Length Selection Guide Material Thickness Screw Length 1 2 13 mm 1 25 mm 5 8 16 mm 1 25 mm 3 4 19 mm 11 4 32 mm 7 8 22 mm 11 2 38 mm 1 25 mm 11 2 38 mm 11 8 29 mm 11 2 38 mm 11 4 32 mm 2 51 mm 13 8 35 mm 2 51 mm 11 2 38 mm 21 2 64 mm Kreg offers a complete line of pocket screws for every workp...

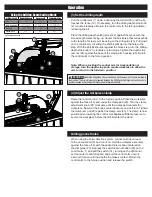
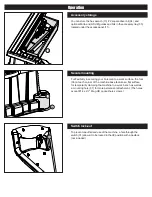
Страница 9: ...2 2 Standard HD 1 2 2 optional accessories When using the chip collection system connect a shop vacuum to the vacuum port 5 and turn it on Hold the workpiece securely against the fence 16 with the pocket hole location centered on the drill guide 23 Depress the switch lock out button 30 on the control arm 1 and pull the switch 31 turning on the drill motor Let the motor reach full speed and pull th...

Страница 10: ...uide by sliding it out of the fence T slot flipping it over so the open end of the stop arm faces center and reinstalling it in the T slot Loosen the socket head bolt on the workpiece stop 32 with the 3mm hex wrench 13 slide the stop to the desired location and tighten the bolt Keeping the fence 16 centered side to side allows you to use the center reading measuring tape 33 to position the stops O...

Страница 11: ... Micro and HD drill guides and bits in the accessory tray 35 located under the access panel 11 Accessory storage For flexibility in securing your Foreman to a work surface the foot 36 at each corner of the machine base features a flat surface for temporarily clamping the machine to a work bench as well as a mounting hole 37 for more permanent attachment The holes accept 14 x 21 2 Kreg HD pocket ho...

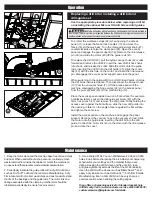
Страница 12: ...pad 26 Open the access panel and engage the panel support 38 Remove the link release pin 39 and slide the motor 40 off the guide rods 41 To replace the drill bit 20 pull the quick change chuck 42 collar forward and remove the drill bit Insert the new drill bit hex shank into chuck and release the collar Slide the motor onto the guide rods inserting the drill bit into the drill guide 23 Align the m...

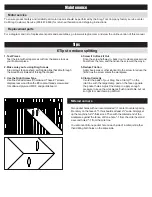
Страница 13: ... of this manual Replacement parts 1 Test Pieces Test the joint with scrap pieces cut from the same stock as your final workpiece 2 Make sure you re using Kreg Screws Kreg screws feature sharp self tapping tips that slice through the wood fibers instead of forcing them apart 3 Use the Right Screw Type Use fine thread screws in hardwood These 7 screws displace less wood than the 8 coarse thread scre...

Страница 14: ...l size is always less than nominal size The board thickness marks on your Kreg Jig refer the actual thickness of the board For example a 1x4 is actually 3 4 thick so you ll set your jig to the 3 4 mark Nominal size vs actual size HD Drill Bit ITEM DB210 HDB Replacement drill bit for the DB210 Foreman G2 Kreg Jig HD Drill Guide and Drill Bit ITEM DB210 HDBB Designed for use with 2 by material this ...

Страница 15: ... IA 50124 800 447 8638 DO NOT RETURN THE MACHINE TO THE DEALER FOR WARRANTY SERVICE Proof of purchase is required before remedy will be provided under the terms of this warranty Kreg Tool Company assumes no responsibility for products returned without prior authorization Kreg Tool Company obligations under this warranty shall be limited to repairing or replacing at Kreg Tool Company option product...

Страница 16: ...riques avec le doigt sur l interrupteur ou lorsqu ils sont branchés et sous tension augmente les risques d accident e Retirez toutes les clés de réglage de l outil électrique avant de mettre celui ci en marche Une clé de réglage oubliée sur un élément rotatif peut occasionner des blessures graves f Ne vous étirez pas pour étendre votre portée Gardez une posture sécuritaire et un bon équilibre en t...

Страница 17: ...afety equipment such as those dust masks that are specially designed to filter out microscopic particles Avoid prolonged contact with dust from power sanding sawing grinding drilling and other construction activities Wear protective clothing and wash exposed areas with soap and water Allowing dust to get into your mouth eyes or lay on the skin may promote absorption of harmful chemicals WARNING A ...

Страница 18: ...31 38 37 36 35 34 33 32 39 21 22 23 24 25 26 27 29 Félicitations pour votre achat de l outil pour perçage en angle semi automatique Foreman DB210 de Kreg Avant d utiliser cet article lisez toutes les instructions et les consignes de sécurités contenues dans le présent manuel Lorsque vous possédez un outil Foreman vous profitez de tous les avantages d un véritable outil pour perçage en angle indust...

Страница 19: ...Pièces 10 6 5 7 4 32 32 36 37 11 4 15 25 31 30 1 33 16 15 29 28 27 9 22 34 13 8 12 26 23 21 17 17 3 ...

Страница 20: ...Pièces 4 2 24 15 21 25 15 19 3 40 4 35 39 38 14 43 46 14 23 41 20 ...

Страница 21: ... vous permet de percer plus rapidement et de réduire la chaleur prolongeant ainsi la durée de vie de votre foret Un appareil Foreman muni du système de nettoyage des copeaux doit être raccordé à un aspirateur d atelier lorsque vous l utilisez Si vous ne raccordez pas le système de nettoyage des copeaux à un aspirateur d atelier les copeaux s accumuleront dans le tuyau et dans le collecteur d aspir...

Страница 22: ... quatre étapes seulement Guide de sélection des vis Épaisseur du matériau Longueur de la vis 12 7 mm 1 2 po 25 4 mm 1 po 15 87 mm 5 8 po 25 4 mm 1 po 19 05 mm 3 4 po 31 75 mm 11 4 po 22 22 mm 7 8 po 38 1 mm 11 2 po 25 4 mm 1 po 38 1 mm 11 2 po 28 57 mm 11 8 po 38 1 mm 11 2 po 31 75 mm 11 4 po 50 8 mm 2 po 34 92 mm 13 8 po 50 8 mm 2 po 38 1 mm 11 2 po 63 5 mm 21 2 po La longueur de la vis est calcu...

Страница 23: ...andard et HD 1 1 2 po 2 1 2po 2 1 2po Accessoires en option Quand vous utilisez le dispositif de nettoyage des copeaux branchez un aspirateur d atelier sur le conduit d aspiration 5 et mettez le en marche Maintenez solidement la pièce à travailler contre le guide 16 en gardant l emplacement du trou en angle centré sur le guide foret 23 Appuyez sur le bouton de verrouillage de l interrupteur 30 sit...

Страница 24: ...é du guide foret en la faisant glisser hors de la fente en T du guide en l inversant de manière à ce que le bras de butée soit face au centre et en la réinstallant dans la fente en T Desserrez le boulon à tête creuse de la butée de pièce 32 à l aide de la clé hexagonale de 3 mm 13 glissez la butée jusqu à l emplacement désiré et serrez le boulon Gardez le guide 16 centré bord à bord cela vous perm...

Страница 25: ...o et HD optionnels dans le plateau à accessoires 35 situé sous le panneau d accès 11 Rangement pour accessoires Afin de vous offrir des options de fixation à une surface de travail les pieds 36 situés à chaque coin de la base de l outil Foreman comprennent une surface plane vous permettant de fixer temporairement l outil à un établi et un trou de montage 37 pour une fixation permanente Vous pouvez...

Страница 26: ...aire des aiguilles d une montre pour relever le tampon du serre joint 26 Ouvrez le panneau d accès et enclenchez le support de panneau 38 Retirez la goupille de déverrouillage 39 et glissez le moteur 40 hors des tiges de guidage 41 Pour remplacer le foret 20 tirez le mandrin à changement rapide 42 vers l avant et retirez le foret Insérez la tige hexagonale du nouveau foret dans le mandrin et relâc...

Страница 27: ... Testez le joint à l aide de retailles du même matériau que celui de votre pièce à travailler 2 Assurez vous d utiliser des vis Kreg Les vis Kreg sont munies de bouts pointus et autotaraudeurs qui tranchent les fibres du bois au ieu de les séparer de force 3 Utilisez le bon type de vis Utilisez des vis à filet fin pour le bois franc Ces vis nº 7 déplacent moins de bois que les vis à filet normal n...

Страница 28: ...a dimension réelle Les dimensions réelles sont toujours plus petites que les dimensions nominales Les marques pour mesurer l épaisseur de la planche sur votre Kreg Jig sont celles de l épaisseur réelle de la planche Par exemple une planche 1 x 4 a en fait une épaisseur de 3 4 po Vous devez alors régler votre gabarit à la marque 3 4 Dimensions nominales et dimensions réelles Foret HD ARTICLE DB210 ...

Страница 29: ...Kreg Tool Company Kreg Tool Company 201 Campus Drive Huxley IA 50124 800 447 8638 NE RETOURNEZ PAS L OUTIL AU DÉTAILLANT POUR LE SERVICE AU TITRE DE LA GARANTIE Une preuve d achat est nécessaire pour obtenir une réparation conformément aux conditions de la présente garantie Kreg Tool Company n est aucunement responsable des produits retournés sans autorisation préalable Les obligations de Kreg Too...

Страница 30: ...enga una posición y un equilibrio adecuados en todo momento Esto permite un mejor control de la herramienta eléctrica en situaciones inesperadas g Asegure las piezas de trabajo Use abrazaderas o una prensa para sostener la pieza de trabajo cuando resulte práctico Es más seguro que usar las manos y de este modo ambas manos quedan libres para operar la herramienta h No se pare sobre la máquina Si la...

Страница 31: ...ecially designed to filter out microscopic particles Avoid prolonged contact with dust from power sanding sawing grinding drilling and other construction activities Wear protective clothing and wash exposed areas with soap and water Allowing dust to get into your mouth eyes or lay on the skin may promote absorption of harmful chemicals WARNING A dust mask or respirator should be worn by all person...

Страница 32: ...o Receptáculos giratorios Tornillo de fijación de la guía del taladro 18 artículo Descripción 20 19 28 31 38 37 36 35 34 33 32 39 21 22 23 24 25 26 27 29 Felicitaciones por haber elegido la máquina para cavidades ocultas semiautomática Kreg Foreman DB210 Lea toda la información sobre seguridad y las instrucciones incluidas en este manual antes de utilizar este producto Una Foreman le proporciona t...

Страница 33: ...Piezas 10 6 5 7 4 32 32 36 37 11 4 15 25 31 30 1 33 16 15 29 28 27 9 22 34 13 8 12 26 23 21 17 17 3 ...

Страница 34: ...Piezas 4 2 24 15 21 25 15 19 3 40 4 35 39 38 14 43 46 14 23 41 20 ...

Страница 35: ...iración 5 en el orificio en la parte posterior de la base y asegúrelo desde afuera con dos tornillos autorroscantes 6 Sujete la cubierta de aspiración 7 a la máquina con cuatro tornillos con cabeza en cruz 8 Deslice las abrazaderas de manguera 9 sobre los extremos de la manguera de la aspiradora 10 y deslice los extremos de la manguera en el puerto de aspiración y la cubierta de aspiración Para fa...

Страница 36: ... trabajo y el largo del tornillo La máquina Foreman le permite hacerlo fácilmente en solo cuatro pasos sencillos Guía de selección de tornillos Grosor del material Largo del tornillo 1 2 13 mm 1 25 mm 5 8 16 mm 1 25 mm 3 4 19 mm 11 4 32 mm 7 8 22 mm 11 2 38 mm 1 25 mm 11 2 38 mm 11 8 29 mm 11 2 38 mm 11 4 32 mm 2 51 mm 13 8 35 mm 2 51 mm 11 2 38 mm 21 2 64 mm El largo del tornillo se mide desde la...

Страница 37: ...s opcionales Cuando use el sistema de recolección de astillas conecte una aspiradora industrial al puerto de aspiración 5 y enciéndala Sostenga la pieza de trabajo de manera segura contra la regla 16 con las ubicaciones de las cavidades ocultas centradas en la guía de taladrado 23 Presione el botón de bloqueo del interruptor 30 del brazo de control 1 y jale del interruptor 31 para encender el moto...

Страница 38: ...era de los lados de la guía de taladrado si se desliza hacia afuera de la ranura en T de la regla y se voltea para que el extremo abierto del brazo de tope esté orientado hacia el centro y se vuelve a instalar en la ranura en T Afloje el perno con cabeza de dado del tope de la pieza de trabajo 32 con la llave hexagonal de 3 mm 13 deslice el tope hacia la ubicación deseada y apriete el perno Manten...

Страница 39: ...drado micro y HD opcionales en la bandeja para accesorios 35 ubicada debajo del panel de acceso 11 Almacenaje de accesorios Para que tenga flexibilidad al fijar su máquina Foreman a una superficie de trabajo las patas 36 de cada esquina de la base de la máquina poseen una superficie plana para fijar temporalmente la máquina a una mesa de trabajo así como un orificio de montaje 37 para una fijación...

Страница 40: ...panel de acceso y active el soporte del panel 38 Retire el pasador de liberación del enlace 39 y deslice el motor 40 fuera de las varillas de guía 41 Para reemplazar la broca para taladro 20 mueva el anillo del portabrocas de cambio rápido hacia delante y retire la broca para taladro Inserte la nueva broca para taladro con vástago hexagonal en el portabrocas y libere el anillo Deslice el motor hac...

Страница 41: ...as Pruebe la junta con piezas de desecho cortadas del mismo material de la pieza de trabajo final 2 Asegúrese de usar tornillos Kreg Los tornillos Kreg tienen puntas afiladas y autorroscantes que cortan las fibras de la madera en vez de rasgarlas 3 Use el tipo de tornillo adecuado Use tornillos de rosca fina para madera dura Estos tornillos 7 cortan menos madera que los tornillos de rosca gruesa 8...

Страница 42: ...rosor de la tabla en la plantilla Kreg se refieren al grosor real de la tabla Por ejemplo una madera de 1x4 tiene en verdad 3 4 de grosor por lo que debe ajustar la plantilla en la marca de 3 4 Tamaño nominal vs tamaño real Broca para taladro HD ARTÍCULO DB210 HDB Broca para taladro de repuesto para la máquina DB210 Foreman G2 Guía de taladro y broca para taladro HD Kreg Jig ARTÍCULO DB210 HDBB Di...

Страница 43: ...mpany Kreg Tool Company 201 Campus Drive Huxley IA 50124 800 447 8638 NO DEVUELVA LA MÁQUINA AL DISTRIBUIDOR PARA EL SERVICIO DE GARANTÍA Se exigirá una prueba de compra antes de proporcionar soluciones según los términos de esta garantía Kreg Tool Company no asume ninguna responsabilidad por productos devueltos sin autorización previa La responsabilidad de Kreg Tool Company según esta garantía se...

Страница 44: ...ias de construcción de proyectos Puede ayudar compartiendo su retroalimentación en www kregtool com feedback Solo toma un par de minutos y nos estará ayudando a crear productos y brindar un soporte que sirva mejor a sus necesidades PARLEZ NOUS DE VOTRE EXPÉRIENCE VOTRE OPINION EST IMPORTANTE POUR NOUS Nous cherchons toujours à améliorer les produits Kreg et à nous assurer que vous soyez satisfait ...

Отзывы: