


Kramer Electronics Ltd.
VIA Capmus², VIA Campus² PLUS
– For Installer: Connecting VIA Capmus², VIA Campus² PLUS
11
For Installer: Connecting VIA
Capmus², VIA Campus² PLUS
Always switch off the power to each device before connecting it to your
VIA Capmus², VIA
Campus² PLUS
. After connecting your
VIA Capmus², VIA Campus² PLUS
, connect its
power and then switch on the power to each device.
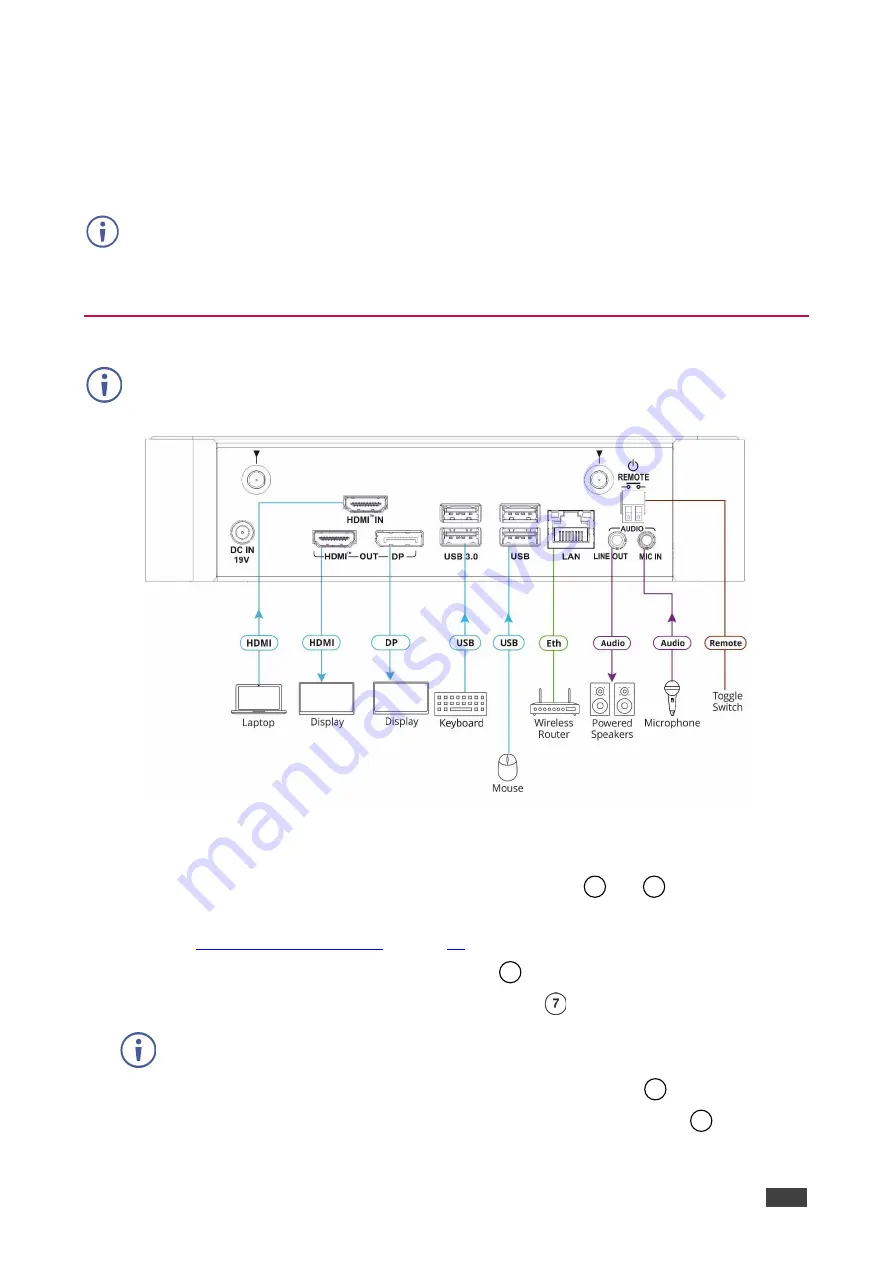
Connecting Device
For illustration purposes, the diagram shows connections for
VIA Campus² PLUS
. The
connections for
VIA Campus²
are the same, except for the HDMI IN connector.
Figure 7: Connecting to the
VIA Campus² PLUS
Rear Panel
To connect the VIA Capmus², VIA Campus² PLUS
as illustrated in (Figure 7):
1. Connect the keyboard and mouse to the USB Connectors
and
.
2. Connect one of the following to be used as the main display for the meeting
▪
HDMI display to the HDMI OUT Connector
.
▪
DisplayPort display to the DisplayPort Connector
.
A touchscreen display is best for annotation.
3. Connect a laptop or other HDMI source to the HDMI IN Connector
.
4. Connect a Local Area Network (LAN) cable to the LAN RJ-45 Connector
for
connection to your network.
8
9
5
6
10


