background image

KRAMER:  SIMPLE CREATIVE TECHNOLOGY


Operating the VP-740HC via the OSD MENU Screen 


16 

8.1.2 

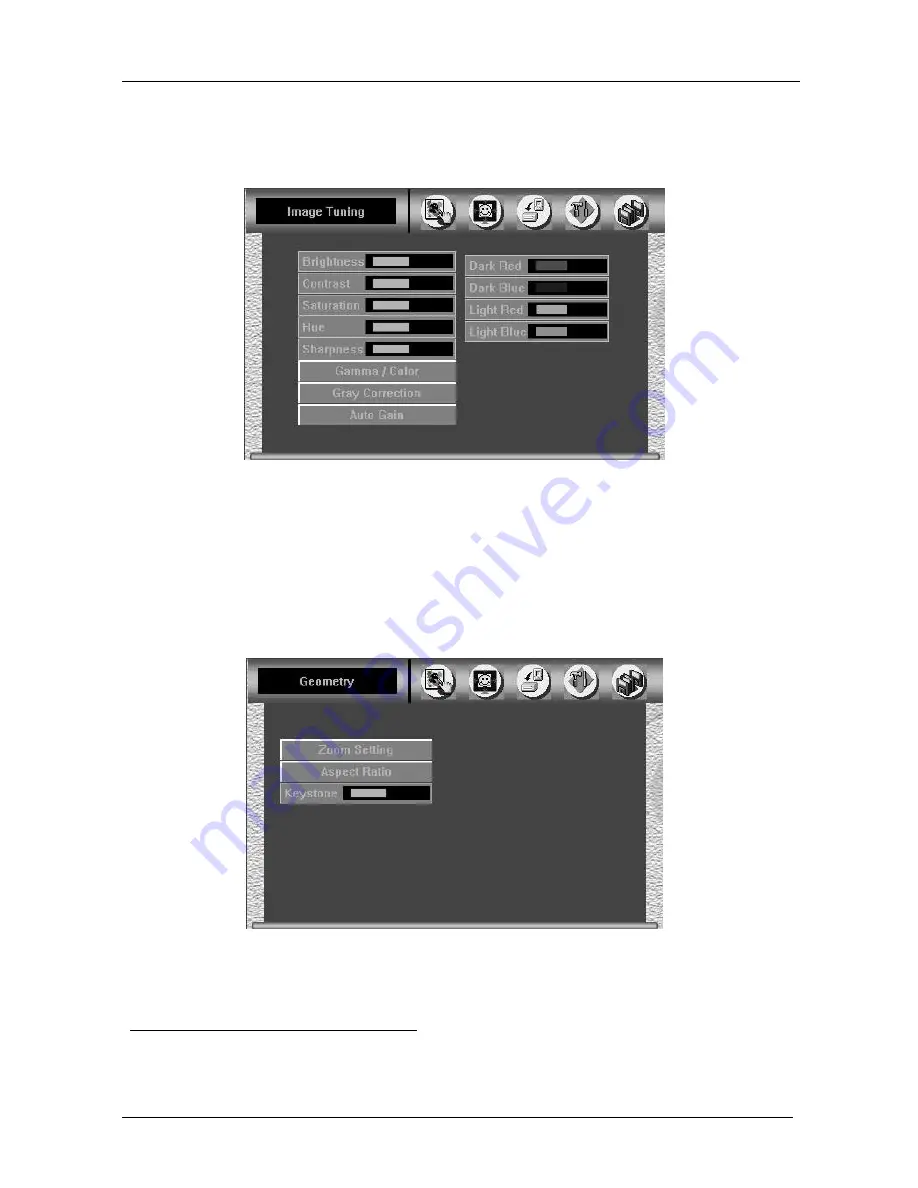
The Gray Correction Screen and Auto Gain 

Choosing Gray Correction

1

, lets you correct the gray color by adjusting the 

dark red, dark blue, light red, and light blue colors (see Figure 10). 


Figure 10: Gray Correction Screen 

Choosing the Auto Gain

2

 button lets you automatically adjust the brightness 

and contrast. 

8.2  Controlling the Geometry 

Figure 11 illustrates the Geometry Screen. 


Figure 11: Geometry Screen 


1 Adjustment range is between –32 and +32 (default is 0) 
2 Available for graphics sources only 

Содержание ScaleMagix 2 VP-740HC

Страница 1: ...Kramer Electronics Ltd USER MANUAL Model VP 740HC ScaleMagix 2...

Страница 2: ...he Gamma Color Screen 15 8 1 2 The Gray Correction Screen and Auto Gain 16 8 2 Controlling the Geometry 16 8 3 Selecting the Source 20 8 4 Configuring via the Utility Screens 20 8 4 1 Choosing the Vid...

Страница 3: ...20 Figure 20 Video Setting Utility Screen Composite or s Video Source 21 Figure 21 Video Setting Utility Screen 21 Figure 22 Video Standard Video Setting Utility Screen 22 Figure 23 PC Data Utility S...

Страница 4: ...Remote Transmitter Functions 33 Table 6 Technical Specifications of the VP 740HC ScaleMagix 2 34 Table 7 Technical Specifications of the VP 740HC Input Signal VGA 35 Table 8 Technical Specifications...

Страница 5: ...te control transmitter This user manual3 2 Getting Started We recommend that you Unpack the equipment carefully and save the original box and packaging materials for possible future shipment Review th...

Страница 6: ...KRAMER SIMPLE CREATIVE TECHNOLOGY Getting Started 2...

Страница 7: ...rsa Uses a universal power supply2 100 240 VAC with automatic voltage selection Includes a rear panel 12VDC OUT power connector that can supply 500mA to any machine with a 12VDC power input Can output...

Страница 8: ...3 16 9 transformation Supports firmware upgrade via RS 232 Includes non volatile memory that retains the last setting after switching the power off Includes a front panel LCD Control the VP 740HC Sca...

Страница 9: ...Your VP 740HC ScaleMagix 2 5 Figure 1 VP 740HC ScaleMagix 2...

Страница 10: ...ctor Connects to the RGBHV source 1 or component video source 1 18 Hs RCA Connector Connects to the RGBHV source 1 19 Comp 1 INPUTS Vs RCA Connector Connects to the RGBHV source 1 20 DVI OUTPUT Connec...

Страница 11: ...s Place the ears of the machine against the rack rails and insert the proper screws not provided through each of the four holes in the rack ears Note that Detachable rack ears can be removed for deskt...

Страница 12: ...r 5 Connect a DVI digital video interface graphics source to the DVI INPUT connector not HDCP compliant 6 Connect the five BNC OUTPUT connectors R Pr G Y B Pb Hs and Vs to a video acceptor for example...

Страница 13: ...ll modem adapter provided with the machine recommended Connect the RS 232 DB9 rear panel port on the VP 740HC unit to the Null modem adapter and connect the Null modem adapter with a 9 wire flat cable...

Страница 14: ...onent YC 1 YC 2 or AV 2 PIP source3 instead of the AV 1 You cannot choose VGA or DVI4 Choosing the VGA PIP source when the AV 1 input is selected will insert the VGA graphic source over the composite...

Страница 15: ...lit or User Define Horizontal and Vertical position placing it anywhere on the screen 7 3 Resizing the PIP To resize the PIP 1 4 1 9 1 16 1 25 Split or User Define When the Label is ON and the PIP is...

Страница 16: ...2 To lock the front panel completely none of the buttons are active Press and hold the MENU front panel OSD button or the MENU key on the infra red remote control transmitter for a few seconds until t...

Страница 17: ...switch seamlessly2 between each input3 that is connected to a source by pressing the front panel SOURCE button The OSD status appears superimposed over the top right corner of the screen for a few se...

Страница 18: ...to move to the previous level in the OSD screen Esc Press the up or down arrow buttons to select the menu icons and press ENTER to confirm the selection Use the right and left arrow buttons to increas...

Страница 19: ...Screen Figure 8 illustrates the Gamma1 Color Screen1 Figure 8 Gamma Color Screen Choosing Color Manager illustrated in Figure 8 lets you adjust the red green blue and yellow see Figure 9 Figure 9 Col...

Страница 20: ...y adjusting the dark red dark blue light red and light blue colors see Figure 10 Figure 10 Gray Correction Screen Choosing the Auto Gain2 button lets you automatically adjust the brightness and contra...

Страница 21: ...ct ratio usually 16 9 virtual wide anamorphic plus non linear scaling letterbox2 the vertical line is expanded to full screen3 it is assumed that there are two bands of black top and bottom of the scr...

Страница 22: ...LE CREATIVE TECHNOLOGY Operating the VP 740HC via the OSD MENU Screen 18 Figure 14 Geometry Aspect Ratio Screen Figure 15 Geometry Aspect Ratio Letterbox Pan Screen Figure 16 Geometry Aspect Ratio Nat...

Страница 23: ...ut Shift Screen You can set the user define1 according to your specific requirements Figure 18 Geometry Aspect Ratio User Define Screen You can adjust the Keystone1 to keep the picture rectangular acc...

Страница 24: ...u can select a source using the front panel SOURCE button which scans the inputs until it locates an active source or the appropriate infra red remote control transmitter keys 8 4 Configuring via the...

Страница 25: ...Delay4 The Video Setting menu also lets you select the Color Format Default RGB or YUV and the Film Mode5 Figure 21 Video Setting Utility Screen Figure 22 displays the Video Standard Video Setting 1...

Страница 26: ...NU Screen 22 Figure 22 Video Standard Video Setting Utility Screen 8 4 2 Choosing the PC Data Utility PC Data is automatically displayed when one of the following sources is selected Component VGA DVI...

Страница 27: ...ncy1 Phase2 Blue Offset3 and Red Offset3 Auto image automatically sets the H Position V Position Frequency and Phase 8 4 3 Choosing the PIP Settings Utility From the PIP Setting Utility screen you can...

Страница 28: ...P 740HC via the OSD MENU Screen 24 Figure 26 PIP Setting Utility On Off Screen Figure 27 PIP Source Setting Utility Screen Figure 28 PIP Size Setting Utility Screen 1 H Position and V Position have an...

Страница 29: ...D Setting Utility From the OSD Setting Utility screen you can set the OSD position3 time out4 and whether the label is displayed or not Figure 30 OSD Setting Utility 1 An immediate switch without chec...

Страница 30: ...4 the refresh rate see Figure 33 and a user definable output mode5 see Figure 34 and Table 3 1 Each adjustment requires confirmation select Confirm the setting and press Enter To cancel an adjustment...

Страница 31: ...W Horizontal sync pulse width HS Horizontal active start point HA Horizontal active region HP Horizontal polarity VT Vertical total VW Vertical sync pulse width VS Vertical active start point VA Verti...

Страница 32: ...reset your VP 740HC ScaleMagix 2 to its preset default setting Figure 36 Factory Reset Screen 8 4 9 Choosing Advanced From the Advanced screen select the blank color1 choose whether the start up logo...

Страница 33: ...e the SOURCE button on the front panel to select an active and connected source or to select an input using your IR remote transmitter Figure 38 Advanced Screen Lock Options The Mode Define option inc...

Страница 34: ...l Total H Start Horizontal active start point H Active Horizontal active region V Start Vertical active start point V Active Vertical active region Ch Pump Charge pump current Color Color format H Fre...

Страница 35: ...t Saturation Hue Sharpness Gamma Color and or Gray Correction and or alterations made via the aspect ratio settings Anamorphic Virtual Wide Letterbox Native 4 3 Output and or User Define You can recal...

Страница 36: ...KRAMER SIMPLE CREATIVE TECHNOLOGY Operating the VP 740HC via the OSD MENU Screen 32 Figure 42 Load Screen...

Страница 37: ...e resolution according to the specifications of the Plasma screen or projector 4 3 Output the width to height ratio is 4 3 User Define DVI VGA Cycles between selecting the DVI or VGA source PIP Select...

Страница 38: ...d Graphics VGA SVGA XGA SXGA UXGA Mac SUN SCANNING FREQUENCY Pixel clock 170MHz Horizontal 15 63 91kHz auto manual select Vertical 50 100Hz auto manual select FEATURES Display aspect ratio 16 9 4 3 An...

Страница 39: ...6l 1024x768 75 60 200l 1024x768 1024x768 85 68 677l 1152x864 1152x864 75 67 500l 1152x870 1152x870 75 68 700l 1152x900 66 61 846l 1152x900 1152x900 76 71 808l 1280x960 60 60 000l 1280x960 1280x960 85...

Страница 40: ...7001 1024x800 1024x800 84 70 8401 1024x768 60 48 363l 1024x768 70 56 476l 1024x768 75 60 200l 1024x768 1024x768 85 68 677l 1280x960 1280x960 60 60 000l 1280x720 1280x720 60 1280x1024 1280x1024 60 63 9...

Страница 41: ...400 85 37 92 800x600 60 37 879l 800x600 75 46 875l 800x600 800x600 85 53 674l 852x480 852x480 60 1024x768 60 48 363l 1024x768 75 60 200l 1024x768 1024x768 85 68 677l 1280x720 1280x720 60 1280x1024 60...

Страница 42: ...0 5 CR get current output resolution Z 10 5 2 CR current resolution is 1024x768 3 Y 0 35 CR Keypad Remote controller set Menu ON Off Z 0 35 CR command setting success Definition ASCII Code 0x20 CR Asc...

Страница 43: ...A Enter 0 20 N A Right 0 21 N A Down 0 22 N A Menu 0 23 N A Auto Gain 0 24 N A Source 1 Set 2 Get 0 32 32 Brightness 1 Set 2 Get 1 32 32 Contrast 1 Set 2 Get 2 32 32 Saturation 1 Set 2 Get 3 32 32 Hue...

Страница 44: ...KeyStone Angle 1 Set 2 Get 24 127 127 PC Data H Position 1 Set 2 Get 25 64 64 PC Data V Position 1 Set 2 Get 26 64 64 PC Data Frequency 1 Set 2 Get 27 16 16 PC Data Phase 1 Set 2 Get 28 32 32 PC Data...

Страница 45: ...75 10 400 3 Set 4 Get 1 0 4 Aspect Ratio Native 0 Left Up 1 Right UP 2 Center 3 Left Down 4 Right Down 3 Set 4 Get 2 0 7 Select Input Source 0 AV 1 1 AV 2 2 YC 1 3 YC 2 4 Component 1 5 Component 2 6 V...

Страница 46: ...Get 11 0 1 Advanced Setting Blank Color 0 Blue 1 Black 3 Set 4 Get 12 0 1 Advanced Setting Logo On Off 0 Off 1 On 3 Set 4 Get 13 0 15 Output Resolution 0 640x480 1 800x600 2 1024x768 3 1280x1024 4 16...

Страница 47: ...oad Gamma Color Presentation 5 8 N A Load Gamma Color Cinema 5 9 N A Load Gamma Color Setting1 5 10 N A Load Gamma Color Setting2 5 11 N A Load Gamma Color Setting3 5 12 N A Save Gamma Color Setting1...

Страница 48: ...is required the original dated invoice or a copy must be presented as proof of warranty coverage and should be included in any shipment of the product Please also include in any mailing a contact name...

Страница 49: ...or the latest information on our products and a list of Kramer distributors visit our Web site www kramerelectronics com where updates to this user manual may be found We welcome your questions commen...

Отзывы: