background image

7.3 Playing back a recording

51

7.3.4

To make a bookmark

You can mark favourite parts

of a recording by creating book-
marks, and then jump to them.

You can have up to 64 book-

marks. Bookmarks are stored

with the recording so that you

can use them again afterwards.

To make bookmarks, perform

the following steps during play-
back:

1. Press the

button to display the progress bar.

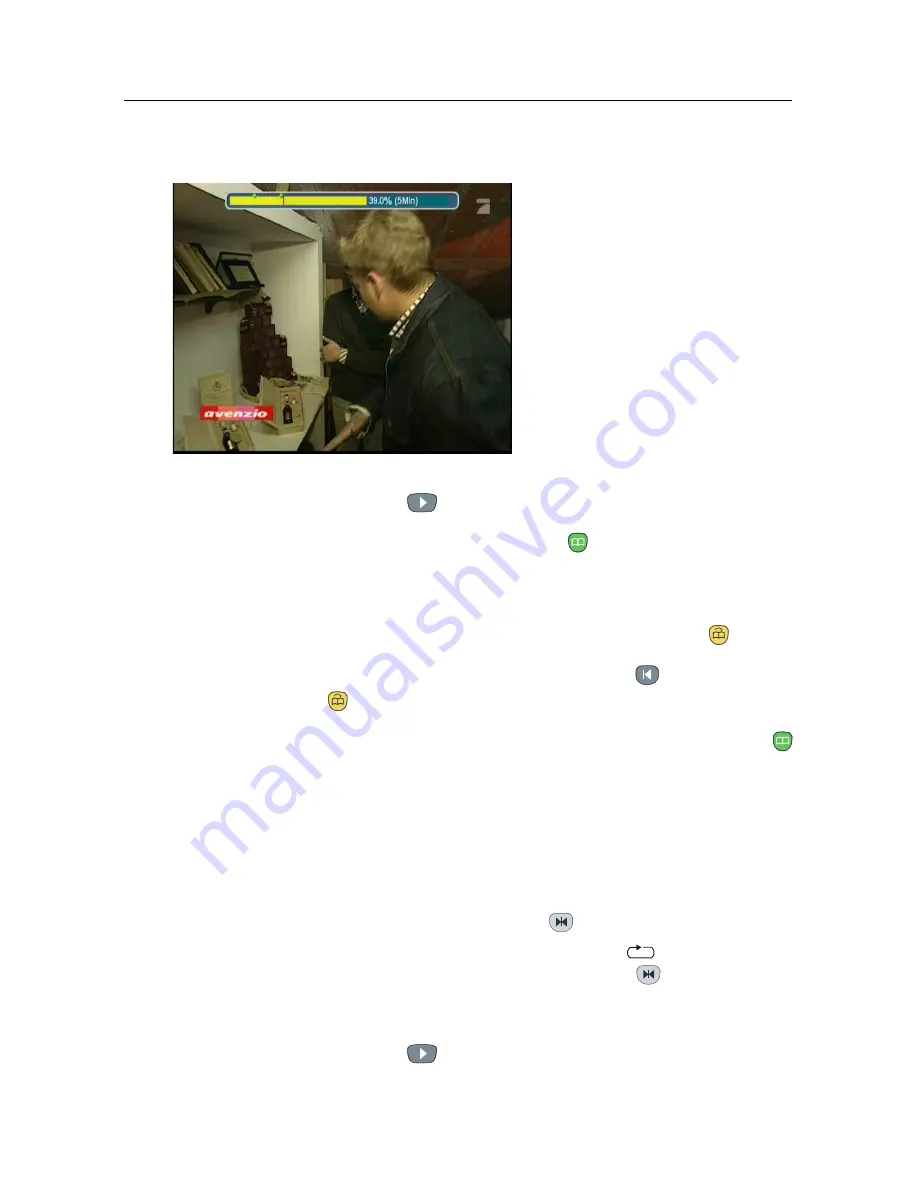
2. To add a bookmark, press the

button at a desired scene;

then you will see a small dot appear above the progress
bar like in the picture above.

3. To jump forward to next bookmark, press the

button.

4. To jump to first bookmark, press the

button then the

button.

5. To delete a bookmark, jump to it and then press the

button.

7.3.5

To play back a recording repeatedly

You can play back a recording repeatedly both in whole and in
part.

To play back in whole, press the

button when the progress

bar is hidden; then the repetition symbol (

) is displayed on

the information box. To cancel it, press the

button again.

To play back in part, perform the following steps:

1. Press the

button to display the progress bar.

Содержание TF 5300k

Страница 1: ...TF 5300k User Guide Digital Terrestrial Receiver Personal Video Recorder CONAX...

Страница 2: ......

Страница 3: ...nt The mains plug which is used as a disconnect device shall remain readily operable The lighting flash with arrowhead symbol within an equilateral triangle is intended to alert the user to the presen...

Страница 4: ...2 4 Connecting up your digital receiver 10 2 4 1 Connecting the antenna 11 2 4 2 Connecting to your television set 11 2 4 3 Connecting to your video cassette recorder 14 2 5 Inserting batteries in th...

Страница 5: ...2 1 The services list 27 5 2 2 The favourite services list 29 5 2 3 Viewing programme information 30 5 2 4 Selecting audio tracks 31 5 2 5 Selecting subtitle tracks 31 5 2 6 Viewing teletext 31 5 3 Vi...

Страница 6: ...8 7 2 6 To move a recording to another folder 48 7 3 Playing back a recording 49 7 3 1 To navigate using the progress bar 49 7 3 2 To play in slow motion 50 7 3 3 To play in fast motion 50 7 3 4 To ma...

Страница 7: ...requency However unlike analogue broadcasts digital broadcasts are not all as signed to their own frequencies instead multiple television broadcasts are transmitted through a single frequency The fre...

Страница 8: ...a special technical feature available on the TF 5300k You can pause the programme you are watching and resume it again at a later time Then you can quickly go to any part of the current programme by f...

Страница 9: ...ghts up while the digital receiver is in standby mode Front display displays the current time in standby mode and displays the current service in operation mode STANDBY button switches the digital rec...

Страница 10: ...See 3 2 6 for more details 4 switches the output of the TV SCART socket between the digital receiver and the device connected to the VCR SCART socket See 3 2 3 for more details 5 is used to set a slee...

Страница 11: ...t See 5 2 1 for more details It is also used to select a menu item 16 FAV displays the favourite lists 17 is used to select a subtitle track 18 EXIT is used to exit a menu or to hide on screen info 19...

Страница 12: ...used to display minify or hide the sub picture See 5 6 for information about picture in picture 31 is used to make a bookmark during playback or time shift 32 is used to jump to next bookmark position...

Страница 13: ...emote control unit Two batteries for the remote control AAA 1 5 V One loop cable to connect the first tuner with the second tuner One SCART cable One composite cable RCA cable A copy of this user guid...

Страница 14: ...se to heat emitting units or in direct sunlight as this will impair cooling Do not lay any objects such as magazines on the digi tal receiver When placed in a cabinet make sure there is a minimum spac...

Страница 15: ...O TV RF OUT ANT 2 1 3 5 8 10 2 4 6 11 12 9 7 Check what connections your television set has in comparison with the digital receiver 1 ANT 1 Terrestrial broadcasting signal input socket for the first t...

Страница 16: ...cket for the audio system Table 2 3 Connectors specifications VIDEO Composite video CVBS output AUDIO Left right audio output S VIDEO Super video S Video output TV CVBS S Video RGB YUV video output Le...

Страница 17: ...he RF LOOP 1 OUT connector to the ANT 2 connector NOTE However if you are in a weak signal area or are using a signal amplifier with more than one output you may achieve better results by connecting a...

Страница 18: ...s via S Video or Component connectors rather than SCART If you have such a television use an appropriate conversion ca ble to link the TV socket on the digital receiver to the matching socket on your...

Страница 19: ...lug one end of the cable into the AUDIO L white and AUDIO R red sockets on the digital re ceiver and plug the other end into the match ing sockets on your television or audio sys tem To enjoy Dolby di...

Страница 20: ...s a video cassette recorder through an auxiliary SCART connector You need to obtain a SCART cable to use the auxiliary SCART connector Plug one end of the cable into the VCR socket on the digital re c...

Страница 21: ...a mains socket Ensure that your television set is turned on so that you will be able to see the display from the digital receiver 2 6 1 Powering on and checking picture Now press the button in top lef...

Страница 22: ...track and of subtitle track Select the System Setting Lan guage Setting menu You should see a screen like the left figure Menu language The digital receiver supports many menu languages Dutch English...

Страница 23: ...y available language no subtitle will be displayed Apart from this setting you can select a subtitle track with the button See 5 2 5 for a detailed description Audio language Set the 1st Audio Languag...

Страница 24: ...n standard of your local area If you have a PAL television you have to set the TV Type option to PAL In this case if you switch to a service of the NTSC stan dard though it is unlikely to happen the d...

Страница 25: ...the RGB colour model provides the best video quality with little difference from the YUV colour model but the CVBS colour model does the least So RGB would be the most desirable option for this 3 2 3...

Страница 26: ...ures then will be reduced to fit to the width of the normal screen Otherwise to watch them in the shape like the right figure set it to Center extract Then wide screen pictures will be cut out on the...

Страница 27: ...Luxem bourg Netherlands New Zealand Norway Portugal Slovakia Slovenia Spain Sweden Switzerland Syria Yugoslavia PAL I Hong Kong Macao Republic of Ireland South Africa United Kingdom PAL K Czech Repub...

Страница 28: ...ehran GMT 4 00 Abu Dhabi Muscat Baku Tbilisi GMT 4 30 Kabul GMT 5 00 Ekaterinburg Islamabad Karachi Tashkent GMT 5 30 Bombay Calcutta Madras New Delhi GMT 6 00 Almaty Dhaka Colombo GMT 7 00 Bangkok Ha...

Страница 29: ...e Access Control menu displays a list of menus that you can lock If the Time Setting item is set to Locked you have to enter the per sonal identification number when accessing the Time Setting menu If...

Страница 30: ...ystem Setting menu and set the Info Box Position option as you desire Its available range is 10 to 3 lines The higher you set the option the lower the information box will be positioned 3 6 To turn on...

Страница 31: ...ee a screen like the left figure If you have an antenna booster you should set the Antenna Sup ply 5V option to On to supply power to it You should set the Search Mode option to Auto for the first tim...

Страница 32: ...to factory settings The digital receiver maintains the following data Services list Favourite list Timer list Preference settings You can reset all data of the digital receiver To do that select the...

Страница 33: ...on Press it again to restore the sound to previous level 5 2 Watching television To change services press the P or P button Pressing the button switches to the previously viewed service In ad dition y...

Страница 34: ...on Pressing the button displays the additional options with which you can do the following By setting the Show Provider option to On you can view service entries by groups of broadcasters To change th...

Страница 35: ...a highlight bar appears on its favourite services list Once you select a desired service with the OK button it will be presented Otherwise to select other group press the V button After you have selec...

Страница 36: ...amme classification symbol Programme summary Broadcasting time Current time In addition you might see the following symbols Subtitle symbol if subtitle tracks are provided on the current programme Tel...

Страница 37: ...title symbol will be marked on the infor mation box Pressing the button displays available subtitle tracks Once you select a subtitle track it will be displayed 5 2 6 Viewing teletext On some services...

Страница 38: ...the button To switch it back press the button again Pressing the button displays the programme guide in the form of spreadsheet To switch it back press the button again You can make a timer recording...

Страница 39: ...called time shifted tele vision Then you can skip com mercials until you catch up to the live broadcast In order to use the time shift feature the Time Shifting option must be set to Enable See 3 6 Wh...

Страница 40: ...e 7 1 5 To end time shift press the button The live pro gramme will be presented When the time shift feature is disabled and a pause is kept for more than 10 seconds the time shift feature will be ena...

Страница 41: ...e available services in the services list may be limited 4 Pressing the button moves the sub picture counter clockwise and pressing the button moves it clock wise 5 Pressing the SAT button swaps the m...

Страница 42: ...Favorites menu You should see a screen like the left figure There are three columns Group list left Favourites list centre Services list right The services list contains all available services whereas...

Страница 43: ...t it The high light bar then moves to the services list 2 To add a service to the selected group put the highlight bar on a desired service entry and press the OK button The selected service entry get...

Страница 44: ...buttons and vertically with the P and P buttons Press ing the OK button on a key en ters its letter in the input line To type a space select the Space key To type lower case letters or numerals selec...

Страница 45: ...ecord two different services while playing back a previously recorded programme You can record two different services while watching one of them using the time shift feature See 5 5 for the time shift...

Страница 46: ...ded CAUTION Do not move the digital receiver nor pull out the plug while it is running It may cause damage to recorded programmes Note that Topfield is not responsible for damages inflicted on files t...

Страница 47: ...e next programme is provided by the electronic programme guide the After this program and After next program options will be available Once the After this program option is selected the current record...

Страница 48: ...arted it is put on the recorded programme list even though it is not finished yet The recording file is named after its service name with a suffix of a number To view the recorded programme list press...

Страница 49: ...h you can specify a file name for the timer recording If you do not specify anything it will be named after the service name See 6 2 for how to use the on screen keyboard Once the Record Start option...

Страница 50: ...ns literally every day Every Weekend means Saturday and Sunday every week Weekly means one day every week Every Weekday means from Monday to Friday every week If your favourite programme is broadcaste...

Страница 51: ...n the same manner as making a new one To delete a timer event put the highlight bar on the entry you want to remove and press the button then you are asked for confirmation If you select Yes it will b...

Страница 52: ...mme See 5 5 for detailed description about the time shift feature While watching a programme with time shift you can record it by performing the following steps 1 Press the button to display the progr...

Страница 53: ...n make a new folder 7 2 1 To delete a recording To delete a recording put the highlight bar on it and press the button then you get asked for confirmation If you select Yes it will be deleted 7 2 2 To...

Страница 54: ...ht bar on a desired recording 2 Press the button to display the additional options 3 Select the Rename option and the on screen keyboard appears Change the name and save it See 6 2 for how to use the...

Страница 55: ...ring a playback you can enjoy the following tricks To see the detailed information about the currently played recording press the button then the information box appears and shows its file name playin...

Страница 56: ...in slow motion during a playback press the button If you press it repeatedly the playback speed changes in 3 steps 1 2 1 4 and 1 8 times To resume normal speed press the button 7 3 3 To play in fast m...

Страница 57: ...n you will see a small dot appear above the progress bar like in the picture above 3 To jump forward to next bookmark press the button 4 To jump to first bookmark press the button then the button 5 To...

Страница 58: ...ng steps 1 Press the button to display the list of recorded pro grammes 2 Select each desired recording with the button Once a recording is selected it gets numbered 3 Press the OK button to start pla...

Страница 59: ...in whole or in part during a playback by performing the following steps 1 Start playback of a recording you want 2 Move to a scene from which you want to start copy by holding down the or button 3 Pr...

Страница 60: ...E If a new hard disk drive is installed it must be formatted because the file system of the digital receiver is different from any of the personal computer You can neither record nor use time shift wi...

Страница 61: ...nstallation menu If there is a new one the System Soft ware Upgrade menu will become enabled If you select the System Software Upgrade menu the digital receiver will ask you whether to start firmware...

Страница 62: ...3 AUDIO L R 10 AUDIO R 13 Auto 25 Button 4 Center extract 20 Change PIN Code 23 Channel 26 Current Event 43 Cut 53 Date 44 Duration 41 44 DVB 1 Electronic Programme Guide 31 Every Day 44 Every Weekday...

Страница 63: ...0 14 21 RF Output 21 S VIDEO 10 12 S PDIF 10 13 Save 53 Search Mode 25 26 Service 43 44 Service Search 25 services list 27 Show Provider 28 Size 47 Sorting 47 Sound Mode 20 specifications 8 10 Start S...

Страница 64: ......

Страница 65: ......

Страница 66: ...either the retailer where they purchased this product or their local government office for details of where and how they can dispose this product for environmentally safe recycling Business users sho...

Отзывы: