INsTRUCTION
1
1-1
2-1
20 cm
W99.6 X L42 X H22.5mm
2-2
3-1
2
2
.5
m
m
4
2
m
m
99.6mm
2
o
-10~+60 C
Back light
DC 12V
Effective temperature range
Water proof
Meter size
Meter weight
JIS D 0203
+/- 85g
Over lean setting
Display range
Over rich setting
14.8~24.0
14.6~10.0
W99.6 X L42 X H22.5mm
A/F ratio display range
<0.5 second
10.0~24.0
4-1
Adjust
Select
3.
Install the oxygen sensor
adapter.(For 2-stroke engine
only!)
wh004ba021
Over lean warning.
Over rich warning.
The backlight is lighting in blue
now.
The backlight is lighting in blue
now.
The symbol showing on
screen, backlight is flashing by
blue/red color now.
The symbol showing on
screen, backlight is flashing by
blue/red color now.
" " (RICH ) means the airfuel ratio
is too rich to detect
" " (LEAN) means the airfuel ratio
is too lean to detect.
A/F meter
Thank you for purchasing
A/F mete
r, before operating the unit, please read these instructions thoroughly and retain them for future
reference.
Notice
1.The LCD meter is made for
DC 12V.
.
P.S.
The oxygen sensor will start to detect the signal after starting the engine over one minute.
2.When installing the meter, please use the attached signal wire to avoid the electromagnetic wave interference caused by the wire.
3.For installation, please follow the steps described in manual. Any damage caused by wrong installation shall be imputed to the users.
4.To avoid a short circuit, please don't pull the wire when installing. don't break or modify the wire terminal.
5.Do not disassemble or change any parts in the manual description.
6.The interior examination or maintenance should be executed by our professionals.
7.
This unit is for Tuning purposes only.
WARNING!
CAUTION!
You could get the installation details from the information behind the mark.
Some processes must be followed to avoid the damage caused by wrong installation.
Some processes must be followed to avoid damages to yourself or the public.
Some processes must be followed to avoid damage to the vehicle.
SYMBOL NOTE:
PRESS THE
BUTTON ONE TIME
PRESS THE
BUTTON 3
SECONDS
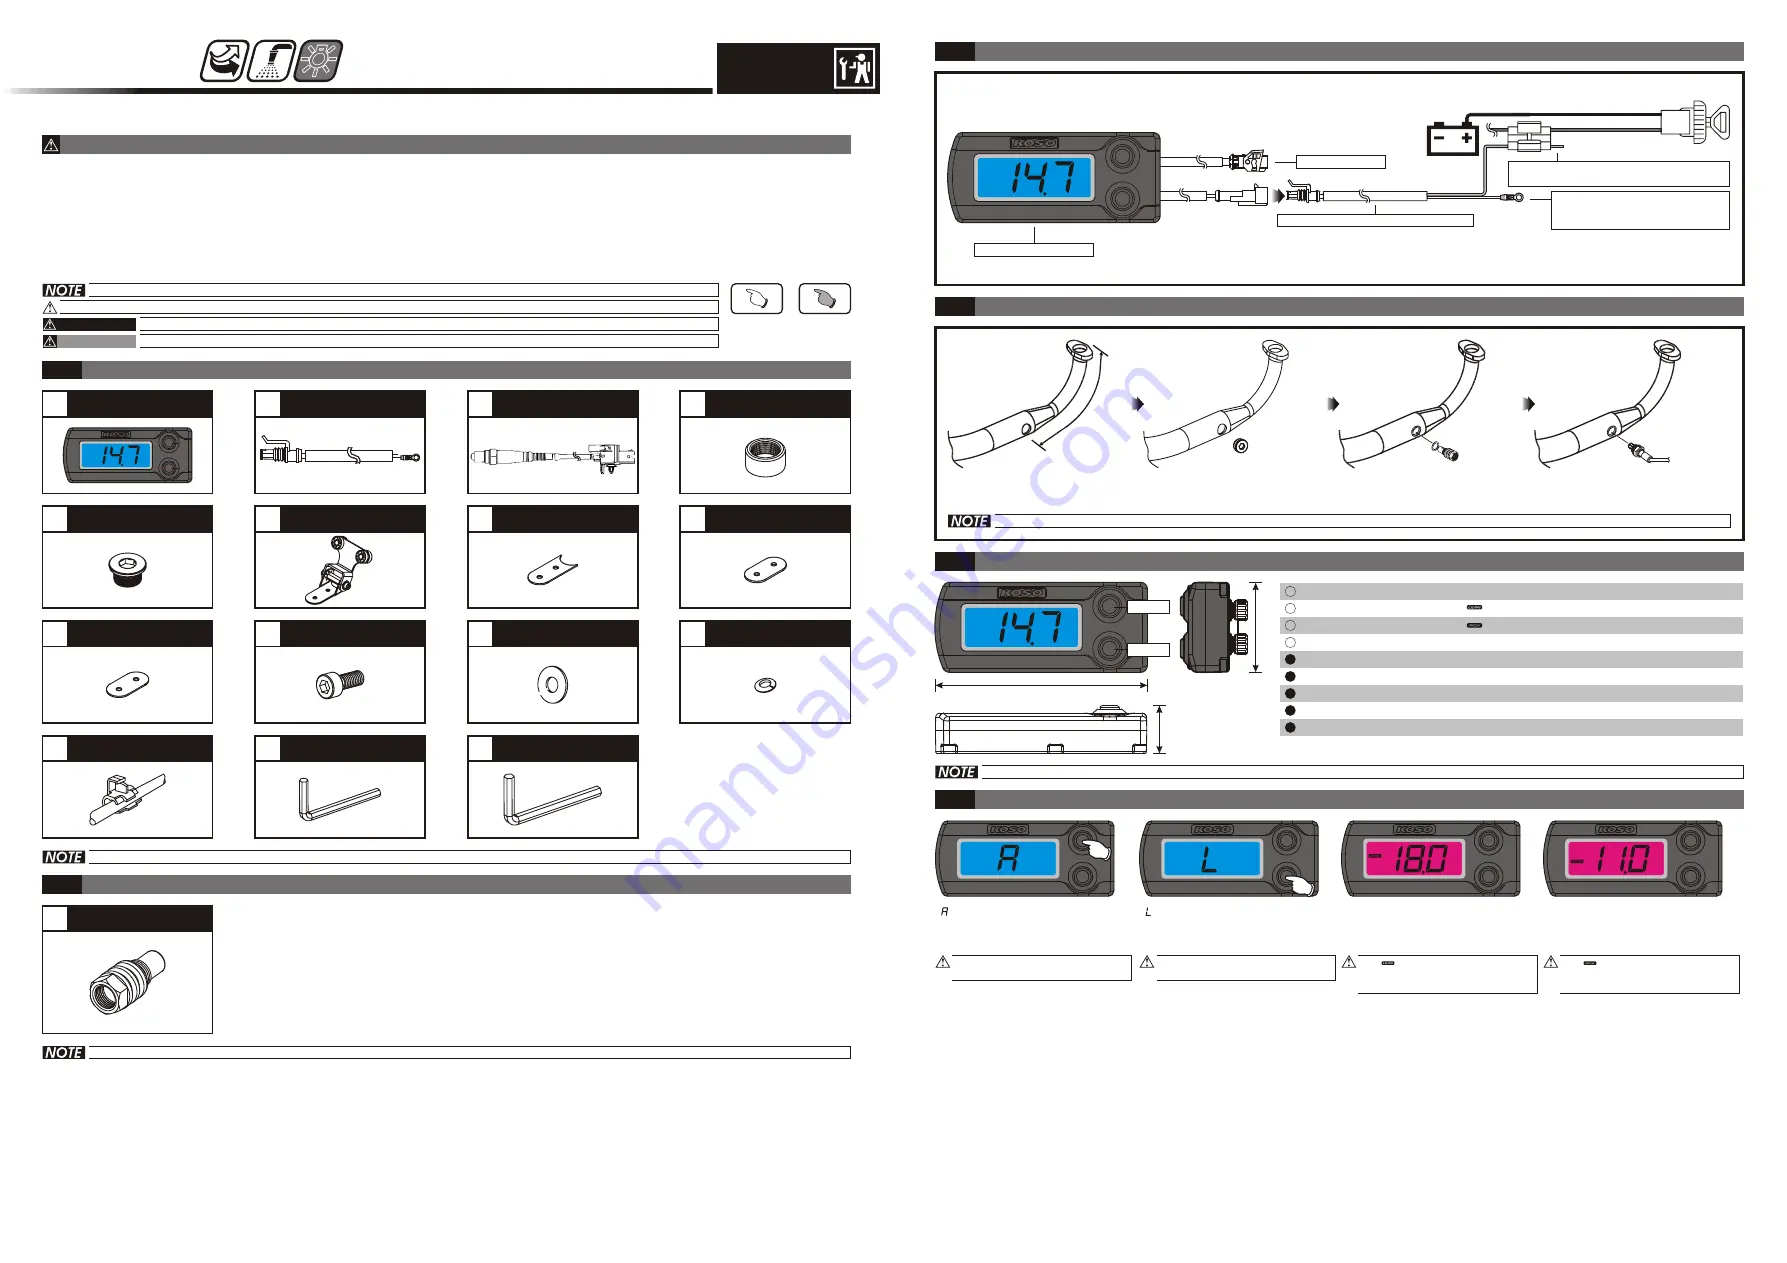
Accessories
Meter X 1
Meter (Accessory 1)
Signal connect wire X 1
Signal connect wire (Accessory 2)
Sensor bung X 1
Connect terminal X 1
Please contact the local distributor if the items you open are not the same, with the above-listed one.
Wiring installation instructions
Oxygen sensor
White / "+"Wire connect key on
DC 12V
main power switch
Black / Ground wire connect to
the engine case or battery
negative (-).
1.
Drill a 22.5mm hole in the
exhaust system at 200mm
away from the exhaust flange.
Oxygen sensor installation
2.
Weld the sensor adapter
to the muffler.
4.
Install the oxygen sensor into
the adapter.
If the meter is used on a 4-
engine. Please skip step3.
stroke
Instruction of function
Function and setting
1-2
Some option accessories are not sold in some area. Please check with your dealer for more information.
Option accessory
Design and specifications are subject to change without notice!
Steel gasket X 1
Meter bracket X 1
Rubber gasketX 1
Rubber gasket X 1
M5 washer X 2
M5 spring washer X2
M5X18L Hexhead
screw X 2
M3 wrench X 1
M4 wrench X 1
3
Oxygen sensorX1
4
8
7
12
11
14
13
3
9
5
10
6
15
1
Sensor adapter X1
(For 2 strokes engine only!)
Bung cap X1
Содержание BA005000
Страница 5: ......


