microKORG XL+
8
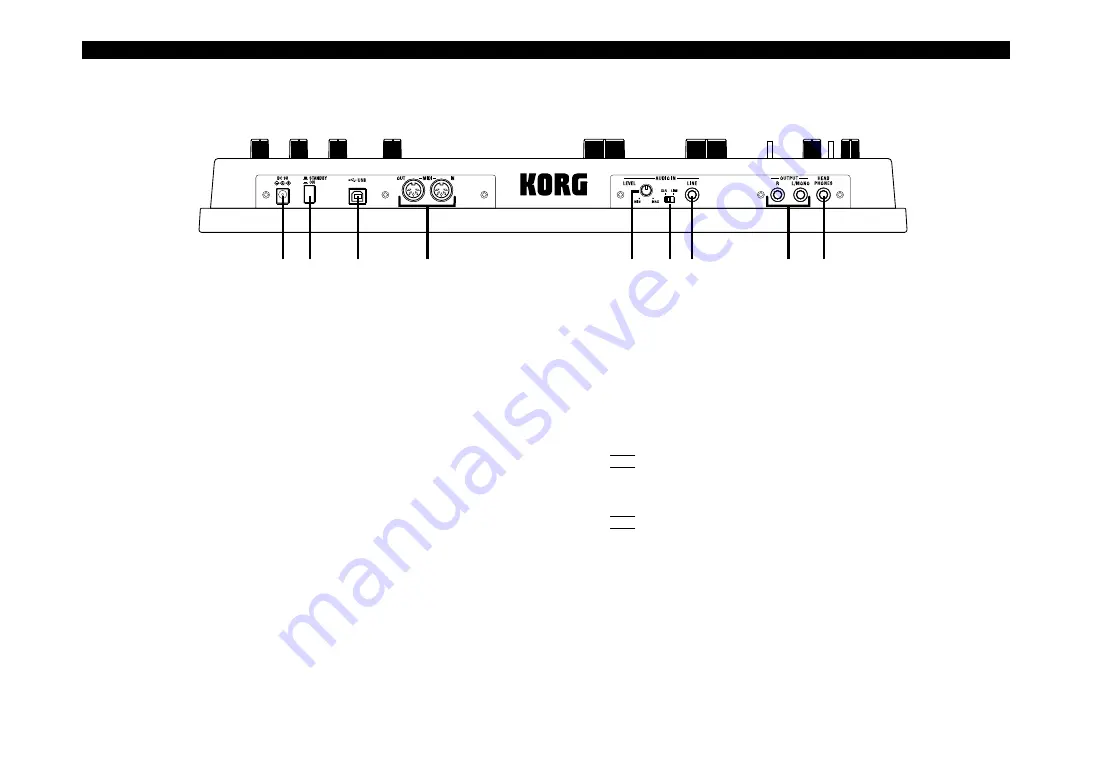
Rear panel
6
7
8
9
1
3
4
5
2
1. [HEADPHONES] jack
You can connect headphones to this jack (stereo 1/4").
2. OUTPUT [L/MONO], [R] jacks
You can connect powered monitors, a stereo amp, mixer, or multi-track
recorder to these jacks.
If you’re using a monaural connection, connect the [L/MONO] jack.
3. AUDIO IN [LINE] jack
This is a monaural audio input jack. Use the AUDIO IN [LEVEL] knob to
adjust the level.
For a synth program, you can connect another synthesizer or audio device
to this jack and use the input audio as the oscillator 1 waveform.
For a vocoder program, you can use the input audio as the modulator sig-
nal.
4. AUDIO IN [XLR/LINE] switch
Set this to the “LINE” position if you’re using the AUDIO IN [LINE] jack on
the rear panel, or to the “XLR” position if you’re using the AUDIO IN [MIC]
jack on the front panel.
5. AUDIO IN [LEVEL] knob
This adjusts the input level from the AUDIO IN [MIC] or [LINE] jacks.
6. MIDI
These connectors allow the
microKORG XL+
to exchange MIDI messages
with an external MIDI device.
[MIDI IN] connector
This connector receives MIDI data.
[MIDI OUT] connector
This connector transmits MIDI data.
7. [USB] connector
This connector allows the
microKORG XL+
to exchange MIDI messages
with your computer. You can also use sound editor software to edit the
microKORG XL+
’s parameters.
NOTE
In order to use a USB connection, you’ll need to install the Korg USB-
MIDI driver in your computer. Download the “Korg USB-MIDI driver” from
the Korg website, and install it as described in the accompanying docu-
mentation.
NOTE
You can download the sound editor software from the Korg website.
8. Power switch
This turns the power on/off.
9. [DC 9V] connector
Connect the included AC adapter here.
Connect the AC adapter to the
microKORG XL+
before you plug it into an
AC outlet.
Содержание microKORG XL+
Страница 1: ...1 E ...
Страница 101: ...Appendices 101 Appendices ...
Страница 102: ...microKORG XL 102 ...


