6
5. SAMPLE EDIT
Here you can edit or modify a sample.
TIP
After editing each item, press the Write button to save the
sample.
SELECT SAMPLE
Selects the sample that you’ll edit.
RENAME
Edits the name of the sample.
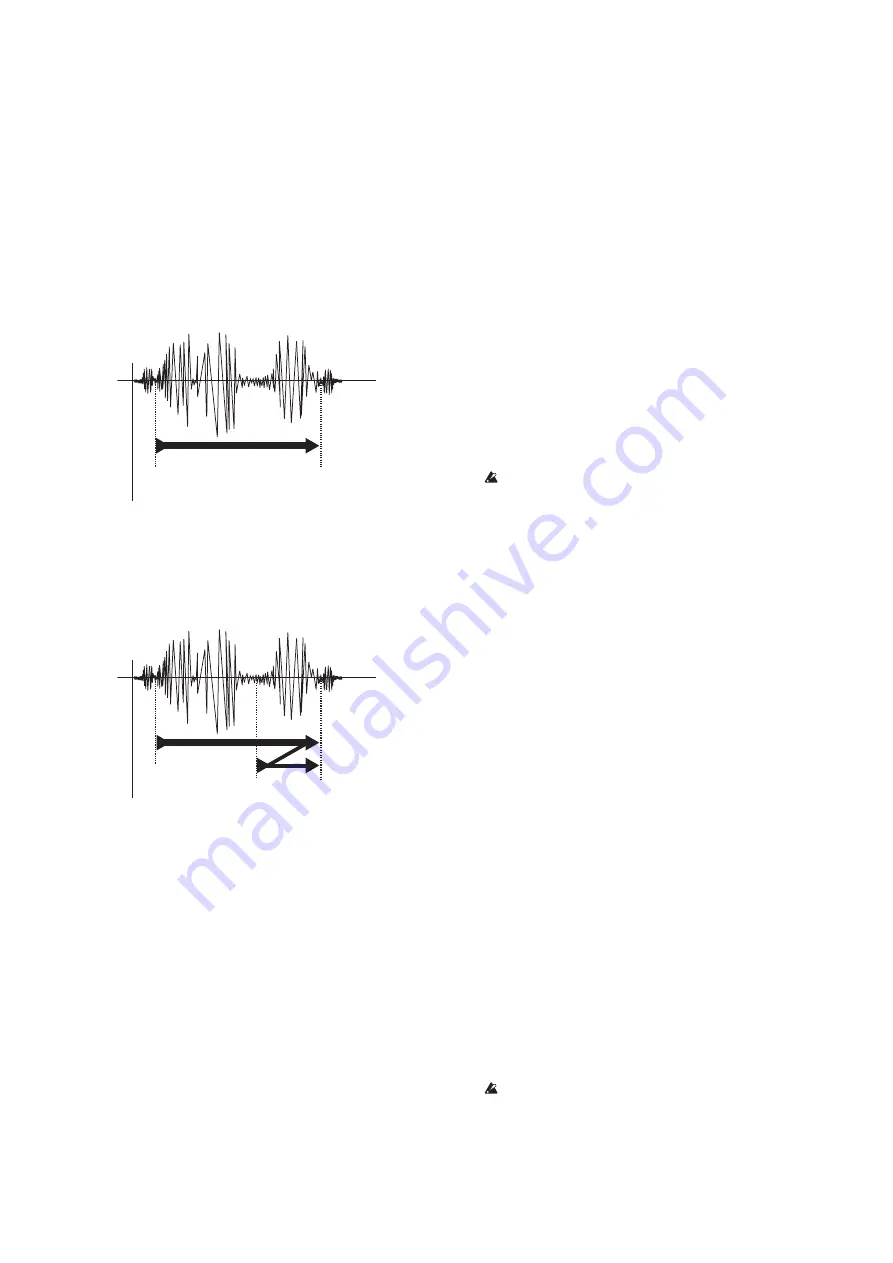
START POINT .......................................................................................
Specifies the playback start point.
END POINT...........................................................................................
Specifies the playback end point.
START
END
0
LOOP START POINT .............................................................................
Specifies the loop start point. The sample playback is looped from
the point you specify here until the END POINT. If you set this to
the same value as END POINT, the sample plays as a one-shot
sample (used for non-looped samples such as drums).
START
END
LOOP START
0
SAMPLE TUNE ................................................................... [-63...+63]
Adjusts the pitch of the sample.
TIME SLICE
Divides the sample by beats.
(
→
About time slice)
CLEAR SLICE
Cancels the result of the TIME SLICE (divide sample) operation.
PLAY LEVEL ............................................................. [Normal, +12 dB]
Changes the playback level of the sample. For a resampled sample,
this is automatically set to “+12 dB” in order to reproduce the
volume at which it was recorded.
TIP
In some cases, setting the play level to +12 dB may make the
sound more likely to distort.
DELETE SAMPLE
Deletes the sample.
TIP
In some cases, deleting preset samples or user samples might
not increase the available sampling time. In this case, defrag-
ment the memory as described in “EXPORT ALL SAMPLE” on
page 9.
TIP
It will no longer be possible to select the preset sample num-
bers with the Oscillator knob. If you want to use the preset
samples again, execute FACTORY RESET.
TIP
You can hear a preview playback by pressing a trigger pad.
TIP
The Filter, Modulation, Amp/EG, and Insert FX sections are
disabled while you’re editing a sample.
TIP
When editing a sample, Voice Assign is set to Mono 2.
About time slice
What is time slice?
Time slice is a function by which a sample that contains clear at-
tacks, such as a rhythm phrase, can be divided into beats and
assigned to steps. For example, this function can detect the attacks in
a rhythm phrase consisting of kick, snare, and hi-hat, and divide the
sampled phrase into notes.
By assigning a time-sliced sample to each step, you can obtain a
natural-sounding performance even if you change the BPM.
You can also assign individual time-sliced samples to parts as
one-shot samples.
Creating a time-sliced sample
1.
In the SAMPLE EDIT screen, use the Value knob to select a
monaural sample that you want to time-slice.
You can’t time-slice stereo samples.
2.
Access the TIME SLICE screen, and press the Menu/Enter
button. Time slice is executed automatically, and the number of
steps and the beat are displayed.
TIP
The start point and end point is automatically specified for
each of the divided samples produced when you time-slice.
You can’t change these points. When you time-slice a
sample, it is no longer possible to play the entire sample in
its original condition.
3.
Turn the Value knob to specify the number of steps into which
you want to divide the sample. Hold down the Shift button and
turn the Value knob to specify the beat. You can specify the beat
as one of four choices: 16, 32, 8 Tri, or 16 Tri.
TIP
When using a time-sliced sample in a pattern, the steps to
which the time slices are assigned will change if the beat
setting of the pattern differs from this setting.
4.
Press the Menu/Enter button to make the display indicate
“Threshold:” and specify the sensitivity at which the time slices
are detected; this adjusts the way in which the notes are divided.
As you use the Value knob to change the threshold, the way in
which the notes are divided will change. You can adjust the
sensitivity in a range of 0–32. Lower values produce a higher
sensitivity, causing the time slices to be detected in greater
detail. The trigger pads are illuminated to indicate the position
of each sliced note. You can press a trigger pad to hear the note
that’s assigned to the corresponding location.
TIP
If you specify a number of steps greater than 16 in step 3,
you can use the step buttons to change the region of time-
sliced steps that are shown.
5.
Hold down the Shift button and press a trigger pad to enable/
disable the corresponding region. Make settings for regions that
could not be detected, or delete regions that you don’t want.
TIP
If you change the sensitivity, it may take a little time for the
divisions to change. Depending on the volume and type of
the sample, there may be cases in which changing the
sensitivity does not change the divisions.
If the beat is set to 8 Tri or 16 Tri, steps 13–16 are not used.
6.
When you have finished making all adjustments, press the Write
button to save the sample.
TIP
If you decide to cancel before finishing the operation, press
the Exit button.


