background image

31

Operation

Level Meter 

screen

Song and 

Location

Mixer

Recording 

(basic)

Recording 

(advanced)

Playback

Effects

Editing

Other

2. Recording-related functions

2-1. Rehearsal function

The 

D888 provides a rehearsal function that lets you practice 

with the mixer settings, LEDs, and display in the same state 
as when actually recording.
This operation does not actually record anything, and will 
not occupy space on the hard disk.
You can practice as many times as you like under the same 
conditions as when actually recording, until you’re satisfied 
with your playing.
When you’re ready, simply turn off the rehearsal function to 
record immediately with the same settings.

If you want to re-do a specific portion of a recording, it is conven-
ient to use the rehearsal function in conjunction with the “repeat 
recording” function described in the preceding section.

Turning the rehearsal function on

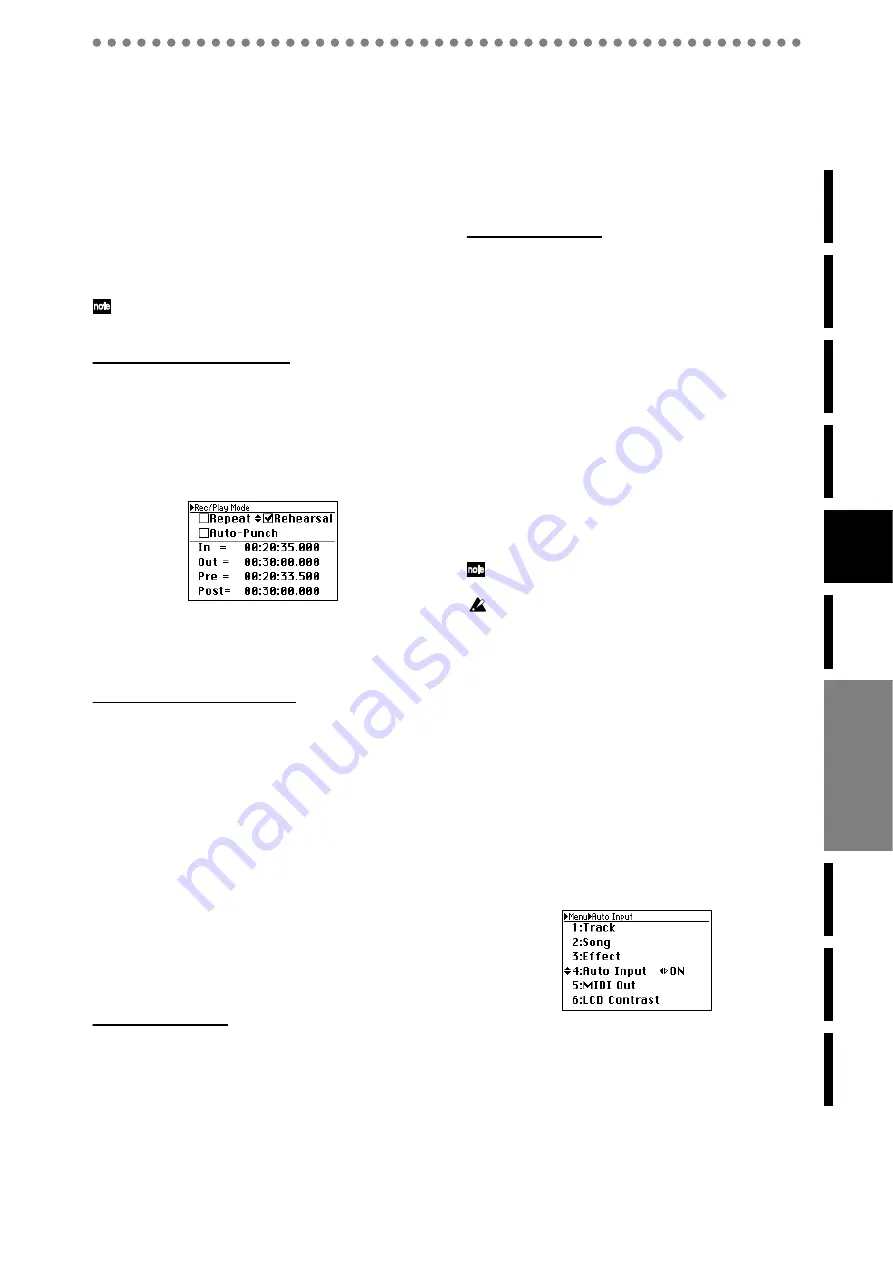
1) Press the REC/PLAY mode button to access the Rec/

Play Mode screen, and use the cursor up/down buttons 
and the cursor left/right buttons to select “Rehearsal”.

2) Press the ENTER/OK button.

A check mark will be added to the setting (it will be 
turned on), and the REHEARSAL LED will light.

3) Proceed as described in “2-2. Channel track recording” 

or “2-3. Overdub recording”.

As long as the REHEARSAL LED is lit, no new recording 
will occur regardless of how many times you repeat this.

Turning the rehearsal function off

1) Press the REC/PLAY mode button to access the Rec/

Play Mode screen, and use the cursor up/down buttons 
and the cursor left/right buttons to select “Rehearsal”.

2) Press the ENTER/OK button.

The check mark will be cleared (the setting will be 
turned off), and the REHEARSAL LED will go dark.

3) Record with the current settings.

2-2. Auto input

Automatically switching between recording and 
playback

This function automatically switches the mixer channel inputs 
in tandem with the record/playback state of the recorder.
Normally you will leave this on so that you can smoothly 
transition between recording, playback, and overdubbing.

When auto input is on

Channels set to Record mode (press the PLAY/REC 
button and then press a channel button to make it light 
red)
While rewinding (REW), fast-forwarding (FF), or 
stopped (STOP), you will hear the input signal for that 
channel.
During playback (PLAY), you will hear the playback of 
the track recorder for that channel.

During recording (REC), you will hear the input signal 
for that channel.

Channels set to Play mode (press the PLAY/REC but-
ton and then press a channel button to make it light 
green)
While rewinding (REW), fast-forwarding (FF), or 
stopped (STOP), you will not hear anything for that 
channel.
During playback (PLAY) or recording (REC), you will 
hear the playback of the track recorder for that channel.

When auto input is off

Channels set to Record mode (press the PLAY/REC 
button and then press a channel button to make it light 
red)
You will always hear the input signal for that channel.

Channels set to Play mode (press the PLAY/REC but-
ton and then press a channel button to make it light 
green)
While rewinding (REW), fast-forwarding (FF), or 
stopped (STOP), you will not hear anything for that 
channel.
During playback (PLAY) or recording (REC), you will 
hear the playback of the track recorder for that channel.

In this way, you can leave the Auto Input function turned on 
so that channels assigned to Record mode will automatically 
switch between recording you when record and playback at 
other times.
This means that you won’t need to change the setting of the 
channel buttons to hear the channels you’ve recorded.

If the Auto Input function is on, an icon is shown in the Level Me-
ter screen (

p.20).

If you want to practice on an instrument connected to the D888 
while playing back previously-recorded tracks, you’ll need to turn 
the Auto Input function off in order to hear the input signal.
Alternatively, you can leave the Auto Input function on, and turn 
on the Rehearsal function (see the preceding section) so that you 
can hear the input signal while you practice.

Turning auto input on/off

1) Press the MENU button to access the Menu screen.

2) Use the cursor up/down buttons to select “4. Auto 

input”.
Alternatively, you can press channel button “4” to select 
“4. Auto Input”

 instead of using the cursor up/down 

buttons

.

3) Use the cursor left/right buttons to switch the setting 

between “ON” and “OFF”. 
If the setting you make differs from the current setting, a 
“?”

 symbol will appear.

4) To confirm the change you made, press the ENTER/OK 

button. 
If you decide not to make the change, press the EXIT/
CANCEL button

 to revert to the original setting.

Recording 

(advanced)

Содержание D888

Страница 1: ...E 1 Owner s Manual...

Страница 2: ...the apparatus When a cart is used use caution when moving the cart apparatus combination to avoid injury from tip over The lightning flash with arrowhead symbol within an equilateral triangle is inte...

Страница 3: ...e aware that Korg will accept no responsibility for any copyright violations which may occur through your use of this product Company names product names and names of for mats etc are the trademarks o...

Страница 4: ...song 19 6 Structure 19 Operation 20 Level Meter screen 20 1 Display content and settings 20 1 1 Peak Hold setting 20 1 2 Level meter position 20 1 3 Switching the counter display 20 1 4 Other Indicat...

Страница 5: ...r 39 2 5 Selecting a channel track file VTrack 39 2 6 Deleting track data Delete 40 Other 40 1 Adjusting the contrast 40 2 Using a foot switch 40 3 Undo and Redo 41 4 Formatting the drive 41 5 Connect...

Страница 6: ...to their lowest position 2 Turn on the power of external input devices such as key boards that are sending audio to the D888 3 If the main power switch POWER ON located on the rear panel of the D888...

Страница 7: ...re shutdown has been completed If you turn off the main power switch or disconnect the power cable before shutdown has been completed data or user settings will be lost and the hard disk may be damage...

Страница 8: ...nd intuitive Effects The Effect section provides 40 bit processing and 11 types of effects The effect parameters can be edited and these edits can be saved as part of your song Editing functions Non d...

Страница 9: ...ondenser mic with PHANTOM button turned on You must turn phantom power off before connecting or disconnecting condenser mics You must turn off the PHANTOM button if you re not using phantom power If t...

Страница 10: ...button as the 0 button for numeric input p 21 35 11 REC PLAY button When this button is on lit you can use the channel buttons to switch each channel of the track recorder between recording and playba...

Страница 11: ...ever connect any device other than a condenser mic Doing so may damage your equipment 19 OUTPUT ASSIGN button This selects the audio signals that will be sent from the OUTPUT 16 jacks Each time you pr...

Страница 12: ...the power the USB screen will appear and the D888 will enter USB mode p 42 2 MIDI OUT connector MIDI Time Code MTC 30 NDF messages are transmitted from this connector Use this when you wish to synchro...

Страница 13: ...CE and MASTER buttons to enter numeric values An indication of in the screen means that you can use the up down cursor but tons to select or make settings and an indication of means that you can use t...

Страница 14: ...o the master track 6 Structure Take a look at a simple block diagram that shows the audio signal flow of the D888 s recorder 1 Setup and listening to the demo song 1 1 Checking and connections Connect...

Страница 15: ...ess the STOP button to stop play back Listening to the demo song again from the beginning 1 Hold down the STOP button and press the REW button to return to the beginning of the demo song 2 Press the P...

Страница 16: ...ou re finished performing press the STOP button to stop recording the button will go dark The D888 s recording level is set pre fader meaning the record levels are adjusted only by the TRIM knobs The...

Страница 17: ...eral times to put this track in record mode lit red 2 Gradually raise the faders of tracks 1 2 and 3 and check the volume of your monitor speakers or headphones 3 Press the REC button to enter record...

Страница 18: ...n press the EXIT CANCEL button several times to switch the level meters to the channel indication IN so that you can watch the input levels 4 Use the MASTER fader to adjust the volume of the master tr...

Страница 19: ...ly p 36 1 4 Saving a song 6 Structure The following illustration is a simplified diagram showing the audio signal flow of the D888 s re corder and how the knobs and faders control the sound Use sectio...

Страница 20: ..._ __ __ Hours Minutes Seconds milliseconds The current location is shown as an absolute time from the beginning of the song Maximum value is 5 59 59 999 H M S F frame display __ __ __ __ Hours Minutes...

Страница 21: ...the current song area 1 3 Renaming a song You can rename the song that is currently selected A song name of up to sixteen characters can be assigned 1 Press the SELECT SONG button to access the Selec...

Страница 22: ...ove toward the beginning of the song Playback will resume when you release the button If you hold down the REW button while stopped you will move toward the beginning of the song and will stop when yo...

Страница 23: ...marks Press the JUMP button to change the location to the next mark moving toward the end of the song Press the JUMP button to change the location to the pre ceding mark moving toward the beginning of...

Страница 24: ...each channel to on lit orange Turn the REC PLAY button on and set the channel button of the channel to Record lit red 3 Adjust the input level Adjust the TRIM knob so that the PEAK LED does not light...

Страница 25: ...utput from the MONITOR OUT jacks Use the PHONES level knobs to adjust the final volume that is output from the headphone jacks 3 2 Adjusting the pan Use the PAN knob of each channel to adjust the pan...

Страница 26: ...can also select WAV files in the virtual track selection screen but if you select a WAV file p 39 you won t be able to record on the track that is adjacent to this track If you want to record be sure...

Страница 27: ...on it will blink 8 Begin recording Press the PLAY button The REC and PLAY buttons will light Begin performing 9 Stop recording When you ve finished performing press the STOP but ton The REC and PLAY b...

Страница 28: ...tton you selected as the bounce destina tion will blink red As the bounce destination you should select an unrecorded channel track or an unrecorded virtual track of a track that s not playing back If...

Страница 29: ...rding p 22 7 Press the PLAY button to begin playback The PLAY button will light The song will play back and you will hear the playback tracks as well as the track you re going to partially re record 8...

Страница 30: ...t press the ENTER OK button to confirm your entry Using marks 1 Use the cursor up down buttons to select In or Out Pre Post and press the ENTER OK button to access the point setting screen 2 Use the J...

Страница 31: ...ing FF or stopped STOP you will hear the input signal for that channel During playback PLAY you will hear the playback of the track recorder for that channel During recording REC you will hear the inp...

Страница 32: ...er proceed as described in p 39 2 4 Selecting a master track file Master before you continue 1 Press the master track MASTER button to select Play mode button lit green At this time all channel tracks...

Страница 33: ...lector 5 Turn the PARAMETER knob to hear how the effect changes The actual parameter assigned to the PARAMETER knob will depend on the effect program See the table at right 2 Effect programs and param...

Страница 34: ...EFFECT selector or PARAMETER knob the screen will switch correspond ingly 3 Press the EXIT CANCEL button to return to the Menu screen 3 Saving effect settings When you save a song that uses an effect...

Страница 35: ...ent song area and the screen will ask Delete Song Are you sure 4 To execute the Delete Song operation use the cursor left right buttons to select Yes for the Execute field and then press the ENTER OK...

Страница 36: ...rnatively you can press channel button 2 to select 2 SONG instead of using the cursor up down but tons 2 Press the ENTER OK button and the screen will ask Save Now Are you sure If you decide not to sa...

Страница 37: ...If you decide to cancel press the EXIT CANCEL button to return to the Copy Track screen 8 Press the ENTER OK button once again The screen will indicate Copy Track Working and when the operation is fi...

Страница 38: ...track If you change your mind you can use Undo to revert to the previ ous state of the data p 41 Play back from the In location to verify that the operation was ex ecuted correctly 2 3 Exchanging tra...

Страница 39: ...er track Selecting a virtual track Refer to p 26 1 1 Selecting virtual tracks Selecting a WAV file You can t record or edit a track for which you ve selected a WAV file In order to record or edit you...

Страница 40: ...return to the Delete Unused V Track screen 7 When you ve finished deleting unwanted track data press the EXIT CANCEL button or the Menu button to return to the Menu screen 1 Adjusting the contrast If...

Страница 41: ...e that you re not erasing any data you need to keep If necessary you can make a backup before you execute this operation 5 Con necting to a computer below If the power is turned off accidentally while...

Страница 42: ...age de vice will be displayed as USB disk Macintosh users Mac OS9 0 4 or later 1 Use a USB cable to connect the D888 to your computer Connect the USB cable from your computer to the D888 s USB connect...

Страница 43: ...ect 5 MIDI Out Alternatively you can select 5 MIDI Out by pressing channel button 5 instead of using the cursor up down buttons 3 Use the cursor left right buttons to select ON or OFF If you ve change...

Страница 44: ...isplay to FreeTime and check the available recording time p 20 Increase the free space on the drive by deleting un wanted songs or songs you have already backed up p 35 Is the REC PLAY MODE appropriat...

Страница 45: ...ecuted Check Sum Error The system update has failed Try the update procedure once again from the beginning If this message still appears please contact your Korg distributor Completed The operation ha...

Страница 46: ...em file and re save it Time Limit The maximum continuous recording time is 6 hours It is not possible to continuously record for longer than this Executing the track editing operation would cause the...

Страница 47: ...acks to which those files had been assigned will be empty Stereo WAV files can be named freely and can be assigned to adjacent pairs of tracks By renaming the files in accordance with the automaticall...

Страница 48: ...song Settings that are always loaded when you select or reload a song Song name Virtual track settings Channel buttons REC PLAY BOUNCE CH ON Master track setting REC PLAY MODE setting Mark points Met...

Страница 49: ...z Equalizer HIGH Fc 10 kHz G 15 dB MID Fc 2 5 kHz G 15 dB LOW Fc 100 Hz G 15 dB Structure Master 1 Signal processing 40 bit 44 1 kHz Programs 11 Display 160 104 pixel movable LCD with backlight Power...

Страница 50: ...mplementation chart 51 MIDI OUT 12 43 Mixdown 18 Mode keys 12 Mode screen 13 Move FF REW keys 22 Point 22 Muting 25 N New song 15 O Operations 13 Outputting Audio 24 Overdubbing 17 P PAN 16 Parameter...

Страница 51: ...menu s MTC Out setting is ON Basic Channel Default Changed Aftertouch Pitch bender Polyphonic Key Monophonic Channel 0 111 Program Change Variable Range System Real Time Clock Command System Exclusiv...

Страница 52: ...ed this product via the internet through mail order and or via a telephone sale you must verify that this product is intended to be used in the country in which you reside WARNING Use of this product...

Отзывы: