Filter change
A
B
A
D
C
E
KORASMART 1300, 1400
Under normal conditions, the filter must be replaced every six
months or when the display shows the sign „ “ asking you to
change it.
Let us strongly advise you to use the original KORADO, a.s.
filters only!
If you wish to replace the filter, turn off the device
and change the filter according to the following instructions.
Please be careful!
Control and remove the mentioned parts of
the device
only!
A
If you wish to replace the filter, turn off the device and change
the filter according to the following instructions. Please be care-
ful! Control and remove the mentioned parts of the device only!
B
Take hold of the top edge of the front plate and tilt it forward.
C
Then unhinge the front plate and put it aside. Then get hold of
the top edge of the heat exchanger and tilt it forward by pulling
its top edge towards you.
D
Remove the used original filter from the heat exchanger and
dispose of it as you do with other household waste.
Note: The container of the new filter is to be used to dispose of
the old filter. Turn the container inside out, use it to remove the
old filter and once this is done, dispose of it in the thrash bin.
E
Now insert the new filter into the heat exchanger. The front
cardboard strip on the filter’s cartridge must be inserted be-
tween the two aluminium edges (1 + 2). The upper edge of the
cardboard strip must not go beyond the top aluminium edge.
The bottom edge of the fleece filter must be pushed behind the
bottom aluminium edge (3).
Now close the device again.
F
Snap carefully the heat exchanger until it stops.
G
Hang the front plate in its bottom part first. Then push its
top part until the snap joints on both sides lock. If your
KORASMART 1300 or KORASMART 1400 device does not
operate immediately, check if you have fitted the front plate
correctly. In case you have other problems, please contact
KORADO, a.s. or your specialised dealer.
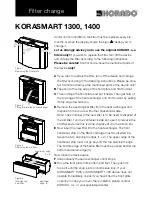
Figure 1
Removing the front plate
Figure 2
Tilting forward the heat exchanger
Figure 3
Removing the old filter
Figure 4
Inserting the
new filter
aluminium
edge (3)
aluminium edge
(1 + 2)


