8
- Wash all parts of the blender except the unit base before first use. (Refer Section : Cleaning)
- Take out the required length of cable from the cable stored on the base of the blender and connect the device to
the power supply.
FEATURES
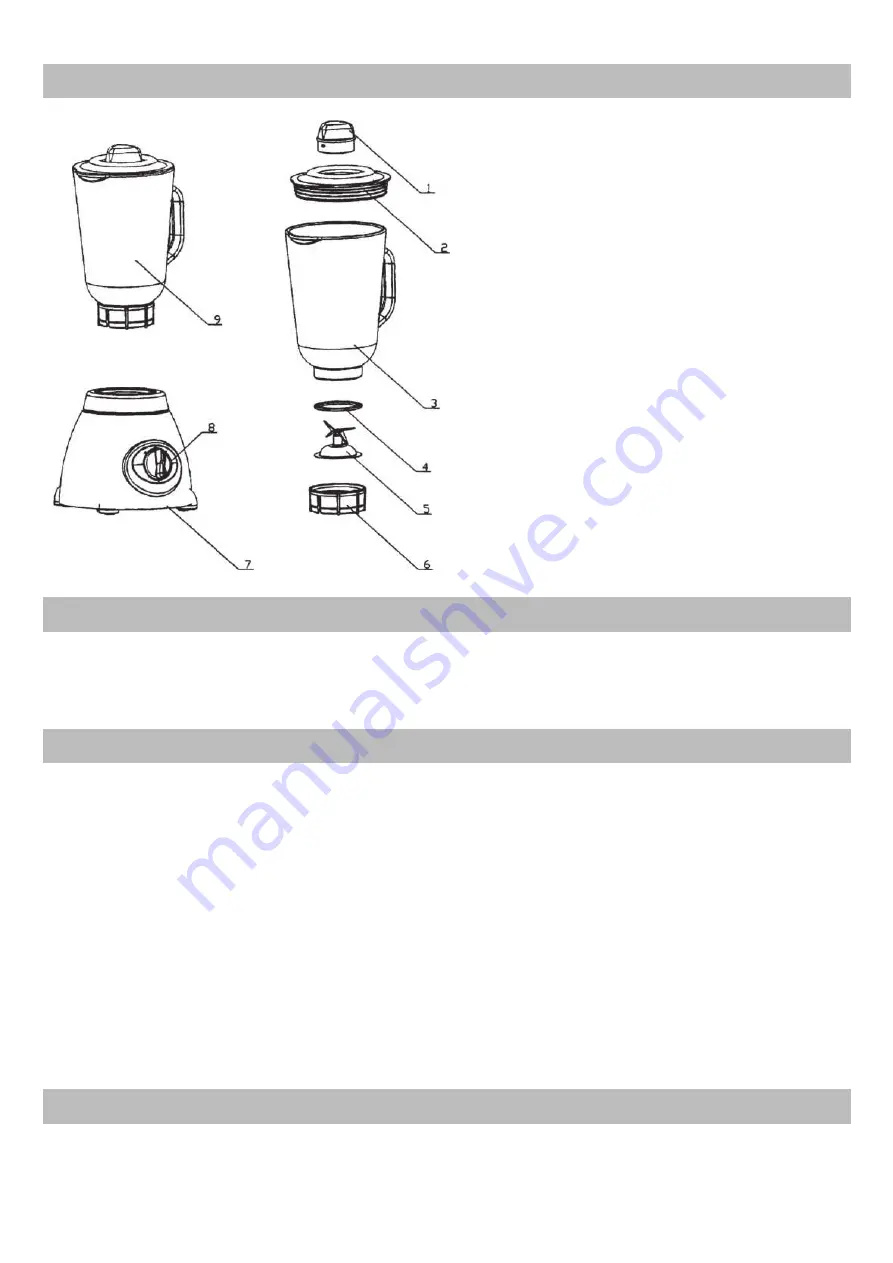
1. Inner cover
2. Lid
3. Jug base
4. Gasket
5. Blender blade
6. Retaining ring
7. Blender base
8. Rotary switch
9. Jug
TECHNICAL INFORMATION
Voltage/frequency: 220 V – 240 V / 50 Hz
Glass jug capacity: 1.5 litre
BEFORE FIRST USE
JUG ASSEMBLY AND USE
1. Make sure the blender is unplugged. Put the Gasket on the Blender Blade. The Gasket must be lie flat.
2. Put the Blade unit with the Gasket into the Retaining Ring.
3. Set the Jug on top of Gasket and screw on Retaining Ring. Make sure the Retaining Ring is screwed secu-
rely. Turn clockwise until it is tight.
4. Set the Jug into place on the Blender Base, making sure it is securely seated. If not, gently rock the Jug until
seated.
5. Plug cord into outlet.
6. Place the food to be blended into the Jug and the Lid on the Jug before blending.
7. Place the Inner Cover into the Lid opening and turn it in anticlockwise direction until it is locked.
8. Process food or beverages. Push the button on the control panel to start blender.
9. ALWAYS turn the blender off and wait until blades have stopped rotating before removing the jar.
10. To remove the jug after blending is complete, lift the jug straight up. If it is not easily removed, rock gently
and lift. Do not twist.
11. NEVER replace the jug onto unit while motor is running.


